Pages

Showing posts with label Cake. Show all posts

Candy Cane Cake

Candy Cane Cake
Candy Cane Cake
This cake is a favorite of mine to bring to Holiday dinners and parties especially if they are all ages celebrations. Understandably kids will be quite happy with one of the cupcakes especially but most adults go mad for them too. It's no wonder, with such a moist scratch cake topped with plenty of peppermint marshmallow frosting that the sight of it brings out the wide-eyed kid in everyone. Merry Christmas everyone!

Candy Cane Cupcakes
Candy Cane Cupcakes

Candy Cane Cake
Recipe by Barry C. Parsons
Candy Cane Cake - this outstanding scratch cake is a kid favorite around here at Christmas time. My kids make the cupcakes to take along to their seasonal parties and they are very often the first items to get gobbled up.

Prep time: Approximately 20 minutes
Cook time: 35 minutes
Total time: Approximately 1 hour.
Yield: One 9 inch double layer cake or 3 dozen cupcakes

Ingredients
Candy Cane Cake
  • 1 1/4 cups sifted all purpose flour
  • 1 1/2 cups sifted cake flour
  • 1/2 teaspoon baking soda
  • 1 1/2 tsp baking powder
  • 1 teaspoon salt
  • 1 1/2 cups sugar
  • 2/3 cup vegetable oil
  • 1/3 cup vegetable shortening at room temperature
  • 2 tsp peppermint extract
  • 3 large eggs
  • 1 1/2 cups buttermilk
  • 1/4 cup crushed candy canes
  • 1/4 cup mixed red and green candy sprinkles
  • 6 roughly chopped candy canes
Directions
  1. Grease and flour two 9 inch cake pans and line the bottoms with 2 circles of parchment paper.
  2. Sift together both flours, baking soda. baking powder, salt and sugar, Set aside.
  3. In the bowl of an electric mixer beat together the vegetable oil, shortening and peppermint extract. Beat well at high speed with whisk attachment until light and fluffy
  4. Beat the eggs in one at a time.
  5. Fold in the dry ingredients alternately with the buttermilk.
  6. I always add dry ingredients in three divisions and liquid ingredients in 2 divisions. It is very important to begin and end the additions with the dry ingredients. Do not over mix the batter. As soon as it has no lumps in the batter, fold in the 1/4 cup crushed candy canes and sprinkles, then pour into the two prepared 9 inch cake pans.
  7. Bake at 325 degrees F for 30-35 minutes or until a wooden toothpick inserted in the center comes out clean. Allow the cake to cool in the pans for 10 minutes before turning out onto wire racks to cool completely.
  8. I've frosted this cake with Marshmallow Frosting with a little peppermint extract added but any good vanilla frosting is great on this cake. You can substitute a little peppermint extract to taste in your favorite frosting recipe but add just a little at a time, it's potent stuff. Find the marshmallow frosting recipe with our Black and White Cake.
  9. If making cupcakes I find that making 1/2 of the frosting recipe is sufficient.
  10. Sprinkle the roughly chopped candy canes over the top of the cake or cupcakes.
Candy Cane Cake
Candy Cane Cake
This cake is a favorite of mine to bring to Holiday dinners and parties especially if they are all ages celebrations. Understandably kids will be quite happy with one of the cupcakes especially but most adults go mad for them too. It's no wonder, with such a moist scratch cake topped with plenty of peppermint marshmallow frosting that the sight of it brings out the wide-eyed kid in everyone. Merry Christmas everyone!

Candy Cane Cupcakes
Candy Cane Cupcakes

Candy Cane Cake
Recipe by Barry C. Parsons
Candy Cane Cake - this outstanding scratch cake is a kid favorite around here at Christmas time. My kids make the cupcakes to take along to their seasonal parties and they are very often the first items to get gobbled up.

Prep time: Approximately 20 minutes
Cook time: 35 minutes
Total time: Approximately 1 hour.
Yield: One 9 inch double layer cake or 3 dozen cupcakes

Ingredients
Candy Cane Cake
  • 1 1/4 cups sifted all purpose flour
  • 1 1/2 cups sifted cake flour
  • 1/2 teaspoon baking soda
  • 1 1/2 tsp baking powder
  • 1 teaspoon salt
  • 1 1/2 cups sugar
  • 2/3 cup vegetable oil
  • 1/3 cup vegetable shortening at room temperature
  • 2 tsp peppermint extract
  • 3 large eggs
  • 1 1/2 cups buttermilk
  • 1/4 cup crushed candy canes
  • 1/4 cup mixed red and green candy sprinkles
  • 6 roughly chopped candy canes
Directions
  1. Grease and flour two 9 inch cake pans and line the bottoms with 2 circles of parchment paper.
  2. Sift together both flours, baking soda. baking powder, salt and sugar, Set aside.
  3. In the bowl of an electric mixer beat together the vegetable oil, shortening and peppermint extract. Beat well at high speed with whisk attachment until light and fluffy
  4. Beat the eggs in one at a time.
  5. Fold in the dry ingredients alternately with the buttermilk.
  6. I always add dry ingredients in three divisions and liquid ingredients in 2 divisions. It is very important to begin and end the additions with the dry ingredients. Do not over mix the batter. As soon as it has no lumps in the batter, fold in the 1/4 cup crushed candy canes and sprinkles, then pour into the two prepared 9 inch cake pans.
  7. Bake at 325 degrees F for 30-35 minutes or until a wooden toothpick inserted in the center comes out clean. Allow the cake to cool in the pans for 10 minutes before turning out onto wire racks to cool completely.
  8. I've frosted this cake with Marshmallow Frosting with a little peppermint extract added but any good vanilla frosting is great on this cake. You can substitute a little peppermint extract to taste in your favorite frosting recipe but add just a little at a time, it's potent stuff. Find the marshmallow frosting recipe with our Black and White Cake.
  9. If making cupcakes I find that making 1/2 of the frosting recipe is sufficient.
  10. Sprinkle the roughly chopped candy canes over the top of the cake or cupcakes.
reade more... Résuméabuiyad

30+ Gingerbread Recipes

     Can you believe Christmas is only 3 days away?  I feel like this year it has come faster then ever before.  I don't know if it's because Thanksgiving was late this year or because I did a crazy amount of baking in December.  How much baking?  Well I ended up taking 24 holiday orders which totaled 41 dozen decorated sugar cookies, 9 dozen other cookies, 2 dozen fudge, 6 dozen hot cocoa on a stick, 8 dozen chocolate covered pretzels, and a few miscellaneous items.   Needless to say, I'm ready for my days off this week!

      Since Christmas is almost here, I wanted my last round up of the year to be holiday themed.  Nothing says Christmas like gingerbread and I've gathered quite a lot of delicious recipes!  The funny part is, I've never made anything gingerbread before last week!  As I was looking through my recipe index I couldn't believe I've never made anything with gingerbread flavor because I sure to eat a lot of it!


Gingerbread Recipes

30+ Gingerbread Recipes for breakfast, dessert, and snack

1.  Gingerbread Cut Out Cookies from bake.love.give
2.  Gingerbread Molasses Cookies from Running to the Kitchen
3.  Chocolate-Stuffed Gingerbread Cookies from i heart eating
5. Gingerbread Cupcakes from Organized Island
6.  Double Ginger Apple Gingerbread from Healthy.Delicious
7.  White Chocolate Gingerbread Biscotti from Chocolate Moosey
8.  Gingerbread Cupcakes from Shugary Sweets

9.   Gingerbread Spice Caramels from bake.love.give
10.  Gingerbread Baby Cakes from Karen's Kitchen Stories
11.  Spicy Chocolate Ginger Guys from Snappy Gourmet
12.  Three Ginger Gingersnaps from bake.love.give
13.  Gingerbread Pancakes from i heart eating
14.  Gingersnap S'mores from Healthy.Delicious
15.  Gingerbread Spice Syrup (for Gingerbread Lattes) from An Edible Mosaic
16.  Gingerbread Men Cookies from Chocolate, Chocolate, and More
17.  Apple Butter Gingerbread Loaf from Dizzy Busy and Hungry
19.  Gingerbread Popcorn from An Edible Mosaic
20.  Cocoa Ginger Crisps from Chocolate, Chocolate, and More
21.  Gingerbread Donuts with Vanilla Bean Glaze from All Day I Dream About Food 
22.  Gingerbread Cupcakes with Brown Sugar Cream Cheese Frosting from Busy in Brooklyn
23.  Apple and Red Currant Cobbler with Gingerbread Topping from Kitchen Tested
24.  Gingerbread Rice Krispie Treats from Shugary Sweets
25.  Gingerbread Waffles from The Kitchen is My Playground
26.  Gingerbread Cinnamon Rolls from Love From the Oven
27.  Gingerbread Pancakes from Growing up Gabel
28.  Chocolate Gingerbread Cupcakes with Cream Cheese Frosting from Chocolate Moosey
29.  Gingerbread Waffles with Maple Pecan Syrup from Canadian Tire Kitchen Crew
30.  Gingerbread Whoopie Pies from diethood
31.  Gingerbread Cake with Whiskey Frosting from Savour Flare
32.  Gingerbread Toaster Pastries with Bourbon Pear Filling from Eat the Love
33.  Holiday Gingerbread Loaves from Canadian Tire Kitchen Crew
     Can you believe Christmas is only 3 days away?  I feel like this year it has come faster then ever before.  I don't know if it's because Thanksgiving was late this year or because I did a crazy amount of baking in December.  How much baking?  Well I ended up taking 24 holiday orders which totaled 41 dozen decorated sugar cookies, 9 dozen other cookies, 2 dozen fudge, 6 dozen hot cocoa on a stick, 8 dozen chocolate covered pretzels, and a few miscellaneous items.   Needless to say, I'm ready for my days off this week!

      Since Christmas is almost here, I wanted my last round up of the year to be holiday themed.  Nothing says Christmas like gingerbread and I've gathered quite a lot of delicious recipes!  The funny part is, I've never made anything gingerbread before last week!  As I was looking through my recipe index I couldn't believe I've never made anything with gingerbread flavor because I sure to eat a lot of it!


Gingerbread Recipes

30+ Gingerbread Recipes for breakfast, dessert, and snack

1.  Gingerbread Cut Out Cookies from bake.love.give
2.  Gingerbread Molasses Cookies from Running to the Kitchen
3.  Chocolate-Stuffed Gingerbread Cookies from i heart eating
5. Gingerbread Cupcakes from Organized Island
6.  Double Ginger Apple Gingerbread from Healthy.Delicious
7.  White Chocolate Gingerbread Biscotti from Chocolate Moosey
8.  Gingerbread Cupcakes from Shugary Sweets

9.   Gingerbread Spice Caramels from bake.love.give
10.  Gingerbread Baby Cakes from Karen's Kitchen Stories
11.  Spicy Chocolate Ginger Guys from Snappy Gourmet
12.  Three Ginger Gingersnaps from bake.love.give
13.  Gingerbread Pancakes from i heart eating
14.  Gingersnap S'mores from Healthy.Delicious
15.  Gingerbread Spice Syrup (for Gingerbread Lattes) from An Edible Mosaic
16.  Gingerbread Men Cookies from Chocolate, Chocolate, and More
17.  Apple Butter Gingerbread Loaf from Dizzy Busy and Hungry
19.  Gingerbread Popcorn from An Edible Mosaic
20.  Cocoa Ginger Crisps from Chocolate, Chocolate, and More
21.  Gingerbread Donuts with Vanilla Bean Glaze from All Day I Dream About Food 
22.  Gingerbread Cupcakes with Brown Sugar Cream Cheese Frosting from Busy in Brooklyn
23.  Apple and Red Currant Cobbler with Gingerbread Topping from Kitchen Tested
24.  Gingerbread Rice Krispie Treats from Shugary Sweets
25.  Gingerbread Waffles from The Kitchen is My Playground
26.  Gingerbread Cinnamon Rolls from Love From the Oven
27.  Gingerbread Pancakes from Growing up Gabel
28.  Chocolate Gingerbread Cupcakes with Cream Cheese Frosting from Chocolate Moosey
29.  Gingerbread Waffles with Maple Pecan Syrup from Canadian Tire Kitchen Crew
30.  Gingerbread Whoopie Pies from diethood
31.  Gingerbread Cake with Whiskey Frosting from Savour Flare
32.  Gingerbread Toaster Pastries with Bourbon Pear Filling from Eat the Love
33.  Holiday Gingerbread Loaves from Canadian Tire Kitchen Crew
reade more... Résuméabuiyad

Vegan Chocolate Avocado Cake with Chocolate Avocado Icing

Vegan Chocolate Avocado Cake with Avocado Chocolate Icing

So yes, I know Christmas is only four days away. I have to admit I've not been very organised this year - I totally forgot about Nikolaus, I haven't baked a Christmas cake or mince pies (yet), we haven't decorated the flat, and we didn't even host a Christmas party. In fact, the extent of my Christmas spirit this year has been watching a lot of Christmas specials on Lifestyle Food (Nigella, Jamie, NigelDonna, Lorraine), and really really looking forward to the week off! I haven't done much planning, but fret not - we are having a proper Christmas Eve supper and Christmas lunch, as well as a couple of low-key foodie Christmastime catch ups with friends. The turkey and ham have been ordered, and today was spent at the market picking up supplies. Fun! Watch this space.

Recently I've been busier with non-Christmas baking. As you will have seen in my last post, "How to Slice an Avocado", I've had a glut of gigantic avocados on hand, and wanted to try making something sweet with them. I remembered seeing this delicious-looking "Almost Vegan Chocolate Avocado Cake" a while ago on The Chronicles of Ms I-Hua and The Boy, and thought it would be a good one to try! Reading I-Hua's post, I saw that she adapted the recipe from the Vegan Chocolate Avocado Cake on Joy the Baker, and I really wanted to see what the pure vegan version would taste like, so I ended up making Joy's recipe. (This also meant I got to share it with the children of a colleague of mine, who happen to have dairy and nut allergies - yay - they get to eat cake too!)

In my "avocado dessert" Googling, I came across this avocado-chocolate frosting on Paleo Spirit, and couldn't believe how rich, luscious and how chocolaty it looked, despite being 100% vegan - no cream, milk, butter or chocolate. I had to try it! I skipped Joy the Baker's bright green avocado buttercream and made the choccy avocado one. (Of course I completely un-Paleo'd it by using super refined icing sugar instead of the suggested maple syrup, haha).

Let's look at the icing - it's just a mixture of ripe avocados, cocoa powder and icing sugar, blended until smooth and creamy.

Barham Avocado

Icing ingredients

I couldn't believe it - twenty seconds in the mixer and bang - it turned into this amazing glossy icing.

Chocolate avocado icing

Of course I had to taste test, and you couldn't taste the avocado at all - it just tasted like dark chocolate, thanks to the cocoa powder. The quantities in the recipe I've given below make a very dark-tasting icing, definitely a grown-up taste. If you want something sweeter, I'd suggest starting with half the amount of cocoa and then adjusting to your liking.

The icing was a dream to work with - so smooth and creamy! It was way easier than a normal ganache or a standard chocolate buttercream as it doesn't seize up or set - it stays velvety smooth for ages.

Iced cake

Joy's recipe makes two 20cm cakes, which she makes into a sandwich cake, but I wanted something smaller that was easier to share around, so I did a small 18cm round cake, as well as a 20cm square slab cake.

Slab cake

I was so impressed with the cake too! Again, despite the inclusion of avocado and the lack of eggs, it didn't taste odd or have an unusual texture - it was just a moist chocolate cake.

Slice of cake - love that texture

I shared the cake with friends and colleagues - and none of them twigged that there was anything unusual about it until I mentioned that it included avocado. An easy-to-make crowd-pleasing chocolate cake that also satisfies a bunch of dietary requirements? Win win win!

Cake the next day

Slice of cake

Vegan Chocolate Cake with Avocado Chocolate Icing
Cake recipe from Joy the Baker
Avocado Chocolate Icing adapted from Paleo Spirit

Ingredients
For the Cake
3 cups plain flour
6 tablespoons unsweetened cocoa powder
1/2 teaspoon salt
2 teaspoons baking powder
2 teaspoons baking soda
1/4 cup vegetable oil
1/2 cup well mashed avocado
2 cups water
2 tablespoons white vinegar
2 teaspoons vanilla extract
2 cups caster sugar
For the Icing
1 very ripe avocado
1/2 cup unsweetened cocoa powder
3/4 cups icing sugar

Method
For the Cake
Preheat the oven to 175C. Line two 20cm round cake tins with baking paper. (I used a 20cm square tin and a 18cm round cake tin).
Sift together the flour, cocoa, salt, baking powder and baking soda into a mixing bowl and set aside.
Whisk together the oil, mashed avocado, water, vinegar and vanilla extract, followed by the caster sugar.
Mix the wet ingredients and dry ingredients together, whisking until smooth.
Pour the batter into the prepared tins. Bake for 40 minutes to an hour, or until cooked when tested with a skewer. Allow to cool in the tins for 10 minutes, then turn out onto a cake rack to cool completely.
For the Icing
Place the avocado flesh, cocoa powder and icing sugar in a food processor and whizz to combine. Add a tablespoon of water if necessary to achieve a spreadable consistency. Spread the icing over the top and sides of the cold cakes in a swirly fashion.
Makes 2 x 20cm cakes
Enjoy!

Vegan Chocolate Avocado Cake with Avocado Chocolate Icing

So yes, I know Christmas is only four days away. I have to admit I've not been very organised this year - I totally forgot about Nikolaus, I haven't baked a Christmas cake or mince pies (yet), we haven't decorated the flat, and we didn't even host a Christmas party. In fact, the extent of my Christmas spirit this year has been watching a lot of Christmas specials on Lifestyle Food (Nigella, Jamie, NigelDonna, Lorraine), and really really looking forward to the week off! I haven't done much planning, but fret not - we are having a proper Christmas Eve supper and Christmas lunch, as well as a couple of low-key foodie Christmastime catch ups with friends. The turkey and ham have been ordered, and today was spent at the market picking up supplies. Fun! Watch this space.

Recently I've been busier with non-Christmas baking. As you will have seen in my last post, "How to Slice an Avocado", I've had a glut of gigantic avocados on hand, and wanted to try making something sweet with them. I remembered seeing this delicious-looking "Almost Vegan Chocolate Avocado Cake" a while ago on The Chronicles of Ms I-Hua and The Boy, and thought it would be a good one to try! Reading I-Hua's post, I saw that she adapted the recipe from the Vegan Chocolate Avocado Cake on Joy the Baker, and I really wanted to see what the pure vegan version would taste like, so I ended up making Joy's recipe. (This also meant I got to share it with the children of a colleague of mine, who happen to have dairy and nut allergies - yay - they get to eat cake too!)

In my "avocado dessert" Googling, I came across this avocado-chocolate frosting on Paleo Spirit, and couldn't believe how rich, luscious and how chocolaty it looked, despite being 100% vegan - no cream, milk, butter or chocolate. I had to try it! I skipped Joy the Baker's bright green avocado buttercream and made the choccy avocado one. (Of course I completely un-Paleo'd it by using super refined icing sugar instead of the suggested maple syrup, haha).

Let's look at the icing - it's just a mixture of ripe avocados, cocoa powder and icing sugar, blended until smooth and creamy.

Barham Avocado

Icing ingredients

I couldn't believe it - twenty seconds in the mixer and bang - it turned into this amazing glossy icing.

Chocolate avocado icing

Of course I had to taste test, and you couldn't taste the avocado at all - it just tasted like dark chocolate, thanks to the cocoa powder. The quantities in the recipe I've given below make a very dark-tasting icing, definitely a grown-up taste. If you want something sweeter, I'd suggest starting with half the amount of cocoa and then adjusting to your liking.

The icing was a dream to work with - so smooth and creamy! It was way easier than a normal ganache or a standard chocolate buttercream as it doesn't seize up or set - it stays velvety smooth for ages.

Iced cake

Joy's recipe makes two 20cm cakes, which she makes into a sandwich cake, but I wanted something smaller that was easier to share around, so I did a small 18cm round cake, as well as a 20cm square slab cake.

Slab cake

I was so impressed with the cake too! Again, despite the inclusion of avocado and the lack of eggs, it didn't taste odd or have an unusual texture - it was just a moist chocolate cake.

Slice of cake - love that texture

I shared the cake with friends and colleagues - and none of them twigged that there was anything unusual about it until I mentioned that it included avocado. An easy-to-make crowd-pleasing chocolate cake that also satisfies a bunch of dietary requirements? Win win win!

Cake the next day

Slice of cake

Vegan Chocolate Cake with Avocado Chocolate Icing
Cake recipe from Joy the Baker
Avocado Chocolate Icing adapted from Paleo Spirit

Ingredients
For the Cake
3 cups plain flour
6 tablespoons unsweetened cocoa powder
1/2 teaspoon salt
2 teaspoons baking powder
2 teaspoons baking soda
1/4 cup vegetable oil
1/2 cup well mashed avocado
2 cups water
2 tablespoons white vinegar
2 teaspoons vanilla extract
2 cups caster sugar
For the Icing
1 very ripe avocado
1/2 cup unsweetened cocoa powder
3/4 cups icing sugar

Method
For the Cake
Preheat the oven to 175C. Line two 20cm round cake tins with baking paper. (I used a 20cm square tin and a 18cm round cake tin).
Sift together the flour, cocoa, salt, baking powder and baking soda into a mixing bowl and set aside.
Whisk together the oil, mashed avocado, water, vinegar and vanilla extract, followed by the caster sugar.
Mix the wet ingredients and dry ingredients together, whisking until smooth.
Pour the batter into the prepared tins. Bake for 40 minutes to an hour, or until cooked when tested with a skewer. Allow to cool in the tins for 10 minutes, then turn out onto a cake rack to cool completely.
For the Icing
Place the avocado flesh, cocoa powder and icing sugar in a food processor and whizz to combine. Add a tablespoon of water if necessary to achieve a spreadable consistency. Spread the icing over the top and sides of the cold cakes in a swirly fashion.
Makes 2 x 20cm cakes
Enjoy!

reade more... Résuméabuiyad

Chunky peach and apple snack cake (or muffins) and a giveaway


I'm not sure about where you live, but here on the east coast of the United States, we get all four seasons of the year. Sometimes we tend to skip over fall and go straight to winter, or sometimes the winters are so mild that it seems like an extended fall season. Regardless, it's near impossible to get fresh, seasonal fruits year-round. That is when I normally head to my grocery store's freezer section.

Many of you may know that frozen fruits and vegetables provide just as many nutrients and vitamins as their freshly-picked friends. But did you know that canned fruits and vegetables can also be in this same category?  Here is a recent study that Oregon State recently published about the benefits of canned California cling peaches. The researchers actually concluded that canned peaches were better than fresh fruit. Wow, huh? (You just need to be careful that the canned fruits are not packed in a heavy sugar syrup.)

So I put the canned California cling peaches to the test. I had some apples left over from my apple picking day at work and wanted to incorporate them into whatever recipe I ended up baking. I found this chunky peach and apple snack cake and thought that it would be perfect for breakfast.

I baked one 8x8 inch pan and 12 muffins with the recipe below. I wanted to be able to share the muffins with friends and keep the cake for ourselves. The muffins were really good - I could barely taste the difference with the white whole wheat flour, and I loved the chunks of apples and peaches. I would recommend adding more fruit if that's your thing. Another change I'd recommend is swapping out some of the white sugar with brown sugar so you can have a more caramel-y flavor to your muffins/cake. If you want to make these even healthier, you could try substituting the melted butter with more coconut oil. Overall, these were very yummy, and the canned peaches passed the test.

And now for the giveaway...

One lucky winner will receive a California cling peach prize pack (say that 10 times fast!), which includes some canned California cling peaches, a reusable grocery bag and a plush "peach pal."  All you need to do is enter via the Rafflecopter widget below. Please be patient since the widget may load slowly. Good luck!

a Rafflecopter giveaway

Disclaimer: The California Cling Peaches Board provided me with some product samples and the prizes for the giveaway. I did not receive any additional compensation for this post. All thoughts, opinions and reviews are 100% my own.

Chunky peach and apple snack cake
  • 1 large apple, peeled, cored and diced
  • 1 and 1/2 cups chopped fresh, frozen or canned peaches
  • 2 TBSP sugar mixed with 1/2 teaspoon cinnamon
  • 2 cups all-purpose flour (I used white whole wheat)
  • 1 cup whole grain wheat or spelt (I used white whole wheat)
  • 2 teaspoons baking powder
  • 3/4 teaspoon salt
  • 1/4 teaspoon baking soda
  • 1/3 cup orange juice
  • zest of 1 orange (I omitted)
  • 1/2 cup (1 stick) butter, melted and cooled
  • 1/2 cup coconut oil, melted and cooled
  • 4 eggs
  • 1 and 1/3 cups sugar
  • 2 teaspoons vanilla extract
Directions
Preheat your oven to 350 degrees F.

Generously grease a 9x13 inch baking pan (alternatively, you can bake this in two 8x8 inch pans or in a muffin pan). Set aside.

In a medium-sized bowl, toss the apples and peaches with the cinnamon/sugar mixture. Set aside.

In a large bowl, whisk together the all-purpose flour, whole wheat flour, baking powder, salt and baking soda.

In a separate medium-sized bowl, mix together the orange juice, orange zest, butter, coconut oil, eggs, sugar and vanilla.

Add the orange juice mixture into the dry ingredients (the flour mixture) and stir until just incorporated - do not over mix. Gently fold in the apples and peaches.

Transfer the batter to your prepared pans. If you are baking muffins, fill them 2/3 full.

If baking in the 8x8 or 9x13 inch baking pans, bake for about 40 minutes or until a toothpick inserted in the center comes out clean.

If baking muffins, bake for about 20 minutes or until a toothpick inserted in the center of a muffin comes out clean. Remove the muffins/cake from the oven and allow them to cool before serving.

Cake/muffins should be stored in an airtight container at room temperature and will keep for about 3-5 days.

Yield: One 9x13 inch pan, two 8x8 inch pans, or about 2 dozen muffins.

Source: Hearth and Hospitality

Photobucket

I'm not sure about where you live, but here on the east coast of the United States, we get all four seasons of the year. Sometimes we tend to skip over fall and go straight to winter, or sometimes the winters are so mild that it seems like an extended fall season. Regardless, it's near impossible to get fresh, seasonal fruits year-round. That is when I normally head to my grocery store's freezer section.

Many of you may know that frozen fruits and vegetables provide just as many nutrients and vitamins as their freshly-picked friends. But did you know that canned fruits and vegetables can also be in this same category?  Here is a recent study that Oregon State recently published about the benefits of canned California cling peaches. The researchers actually concluded that canned peaches were better than fresh fruit. Wow, huh? (You just need to be careful that the canned fruits are not packed in a heavy sugar syrup.)

So I put the canned California cling peaches to the test. I had some apples left over from my apple picking day at work and wanted to incorporate them into whatever recipe I ended up baking. I found this chunky peach and apple snack cake and thought that it would be perfect for breakfast.

I baked one 8x8 inch pan and 12 muffins with the recipe below. I wanted to be able to share the muffins with friends and keep the cake for ourselves. The muffins were really good - I could barely taste the difference with the white whole wheat flour, and I loved the chunks of apples and peaches. I would recommend adding more fruit if that's your thing. Another change I'd recommend is swapping out some of the white sugar with brown sugar so you can have a more caramel-y flavor to your muffins/cake. If you want to make these even healthier, you could try substituting the melted butter with more coconut oil. Overall, these were very yummy, and the canned peaches passed the test.

And now for the giveaway...

One lucky winner will receive a California cling peach prize pack (say that 10 times fast!), which includes some canned California cling peaches, a reusable grocery bag and a plush "peach pal."  All you need to do is enter via the Rafflecopter widget below. Please be patient since the widget may load slowly. Good luck!

a Rafflecopter giveaway

Disclaimer: The California Cling Peaches Board provided me with some product samples and the prizes for the giveaway. I did not receive any additional compensation for this post. All thoughts, opinions and reviews are 100% my own.

Chunky peach and apple snack cake
  • 1 large apple, peeled, cored and diced
  • 1 and 1/2 cups chopped fresh, frozen or canned peaches
  • 2 TBSP sugar mixed with 1/2 teaspoon cinnamon
  • 2 cups all-purpose flour (I used white whole wheat)
  • 1 cup whole grain wheat or spelt (I used white whole wheat)
  • 2 teaspoons baking powder
  • 3/4 teaspoon salt
  • 1/4 teaspoon baking soda
  • 1/3 cup orange juice
  • zest of 1 orange (I omitted)
  • 1/2 cup (1 stick) butter, melted and cooled
  • 1/2 cup coconut oil, melted and cooled
  • 4 eggs
  • 1 and 1/3 cups sugar
  • 2 teaspoons vanilla extract
Directions
Preheat your oven to 350 degrees F.

Generously grease a 9x13 inch baking pan (alternatively, you can bake this in two 8x8 inch pans or in a muffin pan). Set aside.

In a medium-sized bowl, toss the apples and peaches with the cinnamon/sugar mixture. Set aside.

In a large bowl, whisk together the all-purpose flour, whole wheat flour, baking powder, salt and baking soda.

In a separate medium-sized bowl, mix together the orange juice, orange zest, butter, coconut oil, eggs, sugar and vanilla.

Add the orange juice mixture into the dry ingredients (the flour mixture) and stir until just incorporated - do not over mix. Gently fold in the apples and peaches.

Transfer the batter to your prepared pans. If you are baking muffins, fill them 2/3 full.

If baking in the 8x8 or 9x13 inch baking pans, bake for about 40 minutes or until a toothpick inserted in the center comes out clean.

If baking muffins, bake for about 20 minutes or until a toothpick inserted in the center of a muffin comes out clean. Remove the muffins/cake from the oven and allow them to cool before serving.

Cake/muffins should be stored in an airtight container at room temperature and will keep for about 3-5 days.

Yield: One 9x13 inch pan, two 8x8 inch pans, or about 2 dozen muffins.

Source: Hearth and Hospitality

Photobucket
reade more... Résuméabuiyad

Pumpkin Pie Dump Cake

     I love Thanksgiving.  It is probably my favorite food holiday.  Every year we go to my parents house and mom cooks a giant turkey.  She usually makes a lot of the side dishes as well although in recent years I've been getting home earlier and helping with the side dishes.  My cousin Kristin makes the appetizers and I make the desserts.  The entire family is there and it's just a nice time.

Pumpkin Pie Dump Cake-a layer of pie topped with a layer of cake!
      To get to my parents I have to drive 2 1/2 hours.  I usually work a half day on Wednesday so there isn't a lot of time to make creative desserts to take home the next day.  I look for desserts that are easy to make, easy to transport but really, really good.

Pumpkin Pie Dump Cake-the easiest dessert you'll ever make!
      Pumpkin is always a favorite at this time of year so I made a pumpkin pie dump cake.  It's called a dump cake because basically you dump everything in a bowl, mix it, pour it, then bake it.  It only takes a few minutes and the result is pretty awesome.  The bottom layer tastes like pumpkin pie while the top layer is crunchy and cake like.  It's like having two delicious pumpkin desserts rolled into one pan. 

Pumpkin Pie Dump Cake (slightly adapted from The Country Cook)
2 c. pumpkin puree (fresh or canned)
12 oz. evaporated milk
3 eggs
1 c. sugar
2 t. pumpkin pie spice
1 box Spice Cake Mix
1 t. salt
1 c. butter, softened 

1. Preheat the oven to 350 degrees.

2.  In a large bowl combine the pumpkin puree, evaporated milk, eggs, sugar, and pumpkin pie spice.  Mix well and pour into a 9 x 13 pan.

3.  Add the salt to the spice cake mix and sprinkle it on top of the pumpkin mixture.

4.  Melt the butter and pour over top of the cake mix.

5.  Bake for 55 minutes.  Remove from oven and cool on a wire rack.  Refrigerate until ready to serve. 


Pumpkin Pie Dump Cake


     I love Thanksgiving.  It is probably my favorite food holiday.  Every year we go to my parents house and mom cooks a giant turkey.  She usually makes a lot of the side dishes as well although in recent years I've been getting home earlier and helping with the side dishes.  My cousin Kristin makes the appetizers and I make the desserts.  The entire family is there and it's just a nice time.

Pumpkin Pie Dump Cake-a layer of pie topped with a layer of cake!
      To get to my parents I have to drive 2 1/2 hours.  I usually work a half day on Wednesday so there isn't a lot of time to make creative desserts to take home the next day.  I look for desserts that are easy to make, easy to transport but really, really good.

Pumpkin Pie Dump Cake-the easiest dessert you'll ever make!
      Pumpkin is always a favorite at this time of year so I made a pumpkin pie dump cake.  It's called a dump cake because basically you dump everything in a bowl, mix it, pour it, then bake it.  It only takes a few minutes and the result is pretty awesome.  The bottom layer tastes like pumpkin pie while the top layer is crunchy and cake like.  It's like having two delicious pumpkin desserts rolled into one pan. 

Pumpkin Pie Dump Cake (slightly adapted from The Country Cook)
2 c. pumpkin puree (fresh or canned)
12 oz. evaporated milk
3 eggs
1 c. sugar
2 t. pumpkin pie spice
1 box Spice Cake Mix
1 t. salt
1 c. butter, softened 

1. Preheat the oven to 350 degrees.

2.  In a large bowl combine the pumpkin puree, evaporated milk, eggs, sugar, and pumpkin pie spice.  Mix well and pour into a 9 x 13 pan.

3.  Add the salt to the spice cake mix and sprinkle it on top of the pumpkin mixture.

4.  Melt the butter and pour over top of the cake mix.

5.  Bake for 55 minutes.  Remove from oven and cool on a wire rack.  Refrigerate until ready to serve. 


Pumpkin Pie Dump Cake


reade more... Résuméabuiyad

Cherry Cake Squares


For over 175 more tried and tested cookie recipes be sure to browse our 

Cherry Cake Squares
Cherry Cake Squares
These cookies were inspired by another popular Holiday baking staple here in Newfoundland and a very popular recipe on this website at this time of year, Cherry Pound Cake. It's found in practically every home in the province during the Christmas season so I thought, why not translate it into a cookie square version too. These almond tinged cookie squares are pretty easy to make and are another great addition to the Holiday freezer.


Cherry Cake Squares

Recipe by Barry C. Parsons
Based upon a Newfoundland favorite Christmas cake and ideal for the holiday freezer, these easy cookie squares are quick to prepare, freeze exceptionally well and are always a hit with kids of all ages.

Prep time: 10-15 minutes
Cook time: 60 minutes
Total time: 1 hour 15 minutes
Yield: 25 cookie squares
Ingredients
  • 1 cup butter
  • 1 1/2 cup white sugar
  • 2 eggs
  • 1 tsp vanilla extract
  • 1 tsp almond extract 
  • 1 1/2 tsp baking powder
  • 1/4 tsp baking soda
  • 2 cups flour
  • 1 cup glace cherries, quartered
  • FOR THE FROSTING
  • 2 cups icing sugar (powdered sugar)
  • 1/2 cup butter
  • 1 tsp vanilla extract
  • 1 -2 tbsp milk
Directions
  1. Cream butter sugar and vanilla until light and fluff.
  2. Add the eggs, vanilla and almond extracts and beat well.
  3. Sift together the flour, baking powder and baking soda.
  4. Add dry ingredients to the creamed mixture, folding to combine well.
  5. Fold in the chopped cherries.
  6. Spread in a parchment lined or greased 9 inch square baking pan and bake for 50-60 minutes at 350 degrees F. (325 for glass bake ware) A toothpick inserted in the center should come out clean. (This recipe is too large for an 8x8 pan. If you do not have a 9x9 pan you can multiply the entire recipe by 1 1/2 and use a 9x13 pan instead if you have one of those.)
  7. Remove from oven and cool completely on a wire rack.
  8. Frost with vanilla frosting.
  9. For the vanilla frosting beat together the butter, icing sugar, vanilla and milk until, light, fluffy and of a good spreadable consistency. Add the milk only a little at a time until the proper consistency is achieved.
  10. Spread over the cooled cookies and cut into squares or bars.
  11. These freeze very well in airtight containers.

For over 175 more tried and tested cookie recipes be sure to browse our 

Cherry Cake Squares
Cherry Cake Squares
These cookies were inspired by another popular Holiday baking staple here in Newfoundland and a very popular recipe on this website at this time of year, Cherry Pound Cake. It's found in practically every home in the province during the Christmas season so I thought, why not translate it into a cookie square version too. These almond tinged cookie squares are pretty easy to make and are another great addition to the Holiday freezer.


Cherry Cake Squares

Recipe by Barry C. Parsons
Based upon a Newfoundland favorite Christmas cake and ideal for the holiday freezer, these easy cookie squares are quick to prepare, freeze exceptionally well and are always a hit with kids of all ages.

Prep time: 10-15 minutes
Cook time: 60 minutes
Total time: 1 hour 15 minutes
Yield: 25 cookie squares
Ingredients
  • 1 cup butter
  • 1 1/2 cup white sugar
  • 2 eggs
  • 1 tsp vanilla extract
  • 1 tsp almond extract 
  • 1 1/2 tsp baking powder
  • 1/4 tsp baking soda
  • 2 cups flour
  • 1 cup glace cherries, quartered
  • FOR THE FROSTING
  • 2 cups icing sugar (powdered sugar)
  • 1/2 cup butter
  • 1 tsp vanilla extract
  • 1 -2 tbsp milk
Directions
  1. Cream butter sugar and vanilla until light and fluff.
  2. Add the eggs, vanilla and almond extracts and beat well.
  3. Sift together the flour, baking powder and baking soda.
  4. Add dry ingredients to the creamed mixture, folding to combine well.
  5. Fold in the chopped cherries.
  6. Spread in a parchment lined or greased 9 inch square baking pan and bake for 50-60 minutes at 350 degrees F. (325 for glass bake ware) A toothpick inserted in the center should come out clean. (This recipe is too large for an 8x8 pan. If you do not have a 9x9 pan you can multiply the entire recipe by 1 1/2 and use a 9x13 pan instead if you have one of those.)
  7. Remove from oven and cool completely on a wire rack.
  8. Frost with vanilla frosting.
  9. For the vanilla frosting beat together the butter, icing sugar, vanilla and milk until, light, fluffy and of a good spreadable consistency. Add the milk only a little at a time until the proper consistency is achieved.
  10. Spread over the cooled cookies and cut into squares or bars.
  11. These freeze very well in airtight containers.
reade more... Résuméabuiyad

Strawberry Coconut Cake Squares a.k.a Strawberry Lamingtons


For over 175 more tried and tested cookie recipes be sure to browse our 
 
Strawberry Coconut Cake Squares a.k.a Strawberry Lamingtons
After the success of our Chocolate Lamingtons last week, many local fans mentioned this variation of the poplar treat from back in the 70's. Almost every birthday party I attended as a kid would have had some version of this square served among the other treats.

A bit of nostalgia is always welcome at the Holidays, so why not add these to your baking list and have them in the freezer for when you need to pull a few out fast; they freeze well and defrost quickly too. Try them in Raspberry too if you prefer.


Strawberry Coconut Cake Squares a.k.a Strawberry Lamingtons

Recipe by Barry C. Parsons
Strawberry Coconut Cake Squares a.k.a Strawberry Lamingtons - moist cubes of homemade vanilla cake get soaked in a combination of strawberry jello and jam and then rolled in coconut. An easy, pretty and very tasty treat that kids will love.

Prep time: Approximately 20 minutes
Cook time: 35 minutes
Total time: Several hours including cooling and freezing time for the cake.
Yield: 24 dessert squares

Ingredients
  • 1 1/4 cups sifted all purpose flour
  • 1 1/2 cups sifted cake flour
  • 1/2 teaspoon baking soda
  • 1 1/2 tsp baking powder
  • 1 teaspoon salt
  • 1 1/2 cups sugar
  • 2/3 cup vegetable oil
  • 1/3 cup vegetable shortening at room temperature
  • 3 tablespoons good quality vanilla extract
  • 3 large eggs
  • 1 1/2 cups buttermilk
  • Aproximately 4 cups dried shreded coconut
  • FOR THE STRAWBERRY SYRUP
  • 2 small packages Strawberry Jello
  • 1 1/2 cups water (3/4 cup boiling plus 3/4 cup cold)
  • 1 cup strawberry jam
Directions
  1. Grease a 9x13 inch baking pan and line with parchment paper.
  2. Sift together both flours, baking soda. baking powder, salt and sugar, Set aside.
  3. In the bowl of an electric mixer beat together the vegetable oil, shortening and vanilla. Beat well at high speed with whisk attachment until light and fluffy
  4. Beat the eggs in one at a time.
  5. Fold in the dry ingredients alternately with the buttermilk.
  6. I always add dry ingredients in three divisions and liquid ingredients in 2 divisions. It is very important to begin and end the additions with the dry ingredients. Do not over mix the batter. As soon as it has no lumps in the batter, pour into the prepared 9x13 inch pan.
  7. Bake at 325 degrees F for 30-35 minutes or until a wooden toothpick inserted in the center comes out clean. Allow the cake to cool completely in the pan.
  8. Wrap the pan in plastic wrap and place in the freezer until the cake is completely frozen.
  9. When frozen, lift the cake out of the pan using the parchment paper as an aid and cut it into 24 squares. Return to the freezer until ready to dip in the strawberry syrup and coconut.
  10. TO PREPARE THE STRAWBERRY SYRUP dissolve the 2 packages of Jello in the boiling water.
  11. Whisk in the jam and cold water. Chill this to the point that it thickens slightly but not beginning to set.
  12. Working quickly, dip the frozen cake cubes into the syrup one at a time. Let them soak for a few seconds.
  13. Quickly roll the soaked cake into the coconut and place on a parchment lined baking sheet to dry.
  14. Store in airtight plastic containers in the fridge. If you are freezing the dessert squares put them back into the freezer right away. 

For over 175 more tried and tested cookie recipes be sure to browse our 
 
Strawberry Coconut Cake Squares a.k.a Strawberry Lamingtons
After the success of our Chocolate Lamingtons last week, many local fans mentioned this variation of the poplar treat from back in the 70's. Almost every birthday party I attended as a kid would have had some version of this square served among the other treats.

A bit of nostalgia is always welcome at the Holidays, so why not add these to your baking list and have them in the freezer for when you need to pull a few out fast; they freeze well and defrost quickly too. Try them in Raspberry too if you prefer.


Strawberry Coconut Cake Squares a.k.a Strawberry Lamingtons

Recipe by Barry C. Parsons
Strawberry Coconut Cake Squares a.k.a Strawberry Lamingtons - moist cubes of homemade vanilla cake get soaked in a combination of strawberry jello and jam and then rolled in coconut. An easy, pretty and very tasty treat that kids will love.

Prep time: Approximately 20 minutes
Cook time: 35 minutes
Total time: Several hours including cooling and freezing time for the cake.
Yield: 24 dessert squares

Ingredients
  • 1 1/4 cups sifted all purpose flour
  • 1 1/2 cups sifted cake flour
  • 1/2 teaspoon baking soda
  • 1 1/2 tsp baking powder
  • 1 teaspoon salt
  • 1 1/2 cups sugar
  • 2/3 cup vegetable oil
  • 1/3 cup vegetable shortening at room temperature
  • 3 tablespoons good quality vanilla extract
  • 3 large eggs
  • 1 1/2 cups buttermilk
  • Aproximately 4 cups dried shreded coconut
  • FOR THE STRAWBERRY SYRUP
  • 2 small packages Strawberry Jello
  • 1 1/2 cups water (3/4 cup boiling plus 3/4 cup cold)
  • 1 cup strawberry jam
Directions
  1. Grease a 9x13 inch baking pan and line with parchment paper.
  2. Sift together both flours, baking soda. baking powder, salt and sugar, Set aside.
  3. In the bowl of an electric mixer beat together the vegetable oil, shortening and vanilla. Beat well at high speed with whisk attachment until light and fluffy
  4. Beat the eggs in one at a time.
  5. Fold in the dry ingredients alternately with the buttermilk.
  6. I always add dry ingredients in three divisions and liquid ingredients in 2 divisions. It is very important to begin and end the additions with the dry ingredients. Do not over mix the batter. As soon as it has no lumps in the batter, pour into the prepared 9x13 inch pan.
  7. Bake at 325 degrees F for 30-35 minutes or until a wooden toothpick inserted in the center comes out clean. Allow the cake to cool completely in the pan.
  8. Wrap the pan in plastic wrap and place in the freezer until the cake is completely frozen.
  9. When frozen, lift the cake out of the pan using the parchment paper as an aid and cut it into 24 squares. Return to the freezer until ready to dip in the strawberry syrup and coconut.
  10. TO PREPARE THE STRAWBERRY SYRUP dissolve the 2 packages of Jello in the boiling water.
  11. Whisk in the jam and cold water. Chill this to the point that it thickens slightly but not beginning to set.
  12. Working quickly, dip the frozen cake cubes into the syrup one at a time. Let them soak for a few seconds.
  13. Quickly roll the soaked cake into the coconut and place on a parchment lined baking sheet to dry.
  14. Store in airtight plastic containers in the fridge. If you are freezing the dessert squares put them back into the freezer right away. 
reade more... Résuméabuiyad

The Pioneer Woman Cooks: A Year of Holidays PLUS a Boozy Pudding Cake!

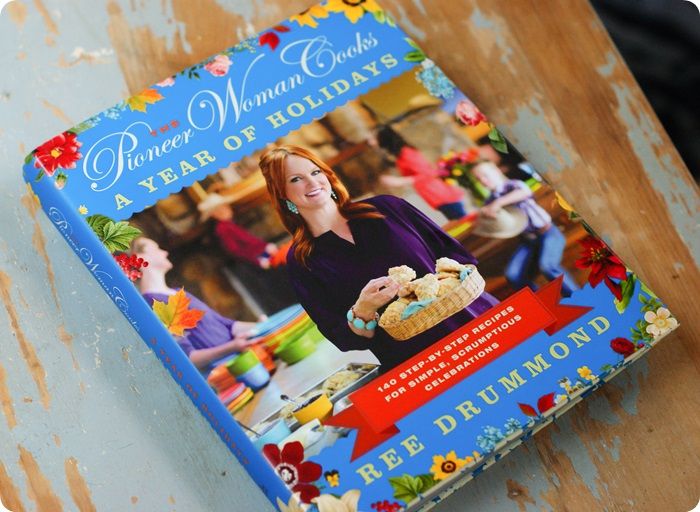
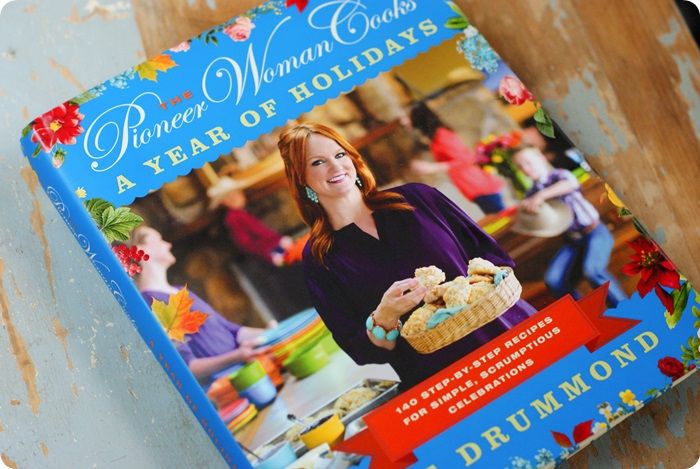
I can't wait to share this book with you today.  It's Ree's latest:
The Pioneer Woman Cooks: A Year of Holidays
The book is so beautiful that it's not with my cookbooks...it's on my coffee table. 

I think this holiday book may be my favorite.  Of course, I said that about Ree's last one and the one before that, but I really, really love this book.

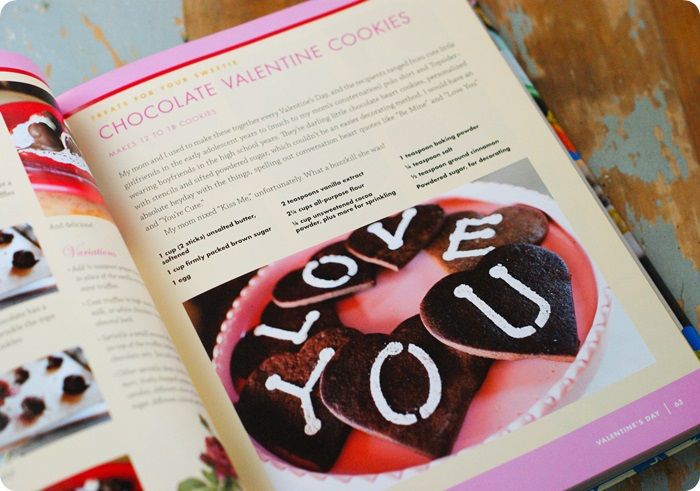
The Pioneer Woman Cooks: A Year of Holidays is divided up by, you guessed it, holidays.  You'll find recipes for Valentine's Day, Cinco de Mayo, Thanksgiving, Christmas, New Year's Eve...and everything in between.  All total: 140 recipes, all presented in Ree's signature step-by-step style.

pioneer woman holidays cookies photo pioneerwomanholidaysbook3of8.jpg
You know I went right for the dessert pages, right?

pioneer woman holidays cheese ball photo pioneerwomanholidaysbook5of8.jpg
I don't know what this says about me, but this Halloween "Cheese Ball of Death" really speaks to me.  Any recipe that calls for a gummy tarantula has to be a winner.

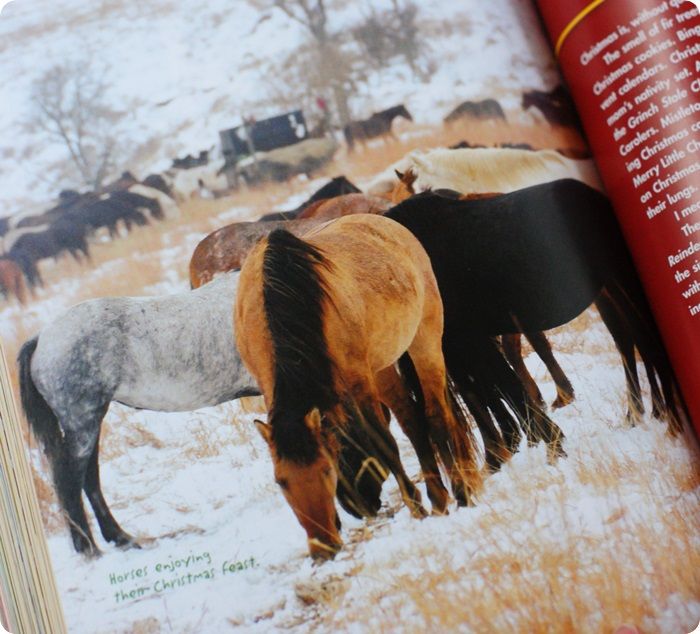
pioneer woman holidays horsies photo pioneerwomanholidaysbook6of8.jpg
Of course, you'll find lots of pictures of the ranch and cowboys.

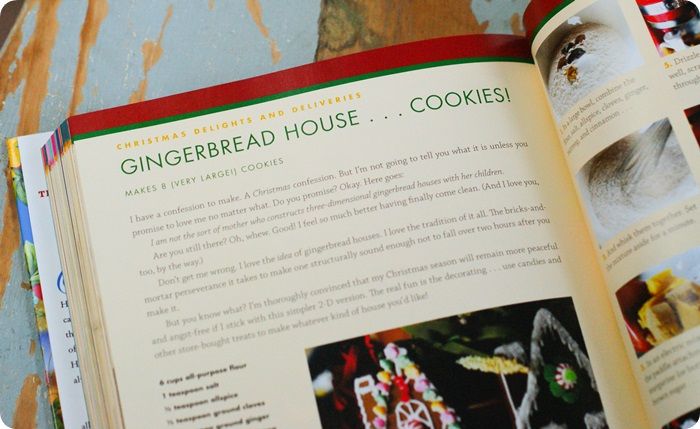
pioneer woman holidays gingerbread photo pioneerwomanholidaysbook7of8.jpg
Do you read cookbooks like novels?  Me, too.  I love those little intro parts before the recipes.  Well, Ree writes them like no other.  I had the best time reading through the book and hearing Ree's voice in my head.  (Does that sound weird?)

Anyway....stay tuned because Ree is giving away three, yes THREE, signed, yes SIGNED, copies of her book in just a bit.

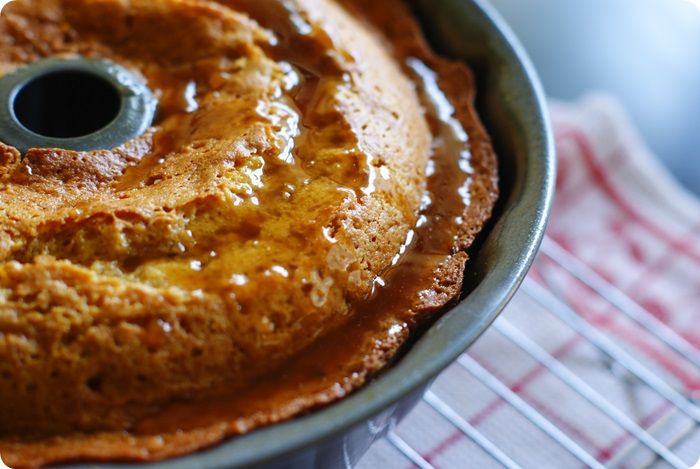
one of the BEST cakes I've ever eaten. ::: kahlua (or rum) pudding cake from The Pioneer Woman Cooks: A Year of Holidays
Now, let me introduce you to a cake.  A boozy cake.  A boozy cake from Ree's book that is responsible for my extra three pounds this week.

one of the BEST cakes I've ever eaten. ::: kahlua (or rum) pudding cake from The Pioneer Woman Cooks: A Year of Holidays
I made Ree's cake, and *promised* myself that I would have just a sliver after taking the pictures.  You can see in one of the pictures that the first slice out was really small.  That was my slice.

one of the BEST cakes I've ever eaten. ::: kahlua (or rum) pudding cake from The Pioneer Woman Cooks: A Year of Holidays
THEN, I decided that you really couldn't see the beautiful, moist cake, so I sliced off another piece...this time a pretty big honkin' piece.

I took the pictures, stood (I didn't even bother sitting) over the table, and INHALED both pieces.  Inhaled, I tell you.

This cake in fantastic.  I'm not sure of it's the booze, or the brown sugar pecans on the top, or the one and a half sticks of butter that are melted and poured over the cake after it bakes, or what.  The combination of it all is magical.

[Note: the cake recipe calls for rum and I used Kahlua...did you know Kahlua is rum and coffee liqueur?  You do now!]

print recipe photo printrecipe.jpg
Christmas Rum Pudding Cake
{from The Pioneer Woman Cooks: A Year of Holidays}

Cake:
1/2 cup lightly packed brown sugar
1/2 cup finely chopped pecans
1 box yellow cake mix
1 (3.4 oz.) package vanilla cook-and-serve pudding mix
4 eggs
1/2 cup water
1/2 cup canola oil
1/2 cup dark rum (or Kahlua)

Glaze:
3/4 cup (1 1/2 sticks) butter
1 1/2 cups sugar
1/4 cup water
3/4 cups dark rum (or Kahlua)

Preheat oven to 325.  Thoroughly grease a Bundt pan.  Sprinkle the brown sugar and pecans in the bottom of the pan.

In a bowl of an electric mixer, beat the cake mix, pudding mix, eggs, water, oil, and rum.  Mix until smooth and totally combined.

Pour the batter into the prepared pan and bake for 50-60 minutes until a toothpick comes out clean.

When the cake has about 10 minutes to go, make the glaze.  Melt the butter and sugar in a saucepan over medium heat.  Then add the water and bring to a boil.  Boil for 4-5 minutes, or until thick.

Turn off the heat and add the rum.  Turn the heat back on and cook for 1 minute more.

one of the BEST cakes I've ever eaten. ::: kahlua (or rum) pudding cake from The Pioneer Woman Cooks: A Year of Holidays
Remove the cake from the oven and let it cool in the pan for 5 minutes.

one of the BEST cakes I've ever eaten. ::: kahlua (or rum) pudding cake from The Pioneer Woman Cooks: A Year of Holidays
Use a skewer or toothpick to poke holes all over the surface of the cake.  Drizzle half of the glaze over the cake and down the sides.  Let it sit in the pan for 10-15 minutes, letting the glaze soak in.

Carefully invert the cake onto a serving platter.  Slowly drizzle the remainder of the glaze over the top, giving the cake a chance to absorb as much as possible.

Let the cake sit for a couple of hours to make sure it's really moist and rummy...or Kahlua-y in my case.

Eat.  Two pieces...while hovering over the table.  It's too good to waste time sitting, people.

The Pioneer Woman Cooks: A Year of Holidays
Alright...who wants a SIGNED copy?  You do!!!  
 (Would this not be the BEST Christmas gift?!?)
 
To enter:  leave a comment on this post telling me your favorite holiday food tradition.

For an extra entry: leave a SEPARATE comment telling me if you've ever tried a recipe from Ree's blog, TV show, or cookbooks.

Entries accepted through 11:59CST, November 20th.  Good luck! :) 

The Pioneer Woman Cooks: A Year of Holidays...you're going to LOVE it!!!


I can't wait to share this book with you today.  It's Ree's latest:
The Pioneer Woman Cooks: A Year of Holidays
The book is so beautiful that it's not with my cookbooks...it's on my coffee table. 

I think this holiday book may be my favorite.  Of course, I said that about Ree's last one and the one before that, but I really, really love this book.

The Pioneer Woman Cooks: A Year of Holidays is divided up by, you guessed it, holidays.  You'll find recipes for Valentine's Day, Cinco de Mayo, Thanksgiving, Christmas, New Year's Eve...and everything in between.  All total: 140 recipes, all presented in Ree's signature step-by-step style.

pioneer woman holidays cookies photo pioneerwomanholidaysbook3of8.jpg
You know I went right for the dessert pages, right?

pioneer woman holidays cheese ball photo pioneerwomanholidaysbook5of8.jpg
I don't know what this says about me, but this Halloween "Cheese Ball of Death" really speaks to me.  Any recipe that calls for a gummy tarantula has to be a winner.

pioneer woman holidays horsies photo pioneerwomanholidaysbook6of8.jpg
Of course, you'll find lots of pictures of the ranch and cowboys.

pioneer woman holidays gingerbread photo pioneerwomanholidaysbook7of8.jpg
Do you read cookbooks like novels?  Me, too.  I love those little intro parts before the recipes.  Well, Ree writes them like no other.  I had the best time reading through the book and hearing Ree's voice in my head.  (Does that sound weird?)

Anyway....stay tuned because Ree is giving away three, yes THREE, signed, yes SIGNED, copies of her book in just a bit.

one of the BEST cakes I've ever eaten. ::: kahlua (or rum) pudding cake from The Pioneer Woman Cooks: A Year of Holidays
Now, let me introduce you to a cake.  A boozy cake.  A boozy cake from Ree's book that is responsible for my extra three pounds this week.

one of the BEST cakes I've ever eaten. ::: kahlua (or rum) pudding cake from The Pioneer Woman Cooks: A Year of Holidays
I made Ree's cake, and *promised* myself that I would have just a sliver after taking the pictures.  You can see in one of the pictures that the first slice out was really small.  That was my slice.

one of the BEST cakes I've ever eaten. ::: kahlua (or rum) pudding cake from The Pioneer Woman Cooks: A Year of Holidays
THEN, I decided that you really couldn't see the beautiful, moist cake, so I sliced off another piece...this time a pretty big honkin' piece.

I took the pictures, stood (I didn't even bother sitting) over the table, and INHALED both pieces.  Inhaled, I tell you.

This cake in fantastic.  I'm not sure of it's the booze, or the brown sugar pecans on the top, or the one and a half sticks of butter that are melted and poured over the cake after it bakes, or what.  The combination of it all is magical.

[Note: the cake recipe calls for rum and I used Kahlua...did you know Kahlua is rum and coffee liqueur?  You do now!]

print recipe photo printrecipe.jpg
Christmas Rum Pudding Cake
{from The Pioneer Woman Cooks: A Year of Holidays}

Cake:
1/2 cup lightly packed brown sugar
1/2 cup finely chopped pecans
1 box yellow cake mix
1 (3.4 oz.) package vanilla cook-and-serve pudding mix
4 eggs
1/2 cup water
1/2 cup canola oil
1/2 cup dark rum (or Kahlua)

Glaze:
3/4 cup (1 1/2 sticks) butter
1 1/2 cups sugar
1/4 cup water
3/4 cups dark rum (or Kahlua)

Preheat oven to 325.  Thoroughly grease a Bundt pan.  Sprinkle the brown sugar and pecans in the bottom of the pan.

In a bowl of an electric mixer, beat the cake mix, pudding mix, eggs, water, oil, and rum.  Mix until smooth and totally combined.

Pour the batter into the prepared pan and bake for 50-60 minutes until a toothpick comes out clean.

When the cake has about 10 minutes to go, make the glaze.  Melt the butter and sugar in a saucepan over medium heat.  Then add the water and bring to a boil.  Boil for 4-5 minutes, or until thick.

Turn off the heat and add the rum.  Turn the heat back on and cook for 1 minute more.

one of the BEST cakes I've ever eaten. ::: kahlua (or rum) pudding cake from The Pioneer Woman Cooks: A Year of Holidays
Remove the cake from the oven and let it cool in the pan for 5 minutes.

one of the BEST cakes I've ever eaten. ::: kahlua (or rum) pudding cake from The Pioneer Woman Cooks: A Year of Holidays
Use a skewer or toothpick to poke holes all over the surface of the cake.  Drizzle half of the glaze over the cake and down the sides.  Let it sit in the pan for 10-15 minutes, letting the glaze soak in.

Carefully invert the cake onto a serving platter.  Slowly drizzle the remainder of the glaze over the top, giving the cake a chance to absorb as much as possible.

Let the cake sit for a couple of hours to make sure it's really moist and rummy...or Kahlua-y in my case.

Eat.  Two pieces...while hovering over the table.  It's too good to waste time sitting, people.

The Pioneer Woman Cooks: A Year of Holidays
Alright...who wants a SIGNED copy?  You do!!!  
 (Would this not be the BEST Christmas gift?!?)
 
To enter:  leave a comment on this post telling me your favorite holiday food tradition.

For an extra entry: leave a SEPARATE comment telling me if you've ever tried a recipe from Ree's blog, TV show, or cookbooks.

Entries accepted through 11:59CST, November 20th.  Good luck! :) 

The Pioneer Woman Cooks: A Year of Holidays...you're going to LOVE it!!!


reade more... Résuméabuiyad

Pumpkin Peekaboo Cake

      Lately I've been seeing all these adorable cakes with pictures in them.  They look like a regular pound cake then whenever they are cut open there is a shape of some type in another color inside.  Since my family was coming to visit I thought it would be fun to try and make one of these.

Pumpkin Peekabook Cake using Pound Cake and Pumpkin Bread.
     I looked through my cookie cutters and decided on making a pumpkin since it's fall and I had a pumpkin cookie cutter.  The cake was easier to make then I thought it would be.  The only difficulty I had was cutting out the pumpkin shape because the stems kept getting cut off.  Otherwise this is a cake that almost anyone could make.

      It turned out super cute and everyone was impressed with the pumpkin in the middle of the pound cake.  I'm going to try this cake again with a Christmas shape in it for the holidays.  You can really use any flavor of cakes and any shape inside depending on the occasion which is why I'm sharing it for this week's 12 Weeks of Christmas Treats hosted by Meal Planning Magic

Pumpkin Peekaboo Cake (adapted from She Knows Food & Recipes)
1 box pumpkin bread mix
1 box pound cake mix
(All ingredients to make the bread and cake)
Orange food coloring

1.  Mix the pumpkin bread according to the package directions.  Add in a few drops of orange food coloring and mix well.

2.  Bake the bread in a 9 x 5 loaf pan.  Bake according to the package directions, pulling the bread out of the oven 5 minutes earlier then the directions state.

3.  Allow the bread to cool completely.  Remove from the loaf pan and refrigerate for 2 hours.

4.  Take the cold pumpkin bread out of the refrigerator, cut into large slices, and cut into pumpkin shapes.

5.  Place the pumpkin shapes in the middle of a 9 x 5 loaf pan.


6.  Mix the pound cake mix according to the package directions.  Pour over top of the pumpkins in the loaf pan, making sure to completely cover the pumpkins.

7.  Bake the pound cake according to the package directions. Cool complete and remove from pan.

8.  Cut into slices and enjoy.

Easy Pumpkin Peekaboo Cake from Hezzi-D's Books and Cooks

      Lately I've been seeing all these adorable cakes with pictures in them.  They look like a regular pound cake then whenever they are cut open there is a shape of some type in another color inside.  Since my family was coming to visit I thought it would be fun to try and make one of these.

Pumpkin Peekabook Cake using Pound Cake and Pumpkin Bread.
     I looked through my cookie cutters and decided on making a pumpkin since it's fall and I had a pumpkin cookie cutter.  The cake was easier to make then I thought it would be.  The only difficulty I had was cutting out the pumpkin shape because the stems kept getting cut off.  Otherwise this is a cake that almost anyone could make.

      It turned out super cute and everyone was impressed with the pumpkin in the middle of the pound cake.  I'm going to try this cake again with a Christmas shape in it for the holidays.  You can really use any flavor of cakes and any shape inside depending on the occasion which is why I'm sharing it for this week's 12 Weeks of Christmas Treats hosted by Meal Planning Magic

Pumpkin Peekaboo Cake (adapted from She Knows Food & Recipes)
1 box pumpkin bread mix
1 box pound cake mix
(All ingredients to make the bread and cake)
Orange food coloring

1.  Mix the pumpkin bread according to the package directions.  Add in a few drops of orange food coloring and mix well.

2.  Bake the bread in a 9 x 5 loaf pan.  Bake according to the package directions, pulling the bread out of the oven 5 minutes earlier then the directions state.

3.  Allow the bread to cool completely.  Remove from the loaf pan and refrigerate for 2 hours.

4.  Take the cold pumpkin bread out of the refrigerator, cut into large slices, and cut into pumpkin shapes.

5.  Place the pumpkin shapes in the middle of a 9 x 5 loaf pan.


6.  Mix the pound cake mix according to the package directions.  Pour over top of the pumpkins in the loaf pan, making sure to completely cover the pumpkins.

7.  Bake the pound cake according to the package directions. Cool complete and remove from pan.

8.  Cut into slices and enjoy.

Easy Pumpkin Peekaboo Cake from Hezzi-D's Books and Cooks

reade more... Résuméabuiyad

Chocolate Coconut Cake Squares a.k.a. Lamingtons!


For over 175 more tried and tested cookie recipes be sure to browse our 
Chocolate Coconut Cake Squares a.k.a. Lamingtons!
This is a recipe that I have not made in a very, very long time. It was almost a lost recipe to me and when I saw it in my sister's Facebook timeline from a blog called Sweet Little Bluebird, the memories came flooding back. My sister Brenda tells me that our Nan Morgan made them which makes sense since she loved anything coconut but I remember them as a very common treat even at kid birthday parties. I went digging through some local old church cookbooks and sure enough, there was the recipe. The original recipe calls for a cake mix but I haven't used one of those in decades; the vanilla scratch cake recipe included here was perfect to use with these dessert squares.

Baby and wedding showers seemed to be more common back in those days and inevitably in rural Newfoundland where I grew up, there was far more food than the ladies present could ever consume. Every lady was certain to leave with the same Tupperware container she brought along but return with it filled with a selection of the treats that the other women had contributed. Besides the ham and cheese and egg salad sandwiches that were always mainstays, as well as a great selection of sweet treats, I remember these little cake squares as being a very common contribution to the celebrations too.

As small children we must have eaten hundreds of these but somehow the popularity of this dessert faded over the years. I have no idea why; they are so moist, soft, chocolatey and scrumptiously coconut covered. My kids had never had them until I made them this past weekend and quickly went through several of them in the first two days. I've frozen the rest of the batch into to enjoy later but I suspect the kids will sneak a few from the basement freezer before long. I'll have to guard them closely.

UPDATE: The first day I posted this recipe I heard from literally  dozens of Australians informing me that these were an Aussie favorite called Lamingtons, reportedly named for Lord Lamington, Governor of Queensland at the turn of the 20th century. How this recipe became popular in Newfoundland in the 1960's or possibly earlier is a mystery to me but I received so many responses from Australia, New Zealand and even as far east as Hong Kong, I've updated the recipe title to reflect its heritage.


Chocolate Coconut Cake Squares a.k.a. Lamingtons!

Recipe by Barry C. Parsons
Chocolate Coconut Cake Squares a.k.a. Lamingtons! - a decades old, nostalgic recipe that deserves a resurgence in popularity. Easy, moist, soft vanilla cake, dipped in chocolate syrup and rolled in dried coconut.

Prep time: Approximately 20 minutes
Cook time: 35 minutes
Total time: Several hours including cooling and freezing time for the cake.
Yield: 24 dessert squares

Ingredients
  • 1 1/4 cups sifted all purpose flour
  • 1 1/2 cups sifted cake flour
  • 1/2 teaspoon baking soda
  • 1 1/2 tsp baking powder
  • 1 teaspoon salt
  • 1 1/2 cups sugar
  • 2/3 cup vegetable oil
  • 1/3 cup vegetable shortening at room temperature
  • 3 tablespoons good quality vanilla extract
  • 3 large eggs
  • 1 1/2 cups buttermilk
  • Aproximately 4 cups dried shreded coconut
  • FOR THE CHOCOLATE SYRUP
  • 1 cup cocoa
  • 1 1/2 cups water
  • 1 tsp vanilla extract
  • 1 1/4 cups white sugar
Directions
  1. Grease a 9x13 inch baking pan and line with parchment paper.
  2. Sift together both flours, baking soda. baking powder, salt and sugar, Set aside.
  3. In the bowl of an electric mixer beat together the vegetable oil, shortening and vanilla. Beat well at high speed with whisk attachment until light and fluffy
  4. Beat the eggs in one at a time.
  5. Fold in the dry ingredients alternately with the buttermilk.
  6. I always add dry ingredients in three divisions and liquid ingredients in 2 divisions. It is very important to begin and end the additions with the dry ingredients. Do not over mix the batter. As soon as it has no lumps in the batter, pour into the prepared 9x13 inch pan.
  7. Bake at 325 degrees F for 30-35 minutes or until a wooden toothpick inserted in the center comes out clean. Allow the cake to cool completely in the pan.
  8. Wrap the pan in plastic wrap and place in the freezer until the cake is completely frozen.
  9. When frozen, lift the cake out of the pan using the parchment paper as an aid and cut it into 24 squares. Return to the freezer until ready to dip in the chocolate syrup and coconut.
  10. TO PREPARE THE CHOCOLATE SYRUP whisk together the sugar and cocoa. This helps to remove any small lumps from the cocoa.
  11. Add the vanilla and water.
  12. Bring to a slow rolling boil and cook for 5-6 minutes. The syrup should thicken slightly but will still be quite thin.
  13. Cool completely to room temperature.
  14. Working quickly, dip the frozen cake cubes into the syrup. You don't want to soak too much syrup into the cake.
  15. Quickly roll the soaked cake into the coconut and place on a parchment lined baking sheet to dry.
  16. Store in airtight plastic containers. If you are freezing the dessert squares put them back into the freezer right away. 
Chocolate Coconut Cake Squares a.k.a. Lamingtons!


    For over 175 more tried and tested cookie recipes be sure to browse our 
    Chocolate Coconut Cake Squares a.k.a. Lamingtons!
    Chocolate Coconut Cake Squares a.k.a. Lamingtons!
    This is a recipe that I have not made in a very, very long time. It was almost a lost recipe to me and when I saw it in my sister's Facebook timeline from a blog called Sweet Little Bluebird, the memories came flooding back. My sister Brenda tells me that our Nan Morgan made them which makes sense since she loved anything coconut but I remember them as a very common treat even at kid birthday parties. I went digging through some local old church cookbooks and sure enough, there was the recipe. The original recipe calls for a cake mix but I haven't used one of those in decades; the vanilla scratch cake recipe included here was perfect to use with these dessert squares.

    Baby and wedding showers seemed to be more common back in those days and inevitably in rural Newfoundland where I grew up, there was far more food than the ladies present could ever consume. Every lady was certain to leave with the same Tupperware container she brought along but return with it filled with a selection of the treats that the other women had contributed. Besides the ham and cheese and egg salad sandwiches that were always mainstays, as well as a great selection of sweet treats, I remember these little cake squares as being a very common contribution to the celebrations too.

    As small children we must have eaten hundreds of these but somehow the popularity of this dessert faded over the years. I have no idea why; they are so moist, soft, chocolatey and scrumptiously coconut covered. My kids had never had them until I made them this past weekend and quickly went through several of them in the first two days. I've frozen the rest of the batch into to enjoy later but I suspect the kids will sneak a few from the basement freezer before long. I'll have to guard them closely.

    UPDATE: The first day I posted this recipe I heard from literally  dozens of Australians informing me that these were an Aussie favorite called Lamingtons, reportedly named for Lord Lamington, Governor of Queensland at the turn of the 20th century. How this recipe became popular in Newfoundland in the 1960's or possibly earlier is a mystery to me but I received so many responses from Australia, New Zealand and even as far east as Hong Kong, I've updated the recipe title to reflect its heritage.


    Chocolate Coconut Cake Squares a.k.a. Lamingtons!

    Recipe by Barry C. Parsons
    Chocolate Coconut Cake Squares a.k.a. Lamingtons! - a decades old, nostalgic recipe that deserves a resurgence in popularity. Easy, moist, soft vanilla cake, dipped in chocolate syrup and rolled in dried coconut.

    Prep time: Approximately 20 minutes
    Cook time: 35 minutes
    Total time: Several hours including cooling and freezing time for the cake.
    Yield: 24 dessert squares

    Ingredients
    • 1 1/4 cups sifted all purpose flour
    • 1 1/2 cups sifted cake flour
    • 1/2 teaspoon baking soda
    • 1 1/2 tsp baking powder
    • 1 teaspoon salt
    • 1 1/2 cups sugar
    • 2/3 cup vegetable oil
    • 1/3 cup vegetable shortening at room temperature
    • 3 tablespoons good quality vanilla extract
    • 3 large eggs
    • 1 1/2 cups buttermilk
    • Aproximately 4 cups dried shreded coconut
    • FOR THE CHOCOLATE SYRUP
    • 1 cup cocoa
    • 1 1/2 cups water
    • 1 tsp vanilla extract
    • 1 1/4 cups white sugar
    Directions
    1. Grease a 9x13 inch baking pan and line with parchment paper.
    2. Sift together both flours, baking soda. baking powder, salt and sugar, Set aside.
    3. In the bowl of an electric mixer beat together the vegetable oil, shortening and vanilla. Beat well at high speed with whisk attachment until light and fluffy
    4. Beat the eggs in one at a time.
    5. Fold in the dry ingredients alternately with the buttermilk.
    6. I always add dry ingredients in three divisions and liquid ingredients in 2 divisions. It is very important to begin and end the additions with the dry ingredients. Do not over mix the batter. As soon as it has no lumps in the batter, pour into the prepared 9x13 inch pan.
    7. Bake at 325 degrees F for 30-35 minutes or until a wooden toothpick inserted in the center comes out clean. Allow the cake to cool completely in the pan.
    8. Wrap the pan in plastic wrap and place in the freezer until the cake is completely frozen.
    9. When frozen, lift the cake out of the pan using the parchment paper as an aid and cut it into 24 squares. Return to the freezer until ready to dip in the chocolate syrup and coconut.
    10. TO PREPARE THE CHOCOLATE SYRUP whisk together the sugar and cocoa. This helps to remove any small lumps from the cocoa.
    11. Add the vanilla and water.
    12. Bring to a slow rolling boil and cook for 5-6 minutes. The syrup should thicken slightly but will still be quite thin.
    13. Cool completely to room temperature.
    14. Working quickly, dip the frozen cake cubes into the syrup. You don't want to soak too much syrup into the cake.
    15. Quickly roll the soaked cake into the coconut and place on a parchment lined baking sheet to dry.
    16. Store in airtight plastic containers. If you are freezing the dessert squares put them back into the freezer right away. 
    Chocolate Coconut Cake Squares a.k.a. Lamingtons!

      reade more... Résuméabuiyad

      Coconut Flour Banana Bread with Chobani Coconut Fudge Frosting

      Coconut Flour Banana Bread with Chobani Coconut Fudge Frosting

      I baked banana bread! It was full of high-fibre coconut flour, sweetened only with mashed bananas and dates, studded with omega-3 filled walnuts and chia seeds, and topped with a fat free yogurt icing, made with strained Chobani Greek yogurt and sprinkled with low-GI coconut sugar. (And despite my earnest rattling off of this bread's nutritional credentials, you can rest assured that it tasted really good. Otherwise it wouldn't come anywhere near this blog!)

      I know what you're thinking - doesn't that sound a bit too health-conscious for Sarah? Where's the butter? Where's the chocolate? Where's the damn peanut butter swirl? I know this type of baking is a bit of a departure for me, but fear not. I haven't been sucked in by the powerful coconut flour lobby with the lure of free samples to spend my precious free time writing about things in which I have no interest. I've actually just been spending up big at health food stores and having fun experimenting with coconut products in my baking. (I trust you all to know that even though I do sometimes take free samples - albeit not that many of late - I only accept things that I am genuinely interested in, and only write about them if I've actually got something to say about them).

      So, my obsession with coconut products. A good friend of mine is a body builder, and I've often accompanied her on trips to the health food store over the past few months. Whilst she's all about the protein powder, Quest bars and pre-workout, I was just like: "Ooh! Activated almonds! Pretty teas! Fancy muesli! Agave syrup!" I never bought anything though, because a) it's expensive and b) I didn't know what to do with it. Then one day Sandra bought some coconut yogurt and dee-licious coconut sugar to try. And that was it. Demon unleashed. I wanted All Of The Coconut!

      I've been putting the coconut sugar on my yogurt in the morning - it tastes like my beloved rapadura sugar, is higher in minerals than ordinary white sugar, and low-GI too - yay! I tried the coconut yogurt (AKA Co-Yo), and I really loved the flavour - super coconutty! However, I don't think I'll be buying it too often - it's really expensive (about $11 for 250 grams), and very high in saturated fat (17% total fat, 13% saturated fat), with very little protein and no calcium at all. I don't get why they call it "guilt free" on the Co-Yo website. It literally has that oily, thick appearance that coconut cream has.

      Coconut yogurt with coconut sugar, smoked salmon, avocado

      I tried eating the Co-Yo in little portions with breakfast, (as per the above photo), or adding a tablespoon of it to my normal fat-free Chobani yogurt (17 grams of protein per 170 gram tub and no fat - wahoo!) to get the coconut flavour without heaps of fat - however the Co-Yo got mouldy before I managed to get through all of it. Boo. I love the flavour and light fluffy texture of the Co-Yo, but it's definitely a treat and not a yogurt-alternative. (Unless, of course, you are lactose and soy intolerant!)

      After that, I went to my local health food store and bought some coconut crunch, and coconut flour to try. Coconut crunch is the dried flesh of a coconut after the coconut oil has been extracted, and you use it in the way you would use psyllium husk - sprinkle it in your cereal or add it to baking for a huge fibre boost. Coconut flour has the virtues of being low carb and ridiculously high in fibre (39% fibre!). Again, it is higher in fat that ordinary flour, but the other nutritional benefits balance it out, methinks. I'm told you need less of it when baking, as it absorbs a huge amount of liquid - so you'll often see coconut flour recipes with a very high ratio of eggs-to-flour.

      I tried making some coconut power porridge for a snack - I found it on the Niulife website - you just stir some milk and coconut flour together, and it thickens almost instantly into a puddingy mixture. Y'all know I love eating a proper breakfast at home (and Instagramming it!), and am always on the lookout for something quick and healthy. I found it a little dry and mealy, even with the addition of sliced mango on the side, so I'll be working on tweaking this recipe to my liking. Watch this space.

      Sliced mango, coconut flour porridge with coconut sugar

      I made some coconut pancakes (recipe here), which I served with diced mango, honey and an espresso. Really delicious! The pancakes were impressively fluffy and soft, and the texture reminded me a little of my beloved ah pong. You can see they were a little messy - they're quite a bit softer than normal wheat-flour pancakes, and I tried flipping them over before they were totally set on the bottom. Whoops!

      Coconut pancakes, lemon, mango, espresso

      Now, let's have a look at the coconut flour banana bread! I had a few overripe bananas hanging around, and thought it would be a good opportunity to test out the coconut flour! I googled a recipe, and came across this one from Teresa Cutter which used coconut flour, chia seeds, coconut oil, bananas and dates, all of which I had in my kitchen. I added walnuts for crunch and deliciousness.

      Ingredients

      Banana bread batter

      Baked banana bread

      The Chobani frosting isn't strictly necessary, but I've been looking for an excuse to make my strained-Chobani frosting again - I strained the yogurt overnight, then mixed it with some icing sugar and lemon juice. Ta-dah!

      Strained yogurt

      Frosted bread

      The "fudge" part of the recipe comes from a few generous spoonfuls of coconut sugar sprinkled over the icing. It dissolves into the icing, becoming caramelly and fudgy. (Like Nigella's Barbados creams).

      Coconut Sugar

      Banana Bread

      The bread is so moist, with a gentle coconut flavour and just a mild sweetness. It lasted for a good week in the fridge. I cut off thick slices for breakfast, for a snack, and to boost my energy before a cardio workout. I gave half the loaf to my bodybuilder friend, and she said she loved it! Yay! I haven't tried these variations myself, but I think you could add vanilla protein powder to the icing instead of icing sugar to boost the protein content, and given how moist it is, I think you could add coconut crunch or psyllium husk to boost the fibre content without it drying out.

      It happens to be gluten free, but don't make the mistake of equating "gluten free" with "healthy". I call BS on that. Just because something's in the health food aisle doesn't automatically make it better for you! It really irritates me when people automatically associate gluten free with better nutrition (and indeed, I've spent many a night whining about this with my friend Jess, who suffers severely from coeliac disease, and has a very restricted diet). A gluten free diet is a necessity for people who suffer from medically diagnosed coeliac disease, an autoimmune disorder which causes an inflammatory reaction in the small intestine whenever gluten is ingested, and can lead to digestive distress, lack of vitality and an inability to absorb nutrients, even hair loss. However, for people with a normal healthy gut, no such reaction occurs, and eliminating gluten from the diet has no health benefits in and of itself.

      Indeed, many of the "gluten free" products you see in supermarkets, like pasta, biscuits and cake, are made of highly refined rice flour and corn flour, mixed with chemicals to replicate the texture that would come from gluten. A low fibre, high-GI carbohydrate bomb that will cause a massive spike in your blood sugar levels! These aren't "health" products, but rather, specialty products made for people with gluten intolerances who can no longer enjoy the foods that they once did.

      Back to happier topics - have you baked with coconut flour? Do you have a favourite coconut flour recipe? Are you as obsessed with health food stores as I am?

      Coconut Flour Banana Bread with Chobani Coconut Fudge Frosting
      Banana bread recipe adapted from Teresa Cutter, Frosting recipe by Sarah Cooks

      For the Frosting
      450 grams Chobani 0% Greek yogurt
      A squeeze of lemon juice
      1/4 - 1 cup icing sugar (to taste)
      1-2 tablespoons coconut sugar
      For the Banana Bread
      4 medjool dates, pitted
      2-3 large ripe bananas (approx 300 grams)
      6 eggs
      60 millilitres coconut oil
      1/2 teaspoon cinnamon
      2 teaspoons baking powder
      70 grams coconut flour
      20 grams chia seeds
      70 grams chopped walnuts

      Method
      For the Frosting
      Line a sieve with muslin or coffee filter paper and place over a bowl. Spoon in the yogurt, then cover loosely with glad wrap and leave in the fridge overnight for the excess water to drip away. The next day, discard the liquid that has collected in the bowl. Tip the drained yogurt into a clean bowl, add the lemon juice and whisk in the icing sugar until it tastes sweet enough for you. I'd start with 1/4 cup, then taste and add more if you like.
      For the Banana Bread
      Preheat the oven to 170C. Line a loaf tin with baking paper. (My loaf tin is 29cm x 14cm x 7.5cm).
      Soak the dates in boiling water from the kettle for 20-30 minutes, or until softened, then drain and discard the soaking water.
      Place the dates, bananas, eggs, coconut oil and cinnamon in the bowl of a food processor, and whizz thoroughly to combine. Scrape the mixture into a large mixing bowl. Add the cinnamon, baking powder, coconut flour, chia seeds and chopped walnuts. Stir with a wooden spoon to combine. Leave the mixture to rest for 10 minutes so that the coconut flour and chia seeds can expand and the mixture can thicken.
      Scrape the mixture into the prepared loaf tin and smooth the top with a spatula. Bake for 45-55 minutes, or until a cake tester comes out clean. Remove to a wire rack to cool. Allow the banana bread to cool completely before adding the frosting.
      To Assemble
      Spread the frosting thickly over the banana bread, making a wavy pattern. Sprinkle a thick blanket of coconut sugar over the top. Allow the sugar to start dissolving into the frosting before serving.

      Coconut Flour Banana Bread with Chobani Coconut Fudge Frosting

      I baked banana bread! It was full of high-fibre coconut flour, sweetened only with mashed bananas and dates, studded with omega-3 filled walnuts and chia seeds, and topped with a fat free yogurt icing, made with strained Chobani Greek yogurt and sprinkled with low-GI coconut sugar. (And despite my earnest rattling off of this bread's nutritional credentials, you can rest assured that it tasted really good. Otherwise it wouldn't come anywhere near this blog!)

      I know what you're thinking - doesn't that sound a bit too health-conscious for Sarah? Where's the butter? Where's the chocolate? Where's the damn peanut butter swirl? I know this type of baking is a bit of a departure for me, but fear not. I haven't been sucked in by the powerful coconut flour lobby with the lure of free samples to spend my precious free time writing about things in which I have no interest. I've actually just been spending up big at health food stores and having fun experimenting with coconut products in my baking. (I trust you all to know that even though I do sometimes take free samples - albeit not that many of late - I only accept things that I am genuinely interested in, and only write about them if I've actually got something to say about them).

      So, my obsession with coconut products. A good friend of mine is a body builder, and I've often accompanied her on trips to the health food store over the past few months. Whilst she's all about the protein powder, Quest bars and pre-workout, I was just like: "Ooh! Activated almonds! Pretty teas! Fancy muesli! Agave syrup!" I never bought anything though, because a) it's expensive and b) I didn't know what to do with it. Then one day Sandra bought some coconut yogurt and dee-licious coconut sugar to try. And that was it. Demon unleashed. I wanted All Of The Coconut!

      I've been putting the coconut sugar on my yogurt in the morning - it tastes like my beloved rapadura sugar, is higher in minerals than ordinary white sugar, and low-GI too - yay! I tried the coconut yogurt (AKA Co-Yo), and I really loved the flavour - super coconutty! However, I don't think I'll be buying it too often - it's really expensive (about $11 for 250 grams), and very high in saturated fat (17% total fat, 13% saturated fat), with very little protein and no calcium at all. I don't get why they call it "guilt free" on the Co-Yo website. It literally has that oily, thick appearance that coconut cream has.

      Coconut yogurt with coconut sugar, smoked salmon, avocado

      I tried eating the Co-Yo in little portions with breakfast, (as per the above photo), or adding a tablespoon of it to my normal fat-free Chobani yogurt (17 grams of protein per 170 gram tub and no fat - wahoo!) to get the coconut flavour without heaps of fat - however the Co-Yo got mouldy before I managed to get through all of it. Boo. I love the flavour and light fluffy texture of the Co-Yo, but it's definitely a treat and not a yogurt-alternative. (Unless, of course, you are lactose and soy intolerant!)

      After that, I went to my local health food store and bought some coconut crunch, and coconut flour to try. Coconut crunch is the dried flesh of a coconut after the coconut oil has been extracted, and you use it in the way you would use psyllium husk - sprinkle it in your cereal or add it to baking for a huge fibre boost. Coconut flour has the virtues of being low carb and ridiculously high in fibre (39% fibre!). Again, it is higher in fat that ordinary flour, but the other nutritional benefits balance it out, methinks. I'm told you need less of it when baking, as it absorbs a huge amount of liquid - so you'll often see coconut flour recipes with a very high ratio of eggs-to-flour.

      I tried making some coconut power porridge for a snack - I found it on the Niulife website - you just stir some milk and coconut flour together, and it thickens almost instantly into a puddingy mixture. Y'all know I love eating a proper breakfast at home (and Instagramming it!), and am always on the lookout for something quick and healthy. I found it a little dry and mealy, even with the addition of sliced mango on the side, so I'll be working on tweaking this recipe to my liking. Watch this space.

      Sliced mango, coconut flour porridge with coconut sugar

      I made some coconut pancakes (recipe here), which I served with diced mango, honey and an espresso. Really delicious! The pancakes were impressively fluffy and soft, and the texture reminded me a little of my beloved ah pong. You can see they were a little messy - they're quite a bit softer than normal wheat-flour pancakes, and I tried flipping them over before they were totally set on the bottom. Whoops!

      Coconut pancakes, lemon, mango, espresso

      Now, let's have a look at the coconut flour banana bread! I had a few overripe bananas hanging around, and thought it would be a good opportunity to test out the coconut flour! I googled a recipe, and came across this one from Teresa Cutter which used coconut flour, chia seeds, coconut oil, bananas and dates, all of which I had in my kitchen. I added walnuts for crunch and deliciousness.

      Ingredients

      Banana bread batter

      Baked banana bread

      The Chobani frosting isn't strictly necessary, but I've been looking for an excuse to make my strained-Chobani frosting again - I strained the yogurt overnight, then mixed it with some icing sugar and lemon juice. Ta-dah!

      Strained yogurt

      Frosted bread

      The "fudge" part of the recipe comes from a few generous spoonfuls of coconut sugar sprinkled over the icing. It dissolves into the icing, becoming caramelly and fudgy. (Like Nigella's Barbados creams).

      Coconut Sugar

      Banana Bread

      The bread is so moist, with a gentle coconut flavour and just a mild sweetness. It lasted for a good week in the fridge. I cut off thick slices for breakfast, for a snack, and to boost my energy before a cardio workout. I gave half the loaf to my bodybuilder friend, and she said she loved it! Yay! I haven't tried these variations myself, but I think you could add vanilla protein powder to the icing instead of icing sugar to boost the protein content, and given how moist it is, I think you could add coconut crunch or psyllium husk to boost the fibre content without it drying out.

      It happens to be gluten free, but don't make the mistake of equating "gluten free" with "healthy". I call BS on that. Just because something's in the health food aisle doesn't automatically make it better for you! It really irritates me when people automatically associate gluten free with better nutrition (and indeed, I've spent many a night whining about this with my friend Jess, who suffers severely from coeliac disease, and has a very restricted diet). A gluten free diet is a necessity for people who suffer from medically diagnosed coeliac disease, an autoimmune disorder which causes an inflammatory reaction in the small intestine whenever gluten is ingested, and can lead to digestive distress, lack of vitality and an inability to absorb nutrients, even hair loss. However, for people with a normal healthy gut, no such reaction occurs, and eliminating gluten from the diet has no health benefits in and of itself.

      Indeed, many of the "gluten free" products you see in supermarkets, like pasta, biscuits and cake, are made of highly refined rice flour and corn flour, mixed with chemicals to replicate the texture that would come from gluten. A low fibre, high-GI carbohydrate bomb that will cause a massive spike in your blood sugar levels! These aren't "health" products, but rather, specialty products made for people with gluten intolerances who can no longer enjoy the foods that they once did.

      Back to happier topics - have you baked with coconut flour? Do you have a favourite coconut flour recipe? Are you as obsessed with health food stores as I am?

      Coconut Flour Banana Bread with Chobani Coconut Fudge Frosting
      Banana bread recipe adapted from Teresa Cutter, Frosting recipe by Sarah Cooks

      For the Frosting
      450 grams Chobani 0% Greek yogurt
      A squeeze of lemon juice
      1/4 - 1 cup icing sugar (to taste)
      1-2 tablespoons coconut sugar
      For the Banana Bread
      4 medjool dates, pitted
      2-3 large ripe bananas (approx 300 grams)
      6 eggs
      60 millilitres coconut oil
      1/2 teaspoon cinnamon
      2 teaspoons baking powder
      70 grams coconut flour
      20 grams chia seeds
      70 grams chopped walnuts

      Method
      For the Frosting
      Line a sieve with muslin or coffee filter paper and place over a bowl. Spoon in the yogurt, then cover loosely with glad wrap and leave in the fridge overnight for the excess water to drip away. The next day, discard the liquid that has collected in the bowl. Tip the drained yogurt into a clean bowl, add the lemon juice and whisk in the icing sugar until it tastes sweet enough for you. I'd start with 1/4 cup, then taste and add more if you like.
      For the Banana Bread
      Preheat the oven to 170C. Line a loaf tin with baking paper. (My loaf tin is 29cm x 14cm x 7.5cm).
      Soak the dates in boiling water from the kettle for 20-30 minutes, or until softened, then drain and discard the soaking water.
      Place the dates, bananas, eggs, coconut oil and cinnamon in the bowl of a food processor, and whizz thoroughly to combine. Scrape the mixture into a large mixing bowl. Add the cinnamon, baking powder, coconut flour, chia seeds and chopped walnuts. Stir with a wooden spoon to combine. Leave the mixture to rest for 10 minutes so that the coconut flour and chia seeds can expand and the mixture can thicken.
      Scrape the mixture into the prepared loaf tin and smooth the top with a spatula. Bake for 45-55 minutes, or until a cake tester comes out clean. Remove to a wire rack to cool. Allow the banana bread to cool completely before adding the frosting.
      To Assemble
      Spread the frosting thickly over the banana bread, making a wavy pattern. Sprinkle a thick blanket of coconut sugar over the top. Allow the sugar to start dissolving into the frosting before serving.

      reade more... Résuméabuiyad