
This cookie idea was
**{update 11/9/11: it was brought to my attention today, that even though these cookies are IN the Martha magazine, they are the work of Danielle Boglivi-Fiori a stylist at The Martha Stewart Show and the founder of Sweet Dani B." And here I thought Martha was toiling away in her kitchen. So, just to be clear, I got them from Martha, Martha got them from Dani. }**
To make them, you'll need:
- royal icing, tinted with AmeriColor
Bright White, Super Red and just a bit of Super Black
- disposable icing bag
- decorating tip (#2 or #3)
- squeeze bottles
- toothpicks
- silver luster dust
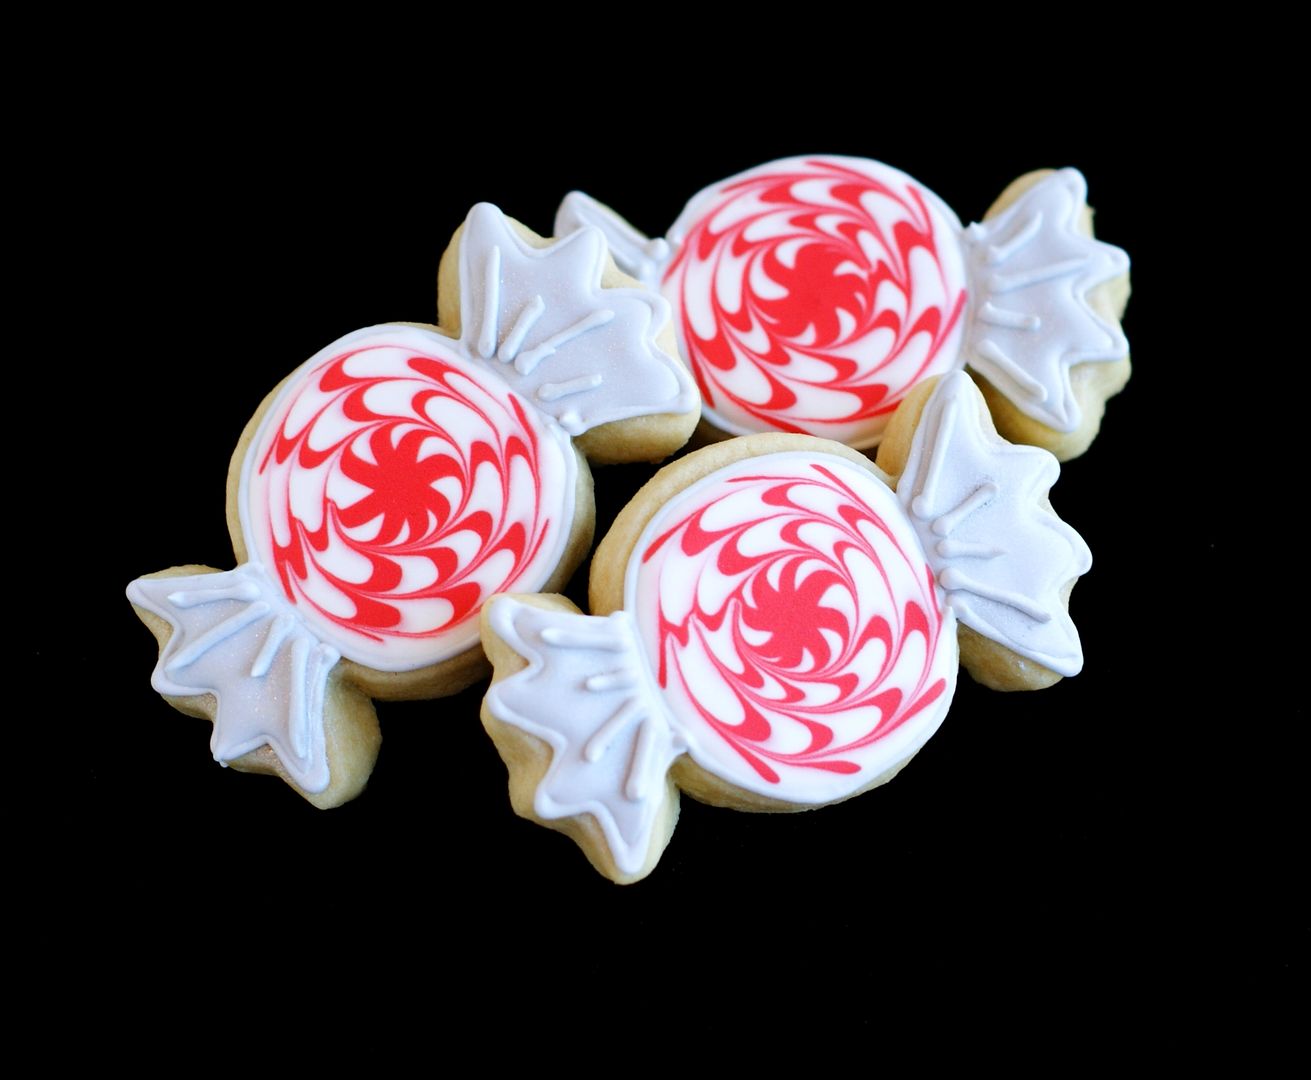
- candy-shaped cookie

Thin the white and red icings with water, a bit at a time, until it is the consistency of thick syrup. Cover with a damp dish towel and let sit several minutes.
Stir gently with a rubber spatula and transfer icings to squeeze bottles.

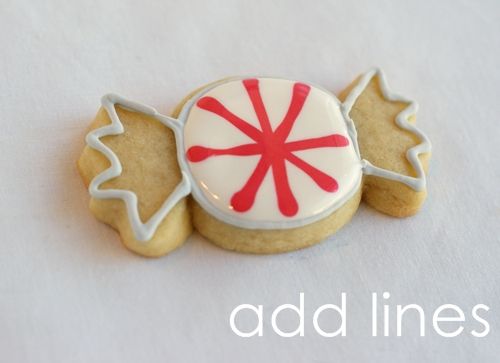
Drag a toothpick through the icing in 3 circles, going the same direction.


Thin the grey icing as described above.


Let dry overnight.


Now...to the trip!
If you're on twitter, I've been teasing a little about making a trip to "the happiest place on earth." There's a reason that for the last two weeks, I've been singing:
"Fairy tales can come true, it can happen to you..."
Saturday, I am going HERE to decorate cookies with some gals. Did you click over? HERE, I'm going HERE!!!
{Who wants to *squee* with me?!?}
So, think of me Saturday, will you? Send good thoughts so I won't forget how to decorate cookies, and that I don't faint, and that I remember to suck my stomach in. OK?
I am so, so, so excited! {You might be able to tell by all of the all of the !!!}
I'll be sure to report back from the land of butter, Wranglers and Ethel Merman! SQUEE!!!
This cookie idea was
**{update 11/9/11: it was brought to my attention today, that even though these cookies are IN the Martha magazine, they are the work of Danielle Boglivi-Fiori a stylist at The Martha Stewart Show and the founder of Sweet Dani B." And here I thought Martha was toiling away in her kitchen. So, just to be clear, I got them from Martha, Martha got them from Dani. }**
To make them, you'll need:
- royal icing, tinted with AmeriColor
- disposable icing bag
- decorating tip (#2 or #3)
- squeeze bottles
- toothpicks
- silver luster dust
- candy-shaped cookie
Thin the white and red icings with water, a bit at a time, until it is the consistency of thick syrup. Cover with a damp dish towel and let sit several minutes.
Stir gently with a rubber spatula and transfer icings to squeeze bottles.
Drag a toothpick through the icing in 3 circles, going the same direction.
Thin the grey icing as described above.
Let dry overnight.
Now...to the trip!
If you're on twitter, I've been teasing a little about making a trip to "the happiest place on earth." There's a reason that for the last two weeks, I've been singing:
"Fairy tales can come true, it can happen to you..."
Saturday, I am going HERE to decorate cookies with some gals. Did you click over? HERE, I'm going HERE!!!
{Who wants to *squee* with me?!?}
So, think of me Saturday, will you? Send good thoughts so I won't forget how to decorate cookies, and that I don't faint, and that I remember to suck my stomach in. OK?
I am so, so, so excited! {You might be able to tell by all of the all of the !!!}
I'll be sure to report back from the land of butter, Wranglers and Ethel Merman! SQUEE!!!
No comments:
Post a Comment