Pages

Showing posts with label Vegan. Show all posts

Vegan Chocolate Avocado Cake with Chocolate Avocado Icing

Vegan Chocolate Avocado Cake with Avocado Chocolate Icing

So yes, I know Christmas is only four days away. I have to admit I've not been very organised this year - I totally forgot about Nikolaus, I haven't baked a Christmas cake or mince pies (yet), we haven't decorated the flat, and we didn't even host a Christmas party. In fact, the extent of my Christmas spirit this year has been watching a lot of Christmas specials on Lifestyle Food (Nigella, Jamie, NigelDonna, Lorraine), and really really looking forward to the week off! I haven't done much planning, but fret not - we are having a proper Christmas Eve supper and Christmas lunch, as well as a couple of low-key foodie Christmastime catch ups with friends. The turkey and ham have been ordered, and today was spent at the market picking up supplies. Fun! Watch this space.

Recently I've been busier with non-Christmas baking. As you will have seen in my last post, "How to Slice an Avocado", I've had a glut of gigantic avocados on hand, and wanted to try making something sweet with them. I remembered seeing this delicious-looking "Almost Vegan Chocolate Avocado Cake" a while ago on The Chronicles of Ms I-Hua and The Boy, and thought it would be a good one to try! Reading I-Hua's post, I saw that she adapted the recipe from the Vegan Chocolate Avocado Cake on Joy the Baker, and I really wanted to see what the pure vegan version would taste like, so I ended up making Joy's recipe. (This also meant I got to share it with the children of a colleague of mine, who happen to have dairy and nut allergies - yay - they get to eat cake too!)

In my "avocado dessert" Googling, I came across this avocado-chocolate frosting on Paleo Spirit, and couldn't believe how rich, luscious and how chocolaty it looked, despite being 100% vegan - no cream, milk, butter or chocolate. I had to try it! I skipped Joy the Baker's bright green avocado buttercream and made the choccy avocado one. (Of course I completely un-Paleo'd it by using super refined icing sugar instead of the suggested maple syrup, haha).

Let's look at the icing - it's just a mixture of ripe avocados, cocoa powder and icing sugar, blended until smooth and creamy.

Barham Avocado

Icing ingredients

I couldn't believe it - twenty seconds in the mixer and bang - it turned into this amazing glossy icing.

Chocolate avocado icing

Of course I had to taste test, and you couldn't taste the avocado at all - it just tasted like dark chocolate, thanks to the cocoa powder. The quantities in the recipe I've given below make a very dark-tasting icing, definitely a grown-up taste. If you want something sweeter, I'd suggest starting with half the amount of cocoa and then adjusting to your liking.

The icing was a dream to work with - so smooth and creamy! It was way easier than a normal ganache or a standard chocolate buttercream as it doesn't seize up or set - it stays velvety smooth for ages.

Iced cake

Joy's recipe makes two 20cm cakes, which she makes into a sandwich cake, but I wanted something smaller that was easier to share around, so I did a small 18cm round cake, as well as a 20cm square slab cake.

Slab cake

I was so impressed with the cake too! Again, despite the inclusion of avocado and the lack of eggs, it didn't taste odd or have an unusual texture - it was just a moist chocolate cake.

Slice of cake - love that texture

I shared the cake with friends and colleagues - and none of them twigged that there was anything unusual about it until I mentioned that it included avocado. An easy-to-make crowd-pleasing chocolate cake that also satisfies a bunch of dietary requirements? Win win win!

Cake the next day

Slice of cake

Vegan Chocolate Cake with Avocado Chocolate Icing
Cake recipe from Joy the Baker
Avocado Chocolate Icing adapted from Paleo Spirit

Ingredients
For the Cake
3 cups plain flour
6 tablespoons unsweetened cocoa powder
1/2 teaspoon salt
2 teaspoons baking powder
2 teaspoons baking soda
1/4 cup vegetable oil
1/2 cup well mashed avocado
2 cups water
2 tablespoons white vinegar
2 teaspoons vanilla extract
2 cups caster sugar
For the Icing
1 very ripe avocado
1/2 cup unsweetened cocoa powder
3/4 cups icing sugar

Method
For the Cake
Preheat the oven to 175C. Line two 20cm round cake tins with baking paper. (I used a 20cm square tin and a 18cm round cake tin).
Sift together the flour, cocoa, salt, baking powder and baking soda into a mixing bowl and set aside.
Whisk together the oil, mashed avocado, water, vinegar and vanilla extract, followed by the caster sugar.
Mix the wet ingredients and dry ingredients together, whisking until smooth.
Pour the batter into the prepared tins. Bake for 40 minutes to an hour, or until cooked when tested with a skewer. Allow to cool in the tins for 10 minutes, then turn out onto a cake rack to cool completely.
For the Icing
Place the avocado flesh, cocoa powder and icing sugar in a food processor and whizz to combine. Add a tablespoon of water if necessary to achieve a spreadable consistency. Spread the icing over the top and sides of the cold cakes in a swirly fashion.
Makes 2 x 20cm cakes
Enjoy!

Vegan Chocolate Avocado Cake with Avocado Chocolate Icing

So yes, I know Christmas is only four days away. I have to admit I've not been very organised this year - I totally forgot about Nikolaus, I haven't baked a Christmas cake or mince pies (yet), we haven't decorated the flat, and we didn't even host a Christmas party. In fact, the extent of my Christmas spirit this year has been watching a lot of Christmas specials on Lifestyle Food (Nigella, Jamie, NigelDonna, Lorraine), and really really looking forward to the week off! I haven't done much planning, but fret not - we are having a proper Christmas Eve supper and Christmas lunch, as well as a couple of low-key foodie Christmastime catch ups with friends. The turkey and ham have been ordered, and today was spent at the market picking up supplies. Fun! Watch this space.

Recently I've been busier with non-Christmas baking. As you will have seen in my last post, "How to Slice an Avocado", I've had a glut of gigantic avocados on hand, and wanted to try making something sweet with them. I remembered seeing this delicious-looking "Almost Vegan Chocolate Avocado Cake" a while ago on The Chronicles of Ms I-Hua and The Boy, and thought it would be a good one to try! Reading I-Hua's post, I saw that she adapted the recipe from the Vegan Chocolate Avocado Cake on Joy the Baker, and I really wanted to see what the pure vegan version would taste like, so I ended up making Joy's recipe. (This also meant I got to share it with the children of a colleague of mine, who happen to have dairy and nut allergies - yay - they get to eat cake too!)

In my "avocado dessert" Googling, I came across this avocado-chocolate frosting on Paleo Spirit, and couldn't believe how rich, luscious and how chocolaty it looked, despite being 100% vegan - no cream, milk, butter or chocolate. I had to try it! I skipped Joy the Baker's bright green avocado buttercream and made the choccy avocado one. (Of course I completely un-Paleo'd it by using super refined icing sugar instead of the suggested maple syrup, haha).

Let's look at the icing - it's just a mixture of ripe avocados, cocoa powder and icing sugar, blended until smooth and creamy.

Barham Avocado

Icing ingredients

I couldn't believe it - twenty seconds in the mixer and bang - it turned into this amazing glossy icing.

Chocolate avocado icing

Of course I had to taste test, and you couldn't taste the avocado at all - it just tasted like dark chocolate, thanks to the cocoa powder. The quantities in the recipe I've given below make a very dark-tasting icing, definitely a grown-up taste. If you want something sweeter, I'd suggest starting with half the amount of cocoa and then adjusting to your liking.

The icing was a dream to work with - so smooth and creamy! It was way easier than a normal ganache or a standard chocolate buttercream as it doesn't seize up or set - it stays velvety smooth for ages.

Iced cake

Joy's recipe makes two 20cm cakes, which she makes into a sandwich cake, but I wanted something smaller that was easier to share around, so I did a small 18cm round cake, as well as a 20cm square slab cake.

Slab cake

I was so impressed with the cake too! Again, despite the inclusion of avocado and the lack of eggs, it didn't taste odd or have an unusual texture - it was just a moist chocolate cake.

Slice of cake - love that texture

I shared the cake with friends and colleagues - and none of them twigged that there was anything unusual about it until I mentioned that it included avocado. An easy-to-make crowd-pleasing chocolate cake that also satisfies a bunch of dietary requirements? Win win win!

Cake the next day

Slice of cake

Vegan Chocolate Cake with Avocado Chocolate Icing
Cake recipe from Joy the Baker
Avocado Chocolate Icing adapted from Paleo Spirit

Ingredients
For the Cake
3 cups plain flour
6 tablespoons unsweetened cocoa powder
1/2 teaspoon salt
2 teaspoons baking powder
2 teaspoons baking soda
1/4 cup vegetable oil
1/2 cup well mashed avocado
2 cups water
2 tablespoons white vinegar
2 teaspoons vanilla extract
2 cups caster sugar
For the Icing
1 very ripe avocado
1/2 cup unsweetened cocoa powder
3/4 cups icing sugar

Method
For the Cake
Preheat the oven to 175C. Line two 20cm round cake tins with baking paper. (I used a 20cm square tin and a 18cm round cake tin).
Sift together the flour, cocoa, salt, baking powder and baking soda into a mixing bowl and set aside.
Whisk together the oil, mashed avocado, water, vinegar and vanilla extract, followed by the caster sugar.
Mix the wet ingredients and dry ingredients together, whisking until smooth.
Pour the batter into the prepared tins. Bake for 40 minutes to an hour, or until cooked when tested with a skewer. Allow to cool in the tins for 10 minutes, then turn out onto a cake rack to cool completely.
For the Icing
Place the avocado flesh, cocoa powder and icing sugar in a food processor and whizz to combine. Add a tablespoon of water if necessary to achieve a spreadable consistency. Spread the icing over the top and sides of the cold cakes in a swirly fashion.
Makes 2 x 20cm cakes
Enjoy!

reade more... Résuméabuiyad

Fresh Vegetable Salsa (medium heat)

     Last week when I went to the farmer's market I was lucky enough to score 14 pounds of peaches for $10 which I used to make spiced peach jam and peach pie filling.  This week when I went I noticed a few very large baskets of tomatoes for sale.  The basket ended up containing 19 pounds of tomatoes and cost a mere $10.  I couldn't wait to get them home and get canning.

Fresh Vegetable Salsa (canned for later!)
     Last year the most popular thing I canned was salsa.  We ended up eating almost all the jars before the spring.  I had canned mild, medium, and hot last year but somehow I only ended up blogging about the mild salsa.  Our favorite was the medium salsa.  It is full of fresh tomatoes, green peppers, onions, and some heat from hot peppers.

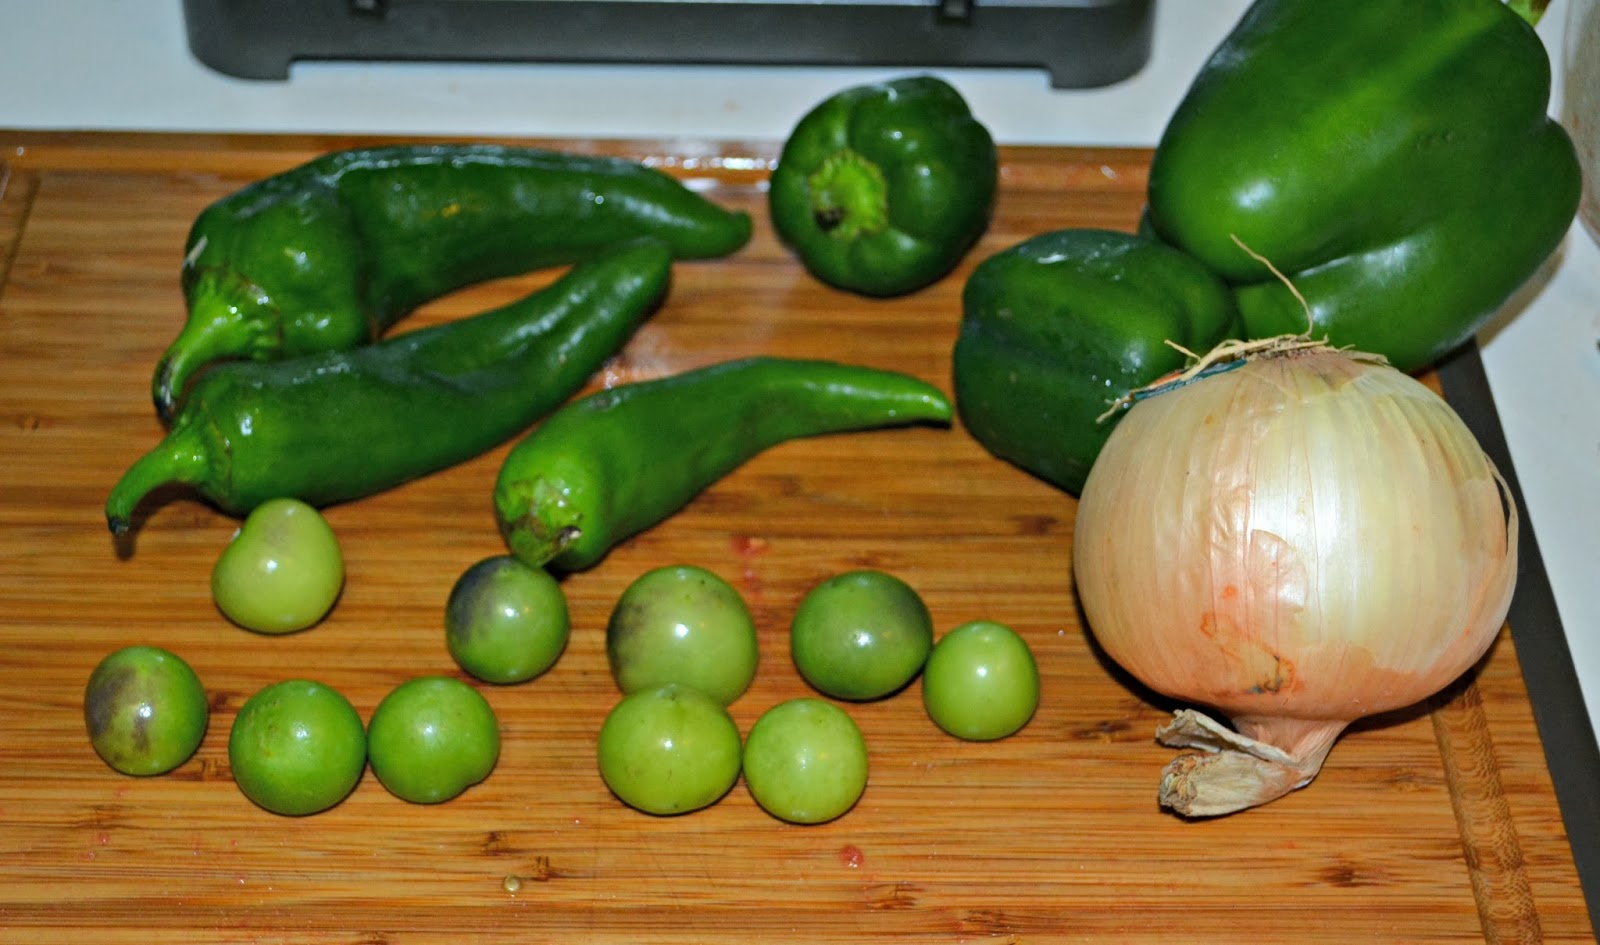
     While I found some of the tomatoes I bought to not be suitable for canning, most of them were and this salsa turned out quickly.  I also had about a pound of tomatillos from our CSA.  As a brief side note, make sure you wear gloves when cutting the hot peppers as they seriously burn.  I touched one before putting my gloves on and then scratched my nose-bad move!  It felt like it was on fire for over an hour.


      The salsa turned out just as well as it did last year.  It has a rich red color and is packed with fresh vegetable flavor.  The heat from the hot peppers comes through in the end and while it doesn't burn your mouth, the heat is definitely there. 

Fresh Vegetable Salsa (medium heat) (slightly modified from Ball's Complete Book of Home Preserving)
7 c. chopped, cored, peeled tomatoes (It took me 6 pounds to get 7 cups)
1 lb. tomatillos, cut in half
2 c. onion, chopped
1 c. green bell pepper, chopped
4 jalapeno peppers, minced
6 garlic cloves, minced
1 can (5.5 oz) tomato paste
3/4 c. white vinegar
2 t. cumin
1 t. salt
1 t. black pepper

1.  Prepare a boiling water canner, jars, and lids.

2.  In a large saucepan combine all the ingredients.  Bring to a boil over medium-high heat, stirring constantly.  Reduce the heat to low and boil gently, stirring frequently, for 30 minutes.

3.  Ladle the hot salsa into hot pint jars.  Leave 1/2 inch of headspace.  Remove the air bubbles and adjust the headspace.  Wipe the rim and place the lid on the jar.  Place the screwband on and tighten to fingertip tight.

4.  Put the jars in the canner, making sure they are completely covered by water, and cover with a lid.  Boil in the canner for 20 minutes.

5.  Remove from heat and remove the lid.  Let sit for 5 minutes.  Remove the salsa from the canner and let them cool for 24 hours.  Check the seals and then store for up to 1 year.

**Makes 5 pints**

Fresh Vegetables made into a Medium salsa then canned for later!


     Last week when I went to the farmer's market I was lucky enough to score 14 pounds of peaches for $10 which I used to make spiced peach jam and peach pie filling.  This week when I went I noticed a few very large baskets of tomatoes for sale.  The basket ended up containing 19 pounds of tomatoes and cost a mere $10.  I couldn't wait to get them home and get canning.

Fresh Vegetable Salsa (canned for later!)
     Last year the most popular thing I canned was salsa.  We ended up eating almost all the jars before the spring.  I had canned mild, medium, and hot last year but somehow I only ended up blogging about the mild salsa.  Our favorite was the medium salsa.  It is full of fresh tomatoes, green peppers, onions, and some heat from hot peppers.

     While I found some of the tomatoes I bought to not be suitable for canning, most of them were and this salsa turned out quickly.  I also had about a pound of tomatillos from our CSA.  As a brief side note, make sure you wear gloves when cutting the hot peppers as they seriously burn.  I touched one before putting my gloves on and then scratched my nose-bad move!  It felt like it was on fire for over an hour.


      The salsa turned out just as well as it did last year.  It has a rich red color and is packed with fresh vegetable flavor.  The heat from the hot peppers comes through in the end and while it doesn't burn your mouth, the heat is definitely there. 

Fresh Vegetable Salsa (medium heat) (slightly modified from Ball's Complete Book of Home Preserving)
7 c. chopped, cored, peeled tomatoes (It took me 6 pounds to get 7 cups)
1 lb. tomatillos, cut in half
2 c. onion, chopped
1 c. green bell pepper, chopped
4 jalapeno peppers, minced
6 garlic cloves, minced
1 can (5.5 oz) tomato paste
3/4 c. white vinegar
2 t. cumin
1 t. salt
1 t. black pepper

1.  Prepare a boiling water canner, jars, and lids.

2.  In a large saucepan combine all the ingredients.  Bring to a boil over medium-high heat, stirring constantly.  Reduce the heat to low and boil gently, stirring frequently, for 30 minutes.

3.  Ladle the hot salsa into hot pint jars.  Leave 1/2 inch of headspace.  Remove the air bubbles and adjust the headspace.  Wipe the rim and place the lid on the jar.  Place the screwband on and tighten to fingertip tight.

4.  Put the jars in the canner, making sure they are completely covered by water, and cover with a lid.  Boil in the canner for 20 minutes.

5.  Remove from heat and remove the lid.  Let sit for 5 minutes.  Remove the salsa from the canner and let them cool for 24 hours.  Check the seals and then store for up to 1 year.

**Makes 5 pints**

Fresh Vegetables made into a Medium salsa then canned for later!


reade more... Résuméabuiyad

Peach Cobbler Cupcakes (Vegan)

     If you follow me on Facebook or Twitter you know that I've been raving about a new cookbook...a new VEGAN cookbook.  Calm down I haven't turned vegan on you!  I just really, really love this cookbook!  The flavors in the book are delicious, the ingredients are wholesome, and my body feels good when I'm eating these vegan treats!

Moist and delicious Vegan Peach Cobbler cupcakes from Hezzi-D's Books and Cooks
     I actually made these for the first day of school this year.  I know that was several weeks ago but since it's still peach season I wanted to share.  The teachers at school gobbled them up and not one of them knew that these were vegan.  I really liked how many peaches went into the cupcakes as it gave them a deep peach flavor.  There was also a lot of flavor from the cinnamon, nutmeg, and cardomom.  Now cardamom is not a spice that I normally keep on hand but I've been seeing it in more and more ingredients so I bought some on a whim the last time I was in Pittsburgh.  I'm glad I did.

     While these cupcakes are delicious on their own, the author suggests pairing them with the maple frosting from the Banana Bread French Toast Cupcake recipe.  I tried that and while it was really good, I had a better idea.  I used the same frosting base but added in cinnamon and cardamom for a spiced frosting that tasted amazing with the peach cupcakes.

     Because of the spices in these cupcakes they are the perfect holiday treat!  I'm sharing them this week for the 12 Weeks of Christmas Treats hosted by Meal Planning Magic.  The bonus with these are that if you have any vegan or vegetarian friends they can enjoy them as well!

Peach Cobbler Cupcakes (slightly adapted from Bake and Destroy:  Good Food for Bad Vegans by Natalie Slater)
1 c. all-purpose flour
1/2 c. whole wheat flour
2/3 c. sugar
1 T. cornstarch
1 1/2 t. baking powder
1 t. cinnamon
1/2 t. nutmeg
1/2 t. salt
1/2 t. cardamom
1/2 c. vanilla almond milk
1/3 c. canola oil
1 t. vanilla
1/2 t. white vinegar
1 1/2 c. peaches, roughly chopped (about 3 peaches)

1.  Preheat the oven to 350 degrees.  Line a muffin tin with cupcake liners.

2.  In a large bowl combine the flours, sugar, cornstarch, baking powder, cinnamon, nutmeg, salt, and cardamom.  Mix to combine.

3.  Stir in the almond milk, canola oil, vanilla, and vinegar.  Mix until well combined.  Allow the batter to rest for 5 minutes then gently fold in the peaches.

4.  Fill each muffin cup 2/3 of the way full and bake for 22-25 minutes.  Remove from oven and allow to cool for 5 minutes in the pan before transferring to a wire rack to cool completely.


Vegan Peach Cobbler Cupcakes are so good noone will know they're vegan!

     If you follow me on Facebook or Twitter you know that I've been raving about a new cookbook...a new VEGAN cookbook.  Calm down I haven't turned vegan on you!  I just really, really love this cookbook!  The flavors in the book are delicious, the ingredients are wholesome, and my body feels good when I'm eating these vegan treats!

Moist and delicious Vegan Peach Cobbler cupcakes from Hezzi-D's Books and Cooks
     I actually made these for the first day of school this year.  I know that was several weeks ago but since it's still peach season I wanted to share.  The teachers at school gobbled them up and not one of them knew that these were vegan.  I really liked how many peaches went into the cupcakes as it gave them a deep peach flavor.  There was also a lot of flavor from the cinnamon, nutmeg, and cardomom.  Now cardamom is not a spice that I normally keep on hand but I've been seeing it in more and more ingredients so I bought some on a whim the last time I was in Pittsburgh.  I'm glad I did.

     While these cupcakes are delicious on their own, the author suggests pairing them with the maple frosting from the Banana Bread French Toast Cupcake recipe.  I tried that and while it was really good, I had a better idea.  I used the same frosting base but added in cinnamon and cardamom for a spiced frosting that tasted amazing with the peach cupcakes.

     Because of the spices in these cupcakes they are the perfect holiday treat!  I'm sharing them this week for the 12 Weeks of Christmas Treats hosted by Meal Planning Magic.  The bonus with these are that if you have any vegan or vegetarian friends they can enjoy them as well!

Peach Cobbler Cupcakes (slightly adapted from Bake and Destroy:  Good Food for Bad Vegans by Natalie Slater)
1 c. all-purpose flour
1/2 c. whole wheat flour
2/3 c. sugar
1 T. cornstarch
1 1/2 t. baking powder
1 t. cinnamon
1/2 t. nutmeg
1/2 t. salt
1/2 t. cardamom
1/2 c. vanilla almond milk
1/3 c. canola oil
1 t. vanilla
1/2 t. white vinegar
1 1/2 c. peaches, roughly chopped (about 3 peaches)

1.  Preheat the oven to 350 degrees.  Line a muffin tin with cupcake liners.

2.  In a large bowl combine the flours, sugar, cornstarch, baking powder, cinnamon, nutmeg, salt, and cardamom.  Mix to combine.

3.  Stir in the almond milk, canola oil, vanilla, and vinegar.  Mix until well combined.  Allow the batter to rest for 5 minutes then gently fold in the peaches.

4.  Fill each muffin cup 2/3 of the way full and bake for 22-25 minutes.  Remove from oven and allow to cool for 5 minutes in the pan before transferring to a wire rack to cool completely.


Vegan Peach Cobbler Cupcakes are so good noone will know they're vegan!

reade more... Résuméabuiyad

Vegan Apple Pie + a Review of Pies and Tarts with Heart by Dynise Balcavage

     Here is your complete guide to homemade vegan pie! First, you’ll master your crust, be it flaky, nutty, cookie-based, vegetable-based, or gluten-free. You’ll learn to make and roll the dough. Then, you’ll craft your filling, finish your pie, decorate it, and make a homemade topping. (Vegan whipped cream, anyone?) Whether you’re looking for a filling meal—such as Mushroom-Polenta Pie or Cornish Pasties—or a dessert pie beyond compare—such as Pumpkin Pie or Butterscotch Pudding Pie—Pies and Tarts With Heart has a lovingly crafted pie for you. And with gluten-free and raw options, you’ll be sure to find the perfect pie for your family’s needs.  (-synopsis)


      I really enjoyed this cookbook.  I've been getting more and more requests for vegan desserts and pies have been one of the hardest things for me to make vegan.  This book starts out by talking about ingredients and tools used in pie making.  Then it moves on to basic crust recipes.  All of the recipes are vegan and most have notations on how to make them gluten free which is an extra bonus in my book.  Next it moves on to traditional pies such as Apple Pie, Gingered-Pear Pie, and Pumpkin Pie.

     Not looking for traditional?  No problem. They move on to Creamy Pies such as Frozen Chocolate Mudslide Pie and Butterscotch Pudding Pie.    There's also citrus pies, nutty pies, and even pies in the raw.  I cannot wait to try the Raw Baklava Crusted Apple Pie-YUM!  Then there is an entire section on artistic tarts.  These tarts are almost too pretty to eat.  The book ends with savory pies and tarts.

I give this book 4 out of 5 stars.

     Looking through the book I just couldn't decide what to make.  I had 4 different pies marked but when I looked on my kitchen counter and saw the fruit bowl overflowing with apples my mind was made up for me.  Apple pie it was!  At first I was just going to use a pre-made pie crust and go with the apple filling recipe but I realized that would defeat the purpose since the pie crust wouldn't be homemade.

     Instead I made the double crust recipe and I'm so glad I did!  While it was harder to roll out than regular pie crust, it tasted even better once it was baked.  The crust was perfectly brown and stayed crisp, even the next day.  Then I made the apple pie filling and was concerned that it was going to be too runny because of the soy milk but when I cut into the pie I didn't have any filling run out.  The next day the filling had firmed up even more and my pie slices were picture perfect.

      My husband had no idea this pie was vegan and he enjoyed it every bit as much as I did.  In fact, we enjoyed it so much we didn't share it with anyone!  That's right, the two of us finished off the entire pie ourselves...oops! 

Vegan Apple Pie (recipe from Pies and Tarts with Heart by Dynise Balcavage, 2013)
For the crust:
2 1/2 c. flour
1/2 t. salt
1/2 c. margarine
1/2 c. vegetable shortening
6-10 T. ice cold water

For the pie:
5 large apples, peeled and sliced
3 T. flour
1/2 c. sugar
1/2 c. brown sugar
1/4 t. nutmeg
1/2 t. ground ginger
1/2 t. cinnamon
1/4 t. salt
1 T. vanilla
2/3 c. vanilla soymilk
1 T. sugar, for sprinkling    

1.  In a large bowl, mix the flour and salt.

2.  Dice the margarine and shortening and add to the flour, tossing very well so each piece is covered with flour.

3.  Using a pastry blender, blend the flour and fats, with the aim of handling the dough as little as possible.  When the bits are about pea size, start adding water, 1 tablespoon at a time, sprinkling evenly onto the dough.

4.  Wrap tightly in plastic wrap.  Refrigerate for at least 2 hours or overnight.  

5.  Preheat the oven to 425 degrees.Divide the dough in half and roll out the top and bottom crusts.  Place the bottom crust in the pan and lay the top gently over it to store temporarily.  Refrigerate until ready to fill.   

6.  Just before baking the pie, in a large bowl, stir together the apples, flour, sugar, brown sugar, spices, salt, vanilla, and soymilk.    Spoon into the prepared crust.  Top with the second crust and crimp the edges as desired.  Sprinkle with the coarse sugar.

7.  Place the pie on a foil-lined cookie sheet (to catch any fruit spillover) and bake for 15 minutes.  Lower the heat to 350 degrees and bake for 45 more minutes, until the top is golden.  If the crust seems to brown too quickly, cover the pie with aluminum foil.  Allow to cool completely before slicing.  


     Here is your complete guide to homemade vegan pie! First, you’ll master your crust, be it flaky, nutty, cookie-based, vegetable-based, or gluten-free. You’ll learn to make and roll the dough. Then, you’ll craft your filling, finish your pie, decorate it, and make a homemade topping. (Vegan whipped cream, anyone?) Whether you’re looking for a filling meal—such as Mushroom-Polenta Pie or Cornish Pasties—or a dessert pie beyond compare—such as Pumpkin Pie or Butterscotch Pudding Pie—Pies and Tarts With Heart has a lovingly crafted pie for you. And with gluten-free and raw options, you’ll be sure to find the perfect pie for your family’s needs.  (-synopsis)


      I really enjoyed this cookbook.  I've been getting more and more requests for vegan desserts and pies have been one of the hardest things for me to make vegan.  This book starts out by talking about ingredients and tools used in pie making.  Then it moves on to basic crust recipes.  All of the recipes are vegan and most have notations on how to make them gluten free which is an extra bonus in my book.  Next it moves on to traditional pies such as Apple Pie, Gingered-Pear Pie, and Pumpkin Pie.

     Not looking for traditional?  No problem. They move on to Creamy Pies such as Frozen Chocolate Mudslide Pie and Butterscotch Pudding Pie.    There's also citrus pies, nutty pies, and even pies in the raw.  I cannot wait to try the Raw Baklava Crusted Apple Pie-YUM!  Then there is an entire section on artistic tarts.  These tarts are almost too pretty to eat.  The book ends with savory pies and tarts.

I give this book 4 out of 5 stars.

     Looking through the book I just couldn't decide what to make.  I had 4 different pies marked but when I looked on my kitchen counter and saw the fruit bowl overflowing with apples my mind was made up for me.  Apple pie it was!  At first I was just going to use a pre-made pie crust and go with the apple filling recipe but I realized that would defeat the purpose since the pie crust wouldn't be homemade.

     Instead I made the double crust recipe and I'm so glad I did!  While it was harder to roll out than regular pie crust, it tasted even better once it was baked.  The crust was perfectly brown and stayed crisp, even the next day.  Then I made the apple pie filling and was concerned that it was going to be too runny because of the soy milk but when I cut into the pie I didn't have any filling run out.  The next day the filling had firmed up even more and my pie slices were picture perfect.

      My husband had no idea this pie was vegan and he enjoyed it every bit as much as I did.  In fact, we enjoyed it so much we didn't share it with anyone!  That's right, the two of us finished off the entire pie ourselves...oops! 

Vegan Apple Pie (recipe from Pies and Tarts with Heart by Dynise Balcavage, 2013)
For the crust:
2 1/2 c. flour
1/2 t. salt
1/2 c. margarine
1/2 c. vegetable shortening
6-10 T. ice cold water

For the pie:
5 large apples, peeled and sliced
3 T. flour
1/2 c. sugar
1/2 c. brown sugar
1/4 t. nutmeg
1/2 t. ground ginger
1/2 t. cinnamon
1/4 t. salt
1 T. vanilla
2/3 c. vanilla soymilk
1 T. sugar, for sprinkling    

1.  In a large bowl, mix the flour and salt.

2.  Dice the margarine and shortening and add to the flour, tossing very well so each piece is covered with flour.

3.  Using a pastry blender, blend the flour and fats, with the aim of handling the dough as little as possible.  When the bits are about pea size, start adding water, 1 tablespoon at a time, sprinkling evenly onto the dough.

4.  Wrap tightly in plastic wrap.  Refrigerate for at least 2 hours or overnight.  

5.  Preheat the oven to 425 degrees.Divide the dough in half and roll out the top and bottom crusts.  Place the bottom crust in the pan and lay the top gently over it to store temporarily.  Refrigerate until ready to fill.   

6.  Just before baking the pie, in a large bowl, stir together the apples, flour, sugar, brown sugar, spices, salt, vanilla, and soymilk.    Spoon into the prepared crust.  Top with the second crust and crimp the edges as desired.  Sprinkle with the coarse sugar.

7.  Place the pie on a foil-lined cookie sheet (to catch any fruit spillover) and bake for 15 minutes.  Lower the heat to 350 degrees and bake for 45 more minutes, until the top is golden.  If the crust seems to brown too quickly, cover the pie with aluminum foil.  Allow to cool completely before slicing.  


reade more... Résuméabuiyad

Spicy Garlic Tofu: Meatless Monday

     Have I ever shared about how I first came to eat tofu?  Ten years ago when my husband and I first met he introduced me to tofu.  He told me about it and told me how great it was when he grilled it and put buffalo sauce on it.  The way he explained it, tofu doesn't really have any taste and would only taste like the buffalo sauce.  I was game so I gave it a try.

     That first time I tasted it I absolutely hated it.  I ate several bites to be polite but I couldn't get over the texture of the tofu.  I'm not sure what it was about it but I couldn't handle it.  Several weeks later we had it in a salad and I had the same reaction.  It wasn't the flavor that was bothering me because really there wasn't any flavor.  After several times of eating the tofu I began getting used to the texture and probably close to a year later I actually ended up enjoying it and cooking with it.  It's funny because now I cook it for us once a week and General Tso's Tofu is my preferred dish at Chinese restaurants.  Funny how something I totally couldn't imagine enjoying, let alone eating, has become a staple in our house.

     With that being said, I'm always looking for new ways to prepare it.  There really aren't that many tofu recipes out there and many of them are Asian.  This spicy garlic tofu is a simple dish with broccoli and red peppers, a little bit of spice, a hint of sweetness, and a lot of garlic.  It's delicious over steamed jasmine rice.

Spicy Garlic Tofu (adapted from My San Francisco Kitchen)
1 T. olive oil
1 brick extra firm tofu, drained and cubed
1/2 red pepper, chopped
1/2 green pepper, chopped
1/4 c. red onion, finely chopped
4 garlic cloves, minced
3 T. soy sauce
1 T. lemon juice
1 T. rice vinegar
1/2 t. brown sugar
1 T. paprika
1/2 t. crushed red pepper flakes
1/2 t. Sriracha sauce
1 c. broccoli florets

1.  Heat the olive oil in a large skillet over medium heat.  Add in the tofu and cook for 5 minutes per side or until it is lightly browned.

2.  Add in the red pepper, green pepper, and onion.  Saute for 5 minutes.


3.  Stir in the garlic and cook for 2 minutes.  Add in the soy sauce, vinegar, lemon juice, brown sugar, paprika, red pepper flakes, Sriracha, and broccoli.

4.  Cook for 10 minutes, stirring occasionally.  Serve hot over top of rice.


     Have I ever shared about how I first came to eat tofu?  Ten years ago when my husband and I first met he introduced me to tofu.  He told me about it and told me how great it was when he grilled it and put buffalo sauce on it.  The way he explained it, tofu doesn't really have any taste and would only taste like the buffalo sauce.  I was game so I gave it a try.

     That first time I tasted it I absolutely hated it.  I ate several bites to be polite but I couldn't get over the texture of the tofu.  I'm not sure what it was about it but I couldn't handle it.  Several weeks later we had it in a salad and I had the same reaction.  It wasn't the flavor that was bothering me because really there wasn't any flavor.  After several times of eating the tofu I began getting used to the texture and probably close to a year later I actually ended up enjoying it and cooking with it.  It's funny because now I cook it for us once a week and General Tso's Tofu is my preferred dish at Chinese restaurants.  Funny how something I totally couldn't imagine enjoying, let alone eating, has become a staple in our house.

     With that being said, I'm always looking for new ways to prepare it.  There really aren't that many tofu recipes out there and many of them are Asian.  This spicy garlic tofu is a simple dish with broccoli and red peppers, a little bit of spice, a hint of sweetness, and a lot of garlic.  It's delicious over steamed jasmine rice.

Spicy Garlic Tofu (adapted from My San Francisco Kitchen)
1 T. olive oil
1 brick extra firm tofu, drained and cubed
1/2 red pepper, chopped
1/2 green pepper, chopped
1/4 c. red onion, finely chopped
4 garlic cloves, minced
3 T. soy sauce
1 T. lemon juice
1 T. rice vinegar
1/2 t. brown sugar
1 T. paprika
1/2 t. crushed red pepper flakes
1/2 t. Sriracha sauce
1 c. broccoli florets

1.  Heat the olive oil in a large skillet over medium heat.  Add in the tofu and cook for 5 minutes per side or until it is lightly browned.

2.  Add in the red pepper, green pepper, and onion.  Saute for 5 minutes.


3.  Stir in the garlic and cook for 2 minutes.  Add in the soy sauce, vinegar, lemon juice, brown sugar, paprika, red pepper flakes, Sriracha, and broccoli.

4.  Cook for 10 minutes, stirring occasionally.  Serve hot over top of rice.


reade more... Résuméabuiyad

Tasty Bite Review: Kung Pao Noodles (vegan)

      Sometimes life gets busy.  There are days when I'm rushing around in the mornings and forget to pack my lunch.  When I get to work I have the option of buying a cafeteria meal (I work at an elementary school) or finding something in the vending machine.  While I do enjoy the grilled cheese, hot turkey, and salads from the cafeteria, there are often days where I do not like the entree choices.

      Recently I received a box of Tasty Bite pouches for my review.  The first thing I noticed is that the pouches microwave in 1 minute.  How awesome is that?  Second thing I noticed is how compact the pouches were.  This is great because I ended up taking 3 of the pouches to school and putting them in my supply closet for days when I forget to pack my lunch.  I ended up eating 2 of the pouches already and we're only 3 weeks into the school year!

       There are several reasons why I really enjoy the Tasty Bite meals.  They are all natural and feature Indian and pan-Asian flavors which are hard to come by in my small rural town.  They don't use preservatives and yet the meals are fresh and delicious anytime I open one.  I also love that they are full of spice as most quick meals tend to be on the bland side.

       Included in my samples I received the Kung Pao noodles, Pad Thai, Bombay Potatoes, Ginger Lentil Rice, Madras Lentils, Channa Masala, and Jaipur Vegetables.  While I ate the Pad Thai and Kung Pao Noodles as they were for lunch, some of the other entrees were great as a base to a dinner.  I used the Ginger Lentil Rice under an Asian chicken dish and served the Madras Lentils in my chili! 

        My favorite entree is the Kung Pao noodles.  The noodles are in a zesty sauce that has some heat to it.  It's tossed with vegetables and peanuts and is a vegan and kosher meal.  Most of the Tasty Bite pouches are vegan, vegetarian, and kosher, and many are also gluten free.  It's great to have so many choices and still get the great flavors as well. 


I received samples of Tasty Bite pouches from the company but all photos and opinions are my own.
      Sometimes life gets busy.  There are days when I'm rushing around in the mornings and forget to pack my lunch.  When I get to work I have the option of buying a cafeteria meal (I work at an elementary school) or finding something in the vending machine.  While I do enjoy the grilled cheese, hot turkey, and salads from the cafeteria, there are often days where I do not like the entree choices.

      Recently I received a box of Tasty Bite pouches for my review.  The first thing I noticed is that the pouches microwave in 1 minute.  How awesome is that?  Second thing I noticed is how compact the pouches were.  This is great because I ended up taking 3 of the pouches to school and putting them in my supply closet for days when I forget to pack my lunch.  I ended up eating 2 of the pouches already and we're only 3 weeks into the school year!

       There are several reasons why I really enjoy the Tasty Bite meals.  They are all natural and feature Indian and pan-Asian flavors which are hard to come by in my small rural town.  They don't use preservatives and yet the meals are fresh and delicious anytime I open one.  I also love that they are full of spice as most quick meals tend to be on the bland side.

       Included in my samples I received the Kung Pao noodles, Pad Thai, Bombay Potatoes, Ginger Lentil Rice, Madras Lentils, Channa Masala, and Jaipur Vegetables.  While I ate the Pad Thai and Kung Pao Noodles as they were for lunch, some of the other entrees were great as a base to a dinner.  I used the Ginger Lentil Rice under an Asian chicken dish and served the Madras Lentils in my chili! 

        My favorite entree is the Kung Pao noodles.  The noodles are in a zesty sauce that has some heat to it.  It's tossed with vegetables and peanuts and is a vegan and kosher meal.  Most of the Tasty Bite pouches are vegan, vegetarian, and kosher, and many are also gluten free.  It's great to have so many choices and still get the great flavors as well. 


I received samples of Tasty Bite pouches from the company but all photos and opinions are my own.
reade more... Résuméabuiyad

Spaghetti Squash with Hummus Pesto (Gluten Free & Vegan)

     If you've been following my adventures this summer you know that I belong to a CSA and that many of my recipes have used fresh fruits and vegetables.  It's been a fun way to learn how to cook some of the produce that I wasn't familiar with prior to receiving our share.  The last few weeks we've received an abundance of squash in all shapes and sizes.  While I'm familiar with yellow squash and zucchini, the spaghetti squash and acorn squash were new to me.

     When I looked at the spaghetti squash my initial thought was cook it with marinara sauce but then that seemed to easy.  Right around this time I received a package from Sabra which included a variety of hummus, salsa, and even vegetable dip!  When I saw the Roasted Pine Nut Hummus and immediately my thoughts went to a hummus pesto sauce.  I just happen to have a bunch of basil in my CSA this week as well so I knew it was meant to be.

       I don't make pesto very often because my husband doesn't like it so I didn't really know what I was doing.  I through in a little basil, a little garlic, some lemon juice, and a whole lot of hummus.  Then I gave it a whirl in the food processor and viola!  Smooth and creamy hummus pesto that was bursting with flavor.


       I roasted up the spaghetti squash in the oven with olive oil, salt, and pepper then scraped out the squash strands.  The pesto went wonderfully with the spaghetti squash.  I didn't know that the squash had a slight sweetness to it but the strong flavor of the hummus pesto went so well with it.  I really enjoyed this meal and I liked knowing that it was both gluten free and vegan as well.  This is definitely a meal I could cook for company.

Spaghetti Squash with Hummus Pesto  (a Hezzi-D original recipe)
2 medium spaghetti squash
1 T. olive oil
1 t. salt
1 t. black pepper

For the Hummus Pesto:
1/2 c. Sabra Roasted Pine Nut Hummus
1/4 c. fresh basil leaves, roughly chopped
2 garlic cloves
1 lemon
1/2 t. salt
1 t. fresh ground black pepper
2 t. olive oil
Parmesan Cheese (optional-leave off if making vegan)

1.  Preheat the oven to 450 degrees.  Spray a 9 x 13 baking dish with cooking spray.

2.  Cut both of the spaghetti squash in half.  Scrape out the seeds with a spoon.

3.  Brush each of the squash halves with olive oil and then sprinkle with salt and pepper.  Place in the baking dish cut side down and bake for 30-35 minutes.  Remove from oven and allow to cool for 5 minutes.

4.  Meanwhile, put the roasted pine nut hummus, basil leaves, garlic cloves, juice of 1 lemon, salt, and pepper in a food processor.  Process until smooth.  Add in olive oil a little at a time until desired consistency is reached.

5.  Carefully handle the hot squash halves and scrape out the spaghetti like strands.  Place in a dish.   Add 1/4 cup of the pesto and toss to coat.

6.  Heat the remaining pesto hummus for 30-60 seconds in a microwave or until just warmed.

7.  Divide the squash between desired amount of plates, top with another spoonful of hummus pesto, and sprinkle with freshly grated Parmesan cheese.  Serve hot.

Note:  The hummus pesto is also great over penne or spaghetti.  It covers about a pound of pasta.


Sabra provided me with the hummus and a stipend for my work but all opinions, photos, and text are 100% my own.
     If you've been following my adventures this summer you know that I belong to a CSA and that many of my recipes have used fresh fruits and vegetables.  It's been a fun way to learn how to cook some of the produce that I wasn't familiar with prior to receiving our share.  The last few weeks we've received an abundance of squash in all shapes and sizes.  While I'm familiar with yellow squash and zucchini, the spaghetti squash and acorn squash were new to me.

     When I looked at the spaghetti squash my initial thought was cook it with marinara sauce but then that seemed to easy.  Right around this time I received a package from Sabra which included a variety of hummus, salsa, and even vegetable dip!  When I saw the Roasted Pine Nut Hummus and immediately my thoughts went to a hummus pesto sauce.  I just happen to have a bunch of basil in my CSA this week as well so I knew it was meant to be.

       I don't make pesto very often because my husband doesn't like it so I didn't really know what I was doing.  I through in a little basil, a little garlic, some lemon juice, and a whole lot of hummus.  Then I gave it a whirl in the food processor and viola!  Smooth and creamy hummus pesto that was bursting with flavor.


       I roasted up the spaghetti squash in the oven with olive oil, salt, and pepper then scraped out the squash strands.  The pesto went wonderfully with the spaghetti squash.  I didn't know that the squash had a slight sweetness to it but the strong flavor of the hummus pesto went so well with it.  I really enjoyed this meal and I liked knowing that it was both gluten free and vegan as well.  This is definitely a meal I could cook for company.

Spaghetti Squash with Hummus Pesto  (a Hezzi-D original recipe)
2 medium spaghetti squash
1 T. olive oil
1 t. salt
1 t. black pepper

For the Hummus Pesto:
1/2 c. Sabra Roasted Pine Nut Hummus
1/4 c. fresh basil leaves, roughly chopped
2 garlic cloves
1 lemon
1/2 t. salt
1 t. fresh ground black pepper
2 t. olive oil
Parmesan Cheese (optional-leave off if making vegan)

1.  Preheat the oven to 450 degrees.  Spray a 9 x 13 baking dish with cooking spray.

2.  Cut both of the spaghetti squash in half.  Scrape out the seeds with a spoon.

3.  Brush each of the squash halves with olive oil and then sprinkle with salt and pepper.  Place in the baking dish cut side down and bake for 30-35 minutes.  Remove from oven and allow to cool for 5 minutes.

4.  Meanwhile, put the roasted pine nut hummus, basil leaves, garlic cloves, juice of 1 lemon, salt, and pepper in a food processor.  Process until smooth.  Add in olive oil a little at a time until desired consistency is reached.

5.  Carefully handle the hot squash halves and scrape out the spaghetti like strands.  Place in a dish.   Add 1/4 cup of the pesto and toss to coat.

6.  Heat the remaining pesto hummus for 30-60 seconds in a microwave or until just warmed.

7.  Divide the squash between desired amount of plates, top with another spoonful of hummus pesto, and sprinkle with freshly grated Parmesan cheese.  Serve hot.

Note:  The hummus pesto is also great over penne or spaghetti.  It covers about a pound of pasta.


Sabra provided me with the hummus and a stipend for my work but all opinions, photos, and text are 100% my own.
reade more... Résuméabuiyad

Banana Bread French Toast Cupcakes (Vegan) + Review of Bake and Destroy by Natalie Slater

Vegan Recipes That’ll Punch Your Taste Buds in the Mouth

Natalie has been described as "Martha Stewart meets Iron Maiden," taking vegan cooking to places it has never been before. Influenced by slasher films, pro-wrestling, punk rock and heavy metal, her quirky-yet-delicious comfort foods are a refreshing take on vegan eating with award-winning flavors. Along the way, her off-color humor, irreverent rants and density of pop-culture references will make you laugh out loud.

Inside this high-energy cookbook you’ll find recipes for Bike Messenger Brownies—inspired by the espresso-infused chai latte these speed demons use to fuel up; and Crouching Cornbread, Hidden Broccoli—Natalie’s sneaky way of getting her son to eat vegetables. Other creations include the Grilled Mac ‘n’ Cheez Sandwich, Taco Lasagna, Chick-O Cheesecake, and her Shepherd’s Pie Pizza, about which she writes, "Some people were born to rock n’ roll. Others were born to ride. I was born to put mashed potatoes on pizza."

Bake and Destroy was named one of the most anticipated cookbooks of the year by VegNews.  (synopsis of Bake and Destroy:  Good Food For Bad Vegans by Natalie Slater)


I have to say, when I first received this book I loved the cover.  It had a photo of Natalie, a picture of a cupcakes, and lots of food doodles.  I was immediately drawn to it.  Upon opening the book I immediately began tagging recipes I wanted to make.  The photos in the book were beautiful and the flavor combinations were out of this world.


While I'd normally choose 2 or 3 recipes to make from a cookbook before reviewing it, I had 7 on my list for this book.  In one weekend I made the Banana Bread French Toast Cupcakes, Peach Cobbler Cupcakes, Chai Berry Muffins, and Breakfast Bites.  The best part?  They all rocked!  Seriously!  I had my husband try everything as well and he was shocked when I told him that everything was vegan.  

The recipes in this book use easy to find, common ingredients that are found in most grocery stores.  I appreciate that as I live in a small town and often have difficulty finding items for specialty baked goods.  I've only recently begun to make vegan baked goods but these were way better then what I've been making.  This is definitely my "go to" vegan cookbook from now on!

I give this cookbook 5 out of 5 stars.

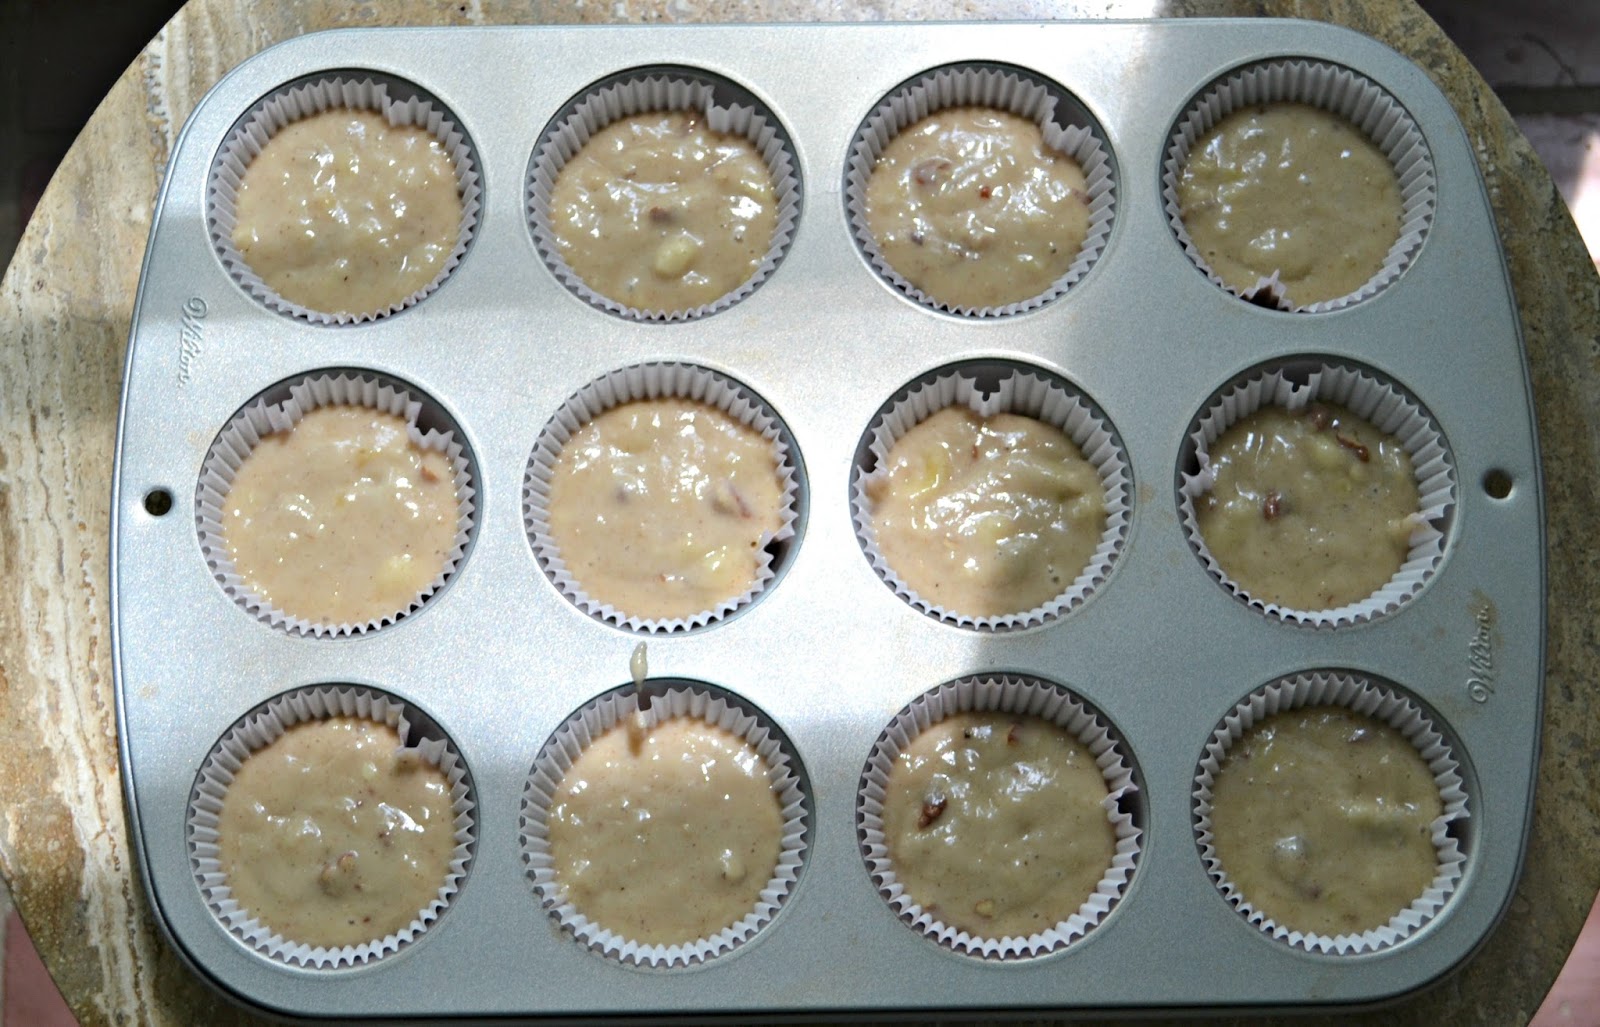
The first recipe I actually ended up making was the banana bread french toast cupcakes.  They just sounded awesome.  The cupcakes are really a basic vegan banana bread with nuts.  The vegan frosting on top is where the french toast part comes in.  The fluffy maple frosting works so well with these cupcakes.  It really was like eating french toast in a cupcake.   They were awesome.


Banana Bread French Toast Cupcakes (from Bake and Destroy:  Good Food for Bad Vegans by Natalie Slater)
Makes 12 cupcakes
Ingredients
CUPCAKES:

½ cup (113 g) mashed overripe banana

1 ¼ cups (156 g) all-purpose flour

¼ teaspoon baking soda

1 teaspoon baking powder

1 teaspoon ground cinnamon

½ teaspoon salt

¾ cup (150 g) sugar

1/3  cup (80 ml) canola oil

23 cup (160 ml) rice or soy milk

1 teaspoon vanilla extract

½ teaspoon almond extract

½ cup (60 g) chopped, toasted walnuts


VEGAN MAPLE BUTTERCREAM FROSTING:

2 cups (250 g) confectioners’ sugar

6 tablespoons (85 g) nonhydrogenated vegetable shortening

6 tablespoons (85 g) vegan margarine

2 tablespoons (40 g) pure maple syrup

½ teaspoon maple flavoring

Pinch of salt


Directions

Preheat your oven to 350°F (180°C) and line a twelve-cup muffin pan with paper liners.


Throw your mashed banana in a blender or just smash it with a fork.


Sift the flour, baking soda, baking powder, cinnamon, salt and sugar into a large bowl and mix well.


In a smaller bowl, whisk together the oil, rice milk, vanilla, almond extract and mashed banana.


Stir or fold the wet ingredients into the dry. Small lumps are fine. Finally, add the walnuts, folding gently.


Fill the liners two-thirds full. Bake for 20 to 22 minutes, or until the tops spring back when lightly touched. Let cool in the pan on a wire rack for 10 minutes, then remove from the pan and let cool completely before frosting.


To make the vegan maple buttercream frosting, beat all the ingredients together in a bowl until they’re light and fluffy.


Vegan Recipes That’ll Punch Your Taste Buds in the Mouth

Natalie has been described as "Martha Stewart meets Iron Maiden," taking vegan cooking to places it has never been before. Influenced by slasher films, pro-wrestling, punk rock and heavy metal, her quirky-yet-delicious comfort foods are a refreshing take on vegan eating with award-winning flavors. Along the way, her off-color humor, irreverent rants and density of pop-culture references will make you laugh out loud.

Inside this high-energy cookbook you’ll find recipes for Bike Messenger Brownies—inspired by the espresso-infused chai latte these speed demons use to fuel up; and Crouching Cornbread, Hidden Broccoli—Natalie’s sneaky way of getting her son to eat vegetables. Other creations include the Grilled Mac ‘n’ Cheez Sandwich, Taco Lasagna, Chick-O Cheesecake, and her Shepherd’s Pie Pizza, about which she writes, "Some people were born to rock n’ roll. Others were born to ride. I was born to put mashed potatoes on pizza."

Bake and Destroy was named one of the most anticipated cookbooks of the year by VegNews.  (synopsis of Bake and Destroy:  Good Food For Bad Vegans by Natalie Slater)


I have to say, when I first received this book I loved the cover.  It had a photo of Natalie, a picture of a cupcakes, and lots of food doodles.  I was immediately drawn to it.  Upon opening the book I immediately began tagging recipes I wanted to make.  The photos in the book were beautiful and the flavor combinations were out of this world.


While I'd normally choose 2 or 3 recipes to make from a cookbook before reviewing it, I had 7 on my list for this book.  In one weekend I made the Banana Bread French Toast Cupcakes, Peach Cobbler Cupcakes, Chai Berry Muffins, and Breakfast Bites.  The best part?  They all rocked!  Seriously!  I had my husband try everything as well and he was shocked when I told him that everything was vegan.  

The recipes in this book use easy to find, common ingredients that are found in most grocery stores.  I appreciate that as I live in a small town and often have difficulty finding items for specialty baked goods.  I've only recently begun to make vegan baked goods but these were way better then what I've been making.  This is definitely my "go to" vegan cookbook from now on!

I give this cookbook 5 out of 5 stars.

The first recipe I actually ended up making was the banana bread french toast cupcakes.  They just sounded awesome.  The cupcakes are really a basic vegan banana bread with nuts.  The vegan frosting on top is where the french toast part comes in.  The fluffy maple frosting works so well with these cupcakes.  It really was like eating french toast in a cupcake.   They were awesome.


Banana Bread French Toast Cupcakes (from Bake and Destroy:  Good Food for Bad Vegans by Natalie Slater)
Makes 12 cupcakes
Ingredients
CUPCAKES:

½ cup (113 g) mashed overripe banana

1 ¼ cups (156 g) all-purpose flour

¼ teaspoon baking soda

1 teaspoon baking powder

1 teaspoon ground cinnamon

½ teaspoon salt

¾ cup (150 g) sugar

1/3  cup (80 ml) canola oil

23 cup (160 ml) rice or soy milk

1 teaspoon vanilla extract

½ teaspoon almond extract

½ cup (60 g) chopped, toasted walnuts


VEGAN MAPLE BUTTERCREAM FROSTING:

2 cups (250 g) confectioners’ sugar

6 tablespoons (85 g) nonhydrogenated vegetable shortening

6 tablespoons (85 g) vegan margarine

2 tablespoons (40 g) pure maple syrup

½ teaspoon maple flavoring

Pinch of salt


Directions

Preheat your oven to 350°F (180°C) and line a twelve-cup muffin pan with paper liners.


Throw your mashed banana in a blender or just smash it with a fork.


Sift the flour, baking soda, baking powder, cinnamon, salt and sugar into a large bowl and mix well.


In a smaller bowl, whisk together the oil, rice milk, vanilla, almond extract and mashed banana.


Stir or fold the wet ingredients into the dry. Small lumps are fine. Finally, add the walnuts, folding gently.


Fill the liners two-thirds full. Bake for 20 to 22 minutes, or until the tops spring back when lightly touched. Let cool in the pan on a wire rack for 10 minutes, then remove from the pan and let cool completely before frosting.


To make the vegan maple buttercream frosting, beat all the ingredients together in a bowl until they’re light and fluffy.


reade more... Résuméabuiyad

CSA Wednesdays: Loaded Potato Rounds and Diced Veggies with Demi-Glaze

    It was another great week of vegetables for our CSA from Goodness Grows.  This week we received 4 zucchinis, 2 yellow squash, a large bag of beans, a couple of leeks, a bag of potatoes, mint, cilantro, onions, and paneer.  Then because they didn't have the cucumbers they expected to have I got to chose one thing from their farmer's market table!  There was a lot to choose from but when I saw the beautiful head of cabbage I had visions of these Korean Style Beef Tacos and that's exactly what we had for dinner that night!


     As it turned out, the vegetables we received went perfectly with what I had planned for our meals this past week.  I used the paneer, onions, and part of a zucchini over top of greens in a Fried Paneer Salad.  I used the mint to make mint iced tea and mojitos.  Then I came to the potatoes.  I love potatoes.  Literally love them and could eat them mashed, fried, baked, sauteed, anyway you make them I will eat them.

     I've had a recipe for loaded potato rounds sitting around for a few weeks and these potatoes looked perfect for it!  I sliced the potatoes into 1/4 inch rounds then brushed them with butter and put the toppings on!  I only used cheese and green onions, but bacon and sour cream could be used as well.


Loaded Potato Rounds (adapted from Allrecipes)
8 red skinned or new potatoes, washed and sliced
3 T. butter, melted
1/2 c. cheddar cheese, shredded
1 t. sea salt
1/2 t. pepper
2 green onions, sliced

1.  Preheat the oven to 400 degrees.

2.  Brush both sides of each potato round with melted butter and place on a cookie sheet.  Sprinkle with half of the salt and pepper.

3.  Bake for 15 minutes then flip over.  Brush with any remaining butter and sprinkle with remaining salt and pepper.  Return to the oven and bake for 15 minutes.

4.  Remove from oven, sprinkle with cheese and green onions, and bake for 5 additional minutes or until cheese is melted.

5.  Serve with sour cream on the side if desired.


     Then I finished up the vegetables by making Diced Vegetables with Demi-Glaze as a side dish.  I used a leek, zucchini, squash, potatoes, peas, carrots, and celery.  The veggies get very tender and the demi-glaze is amazing.   It's rich and flavorful and tastes great with the veggies.  I'd reduce the time I cooked the vegetables but otherwise it's a great side dish.

Diced Veggies with Demi-Glaze (adapted from Vegetarian Times)
For the Demi-Glaze:
2 t. olive oil
1 leek, chopped
1 carrot, finely chopped
1 stalk celery, finely chopped
1 T. flour
1 T. tomato paste
4 garlic cloves, minced
3 c. vegetable broth
1 c. dry red wine
1 t. black pepper
1 t. thyme

For the veggies:
1 T. sesame oil
1 t. cumin
1/4 t. cayenne pepper
1/2 lb. potatoes, diced
1 c. baby peas
1 zucchini, diced
1 yellow squash, diced
1/2 c. vegetable broth
4 garlic cloves, minced 

1.  To make the demi-glaze heat the oil in a medium saucepan over medium high heat.  Add in the leek, carrot, and celery.  Saute for 10 minutes.

2.  Stir in the flour and cook for 2 minutes.  Add tomato paste, garlic, broth, and wine.  Simmer for 5 minutes.

3.  Add pepper and thyme, reduce heat, and simmer for 30 minutes.  Remove from heat and cool.  (The recipe said to discard solids but I liked the glaze as it was.)


4.  To make the veggies heat the sesame oil in a large skillet over medium heat.  Add the cumin, cayenne pepper, and potatoes.  Saute for 10 minutes.

5.  Add in the peas, zucchini, squash, broth, and garlic.  Cover and cook for 10 minutes.

6.  Divide the vegetables among four bowls and drizzle with the demi-glaze. 


    It was another great week of vegetables for our CSA from Goodness Grows.  This week we received 4 zucchinis, 2 yellow squash, a large bag of beans, a couple of leeks, a bag of potatoes, mint, cilantro, onions, and paneer.  Then because they didn't have the cucumbers they expected to have I got to chose one thing from their farmer's market table!  There was a lot to choose from but when I saw the beautiful head of cabbage I had visions of these Korean Style Beef Tacos and that's exactly what we had for dinner that night!


     As it turned out, the vegetables we received went perfectly with what I had planned for our meals this past week.  I used the paneer, onions, and part of a zucchini over top of greens in a Fried Paneer Salad.  I used the mint to make mint iced tea and mojitos.  Then I came to the potatoes.  I love potatoes.  Literally love them and could eat them mashed, fried, baked, sauteed, anyway you make them I will eat them.

     I've had a recipe for loaded potato rounds sitting around for a few weeks and these potatoes looked perfect for it!  I sliced the potatoes into 1/4 inch rounds then brushed them with butter and put the toppings on!  I only used cheese and green onions, but bacon and sour cream could be used as well.


Loaded Potato Rounds (adapted from Allrecipes)
8 red skinned or new potatoes, washed and sliced
3 T. butter, melted
1/2 c. cheddar cheese, shredded
1 t. sea salt
1/2 t. pepper
2 green onions, sliced

1.  Preheat the oven to 400 degrees.

2.  Brush both sides of each potato round with melted butter and place on a cookie sheet.  Sprinkle with half of the salt and pepper.

3.  Bake for 15 minutes then flip over.  Brush with any remaining butter and sprinkle with remaining salt and pepper.  Return to the oven and bake for 15 minutes.

4.  Remove from oven, sprinkle with cheese and green onions, and bake for 5 additional minutes or until cheese is melted.

5.  Serve with sour cream on the side if desired.


     Then I finished up the vegetables by making Diced Vegetables with Demi-Glaze as a side dish.  I used a leek, zucchini, squash, potatoes, peas, carrots, and celery.  The veggies get very tender and the demi-glaze is amazing.   It's rich and flavorful and tastes great with the veggies.  I'd reduce the time I cooked the vegetables but otherwise it's a great side dish.

Diced Veggies with Demi-Glaze (adapted from Vegetarian Times)
For the Demi-Glaze:
2 t. olive oil
1 leek, chopped
1 carrot, finely chopped
1 stalk celery, finely chopped
1 T. flour
1 T. tomato paste
4 garlic cloves, minced
3 c. vegetable broth
1 c. dry red wine
1 t. black pepper
1 t. thyme

For the veggies:
1 T. sesame oil
1 t. cumin
1/4 t. cayenne pepper
1/2 lb. potatoes, diced
1 c. baby peas
1 zucchini, diced
1 yellow squash, diced
1/2 c. vegetable broth
4 garlic cloves, minced 

1.  To make the demi-glaze heat the oil in a medium saucepan over medium high heat.  Add in the leek, carrot, and celery.  Saute for 10 minutes.

2.  Stir in the flour and cook for 2 minutes.  Add tomato paste, garlic, broth, and wine.  Simmer for 5 minutes.

3.  Add pepper and thyme, reduce heat, and simmer for 30 minutes.  Remove from heat and cool.  (The recipe said to discard solids but I liked the glaze as it was.)


4.  To make the veggies heat the sesame oil in a large skillet over medium heat.  Add the cumin, cayenne pepper, and potatoes.  Saute for 10 minutes.

5.  Add in the peas, zucchini, squash, broth, and garlic.  Cover and cook for 10 minutes.

6.  Divide the vegetables among four bowls and drizzle with the demi-glaze. 


reade more... Résuméabuiyad