Pages

.

And...The Winners Are:

Um...so life got a little busy and and I totally forgot to post who my two winners are.  Sorry about that! 

On the bright side - there are two winners instead of the one I mentioned when starting the giveaway.  :-)

And, the winners are:

a Rafflecopter giveaway

I'll pack up your prizes over the weekend and mail them out on Monday, Karen and Ashley!  Just shoot me an email (allthelittlestuff@gmail.com) to confirm your shipping address.

Photobucket
reade more... Résuméabuiyad

Smoked Chicken, Spinach, Grilled Pineapple and Pomegranate Salad

Smoked Chicken, Spinach, Grilled Pineapple and Pomegranate Salad

Just had to post this one for Dole National Salad Day! I do love a colorful, flavorful dinner salad and this one was totally outstanding. The chicken breasts are dry rubbed with smokey spices and then slowly open roasted on a rack in the oven (or under indirect low heat on a backyard gas grill). This provides delicious juicy chicken chunks to enjoy with the spinach and other vegetables and of course, the sweet grilled pineapple and tangy pomegranate seeds. A simple homemade lemon dijon dressing completed this balanced, nutritious, colorful, flavorful and oh so satisfying dinner salad.

Serves 4

4 large boneless skinless chicken breasts

Wash and pat dry, then roll in the dry rub.

Dry Rub

  • 2 tbsp smoked paprika
  • 3 tbsp paprika
  • 1/2 tsp chipotle powder
  • 2 tbsp powdered ginger
  • 2tbsp dry mustard
  • 1 tsp dry thyme
  • 1 tsp black pepper
  • 1 tbsp garlic powder
  • 2 tsp salt
  • 2 tbsp brown sugar1 tbsp chili powder
Place the chicken breasts on a rack in a roasting pan and roast at only 275 degree F for about an hour depending on the size of the chicken breasts. Always use a meat thermometer inserted into the middle of the thickest part of the chicken breast reaches 170 degrees F or 77 degrees Celsius. Let he chicken rest for 10 minutes before dicing and adding to the salad.

The salad is composed of :
  • about 6 cups baby spinach or mixed baby greens, like Dole Tender Garden
  • 1/2 cup sliced radishes
  • 1 cup julienne sweet bell peppers
  • 1/2 sliced English cucumber
  • seeds of half a pomegranate
  • 1 1/2 cups lightly grilled diced golden pineapple    
Lemon Dijon Salad Dressing

Shake together in an airtight container until well combined:
  • 1/3 olive oil
  • juice and finely minced zest of one lemon
  • 3 tbsp dijon mustard
  • pinch of salt
  • pinch of pepper
  • 1 1/2 tbsp honey

reade more... Résuméabuiyad

Frozen Peanut Butter Cup Pie

Frozen Peanut Butter Cup Pie
You are going to find many recipes for frozen peanut butter pie if you search the web and I have tried quite a few of them. Some have crushed peanut or vanilla wafer crusts, some have cream cheese in the mix, many have sweetened condensed milk in the recipe and quite a few have chocolate on the bottom. I finally got around to creating my own version of this delicious dessert and I tried to make it like a big frozen peanut butter cup which both my daughter and I particularly love.

I went with a chocolate cookie crumb crust to mimic the shell of the peanut butter cup while adding a crunchy element. I also used the sweetened condensed milk that seemed to be in almost all the recipes. I didn't use cream cheese, instead opting for mascarpone cheese for a less tangy, more neutral creamy taste and texture. Many of the recipes I've seem have an open top but I opted for a soft ganache top which would complete the peanut butter cup look and taste and would soften quickly out of the freezer before serving.

From the first bite I knew I had a winner. The creamy, no churn peanut butter ice-cream center is incredibly silky as is the soft melt-in-your-mouth ganache top with the crust adding a great textural crunch. Incredible! Peanut butter cup lovers are going to go wild for this one.

Frozen Peanut Butter Cup Pie
Lightly grease and line the bottom and sides of a 9 inch spring form pan. Line with parchment paper and then very lightly grease the parchment paper as well.

Mix together:
  • 2 2/3 cups chocolate cookie crumbs
  • 2/3 cup melted butter
  • 3 rounded tbsp white sugar
Press the crumbs into the bottom and 3/4 of the way up the sides of the prepared pan. Set aside.

Whip to firm peaks:
  • 1 cup whipping cream
  • 2 tbsp icing sugar (powdered sugar)
  • 1 tsp vanilla extract
Slowly beat in:
  • one 10 ounce can of sweetened condensed milk
Next beat in:
  • 1 cup mascarpone cheese
  • 3/4 cup peanut butter
Pour into the prepared crust and freeze for several hours or preferably overnight.

Melt together in a double boiler:
  • 2 cups semi sweet chocolate chips
  • 2/3 cup whipping cream, heated in the microwave to almost boiling
Reserve a little of the chocolate mixture to drizzle over the whipped cream if you like, then spread the rest over the top of the frozen pie. Return to the freezer until ready to serve. Before serving you can garnish with whipped cream and a drizzle of the chocolate ganache as well as some roasted peanuts.

Note: if your freezer is very cold as mine is, be sure to take the pie out of the freezer for 10 or 15 minutes before serving to allow it to soften sufficiently to be easily cut.
reade more... Résuméabuiyad

Spring Fling Giveaway Hop!

    It's spring and since we recently just moved I've been doing my best to clean out the closets and my book shelves.  Thankfully Kathy from I am a Reader, Not a Writer is hosting a Spring Fling Giveaway Hop!  My spring cleaning is your gain because I'm giving away a box of books!  One winner in the United States (sorry, this giveaway is not for my international readers) will win the entire box of books.

     Included in the box are the books:
  • A SIGNED copy of The Inn at Rose Harbor by Debbie Macomber
  •  A Gangster's Garden by Marc Cortez
  • The Loved and the Lost by Lory S. Kaufman
  • Shopaholic & Baby by Sophie Kinsella
  • The Immortal Rules by Julie Kagawa
  • Fix-It and Forget-It Cookbook


a Rafflecopter giveaway
Check out all the other blogs involved in the Spring Fling Giveaway Hop!
reade more... Résuméabuiyad

The Best Ever Grilled Margarita Chicken with Marinade Recipe

After nearly a year of enjoying some of our favorite grilled chicken recipes and trying several others, we decided we had to share this one with you again. Truly in our top 2 favorite grilled chicken recipes. Definitely the best margarita chicken ever.
Continue Reading »
reade more... Résuméabuiyad

15 Interesting Facts About Chocolate

The first chocolate bar was made by Cadbury in England in 1842. The word chocolate import from the Aztec word xocolatl, meaning, virulent water.It manufacturers use 40% of the world's almonds and 20% of the world's peanuts. People spend approx 7 billion dollars in a year on chocolate.The largest choco bar was manufactured by Elah-Dufour United Food Companies at Turin, Italy, in March 2000 & the weight of bar is 2268 kilograms.Most of the people thinks- calories are bad. Think suchlike this: one single choco chip can provide you sufficient energy to pace 150 feet.Milk chocolate is most popular & favorite chocolate in the world; dark choco is very famous amongst men. These two flavor of choco in sale very much.It contains large amount of Antioxidants and which is really good for health. Antioxidants help to prevent cancer and heart diseases.A half-cup of special extra-flavonoid-enriched cocoa every day can helps the women's skin moister, smoother, and less scabrous and red when uncovered to ultraviolet light. The flavonoids absorb UV light which helps protect & increase blood flow to the skin.It always melts in our mouth while candy not melts. This is because melting point of chocolate is lowest than candy i.e 93 degrees Fahrenheit. That's why it melts in our mouth while candy not.A fascinating info about it i.e that Americans love vanilla flavor. In fact, Americans are having a love affair with chocolate. And not only on Valentine's Day even, in the year 2000 alone, 3.3 billion pounds of choco were eaten in the U.S.!It includes a chemical called phenylethylamine. These phenylethylamine, put out serotonin and endorphins- these two chemicals make us feel happy!17,000 people in Belgium work in the choco industry. 66 percent of the entire worlds cacao is produce in Africa and rest of cocoa is farmed in 15 countries.One ounce of baking cocoa is equal to 10% of the daily suggested intake of iron. Which is very helpful for the people.It discharges chemical into your body which is created when you start falling in love. In 2006 more than 6.5 million tons of chocolate was traded worldwide.It is a valuable energy source. The shelf life of a box of chocolate is approximately one year.A dozen of chocolate bars is equal to the amount of caffeine found in a cup of coffee.We DownloadFood provides Food at your destination which are totally free, for which you don't have to pay any money just order your food online & DownloadFood will be delivered directly at your doorstep. No crappie offers which have hidden meaning and lots of term & conditions. Rate this Article

15 Interesting Facts About ChocolateNot Rated Yet

Aakash Cla has published 2 articles. Article submitted on April 24, 2013. Word count: 386

reade more... Résuméabuiyad

Maple Apple Baked Beans with Apple Sausage

Maple Apple Baked Beans with Apple Sausage

Do they still sell canned beans and wieners? I don't think I've seen them since I was a kid and to be honest, apart from canned tomatoes or beans, there is very little caned food that actually comes into our house, so I'm not well acquainted with the canned food aisle. I do remember eating them for lunch all the time as a kid and that thought inspired this much more flavorful version using some delicious apple sausage and  beans baked in an apple infused sauce. The result was very tasty indeed and we enjoyed these with some great artisan crusty bread from Georgestown Bakery around the corner.

I was lucky enough to find some low fat turkey sausage for this recipe to keep it in the healthier range. I precooked the sausages in the oven first before adding them to the beans in the last half hour or so of cooking time. This allowed the sausages to impart some of their spicy flavor without falling apart into the beans...although that doesn't sound too bad either. Freshly baked cornbread or Buttermilk Biscuits are also terrific with these baked beans.

Begin by soaking in water overnight or up to 48 hours:
  • 1 1/2 pounds dry white beans
Saute together until softened but not browned:
  • 4 cloves minced garlic
  • 1 large red onion, finely chopped
  • 3 tbsp olive oil
Cook until the onions and garlic are softened, then add along with the drained soaked beans to an oven safe dutch oven or roaster and:
  • 3 cups water
  • 1 cup maple syrup
  • 1/2 cup dark brown sugar
  • 1 1/2 tsp salt
  • 1 tsp pepper
  • 3 tbsp smoked paprika
  • 1 tsp chipotle powder
  • 1 tbsp dried thyme
  • 1/4 cup Worcestershire sauce
  • one 28 ounce can tomato sauce
  • 2 tbsp dry mustard powder
  • 4 large apples, peeled, cored and diced (Softer fleshed apples like Macintosh are good, not crisp type apples like Granny Smiths. Use one you would use to make applesauce.)
  • 1/4 cup apple cider vinegar
Stir all together well, cover and place in a 325 degree F oven for 3 to 4 hours
stirring occasionally. The beans should be fully cooked and tender and the sauce
should thicken. I sometimes add a little extra boiling water during the cooking time if
the sauce thickens too quickly before the beans are fully cooked. This is not a problem
at all and can be done more than once if necessary.

Roast or pan fry to fully cooked:
  • 1 1/2 pounds low-fat apple sausage
Slice the sausages into coins and add them to the baked beans in the last 30-60 minutes of cooking time for the beans.
reade more... Résuméabuiyad

Cajun Pork and Peppers Fettuccine Alfredo #WeekdaySupper

     I'm a menu planner.  This has only been the case for the past two years but it has made my life so much easier!  Every Saturday I sit down and look through my saved recipes on Pinterest, look through recipes I've clipped from my cooking magazines, and choose a few favorites.  Then I go through my pantry and refrigerator looking at what I have and write down the ingredients that I don't have.  I go grocery shopping on Sundays and the rest of the week is easy.  I know what I need to defrost ahead of time and when I get home from work I'm not rushing around trying to figure out what to make.

    This past week was no exception.  I had my menu plan written, my grocery shopping finished, and then I saw THIS recipe.  I don't know if it was the bright colors, the delicious seasonings, or the gorgeous picture but I had to make it.  I looked in the freezer and found some pork chops then looked in the refrigerator and found some peppers.  I set the pork in the refrigerator to defrost and two days later I bumped another pasta off the menu and we had this for dinner.   This is a quick and easy recipe and I'm happy to be sharing it for #WeeknightSupper as it's perfect to make after a hard day at work. 

Sunday Supper Movement

       This dish was as delicious as it looked.  The sauce is creamy and slightly spicy.  The peppers add bright colors and the pork add protein to the dish.  We ended up sprinkling extra Cajun seasoning on top of the pasta for an added kick. 

Cajun Pork and Peppers Fettuccine Alfredo  (adapted from So Tasty, So Yummy)
3/4 lb. boneless pork chops, cut into chunks
1 T. Cajun seasoning, divided
1 T. olive oil
1/2 onion, diced
1 bell pepper, sliced (I used half a green pepper and half a red pepper)
2 garlic cloves, minced
1 T. tomato paste
1/4 c. white wine
2 T. cornstarch
1 c. chicken broth
1 c. fat free half and half
1 t. black pepper
1/4 t. red pepper flakes
1/4 c. grated Parmesan cheese
12 oz. whole wheat pasta

1. Place the pork chunks in a large bag.  Sprinkle in 2 teaspoons of Cajun into the bag and shake to coat.

2.  Heat 1 tablespoon of olive oil in a large skillet.  Add the pork and saute until browned.  Pour the pork into a bowl and return the skillet to the heat.

3.  Heat the remaining olive oil in the skillet and add the onion and peppers.  Saute for 3-4 minutes.  Add the garlic and cook for 30 seconds.

4.  Meanwhile, cook the pasta according to the package directions.  Drain and keep warm.

5. Pour the wine into the pan with the vegetables to de-glaze it.


6.  In a medium bowl whisk together the cornstarch, chicken broth, and half and half.  Add the mixture to the vegetables and stir.  Bring to a boil then reduce heat to a simmer.  Continue cooking for 5 minutes.


7.  Remove the skillet from the heat and stir in the black pepper, red pepper flakes, grated Parmesan, and pasta.  Toss to coat the pasta.  Serve hot.


Be sure to check out the other awesome #WeeknightSupper meals this week!
 Monday - Hezzi-D’s Books and Cooks - Cajun Pork and Peppers Fettuccine Alfredo
Tuesday - Supper For A Steal - Jerk Shrimp Tacos with Mango Salsa
Wednesday - Happy Baking Days - Risotto Primavera
Thursday - Small Wallet, Big Appetite - Southwestern Crock Pot Baked Sweet Potatoes
Friday - Growing Up Gabel - Grilled Chicken Gyros with Tzatiki Cucumber Sauce
reade more... Résuméabuiyad

Outrageous Orange Amaretto Syrup


This weekend we enjoyed the company of several local Phoenix blogger friends. We served an outrageous pancake brunch with an insane pancake bar. There were requests for every recipe. Our most popular item was my orange amaretto syrup.

Continue Reading »
reade more... Résuméabuiyad

Don't Judge a Book (or bar) by Its Cover.

You know how sometimes a dessert isn't the most gorgeous thing in the world, but it IS the most delicious?
raspberry swirl cheesecake bars with oreo cookie crust | bake at 350
This is the case with these Raspberry Swirl Cheesecake Bars.  Not that they're *ugly,* but they're not going to win any beauty contests, either.  But ohmygosh...I could have inhaled the entire pan.
(I limited myself to 2.5 per day.)

Here is a universal truth in baking:  Any recipe that starts with this...
birthday cake oreos for chocolate crust | bake at 350
...can't be wrong.

{If you ever see a recipe that calls for "chocolate wafer cookies," feel FREE to use Oreos minus the cream filling.  I used Birthday Cake Oreos for these.  What you do with that cream filling is between you and your kitchen walls.  Thank goodness my walls don't talk.}

raspberry cheesecake bars with oreo crust
Alrighty, so after giving the Oreos a good whir in the blender or food processor and adding some melted butter, you'll make a cheesecake filling.

The cheesecake is flavored with vanilla and a touch of almond.  I love that bit of almond.

raspberry cheesecake bars preserves photo raspberrycheesecakebarspreservesrounded.jpg
Then, you'll mix up some raspberry preserves and fresh lemon juice...
raspberry swirl cheesecake bars with oreo cookie crust | bake at 350
...and swirl it all around.

raspberry swirl cheesecake bars with oreo cookie crust | bake at 350
As the cheesecake bars bake, the cheesecake poofs and the raspberry swirl nestles right down into the batter.  Mmmm....

And then you eat.  Cool, creamy, tangy, rich, and sigh.
raspberry swirl cheesecake bars with oreo cookie crust | bake at 350
Never judge a bar by its cover, my friends.

For the full recipe, click on over here.


reade more... Résuméabuiyad

Dainty Sichuan


CHILLI!

Dainty Sichuan
Lvl 2 / 206 Bourke Street
Melbourne, VIC 3000
Ph: (03) 9650-2188
Dainty Sichuan Food on Urbanspoon

So, if you follow me on Instagram or Twitter (or are ever in my general vicinity, really), I'm sure you will have realised I'm addicted to Sichuan food, and to chilli in general. When I posted about Sichuan food back in September, it was very much a cooking post, and I even mentioned that I hadn't been that impressed by Dainty Sichuan before then.  Well, that's certainly all changed! Since the Bourke Street location opened, I've visited four times and even suffer Sichuan pepercorn and chilli withdrawals if it's been a while! Definitely obsessed.

For today's post I'd like to share with you the different dishes we've tried so far. I haven't taken note of the exact prices (sorry!) but the normal dishes tend to be around $25-30, and they have a few big or deluxe dishes for about $45. Also, the portions are huge, so it's best to go in a group!

One of my favourites is the beans with minced pork. So delicious! I'm pretty sure the beans themselves are deep fried, making the skin wrinkly and giving them an amazing texture, and they are positively zingy with ground Sichuan peppercorns! We always, always, order this dish!
Green beans with minced pork
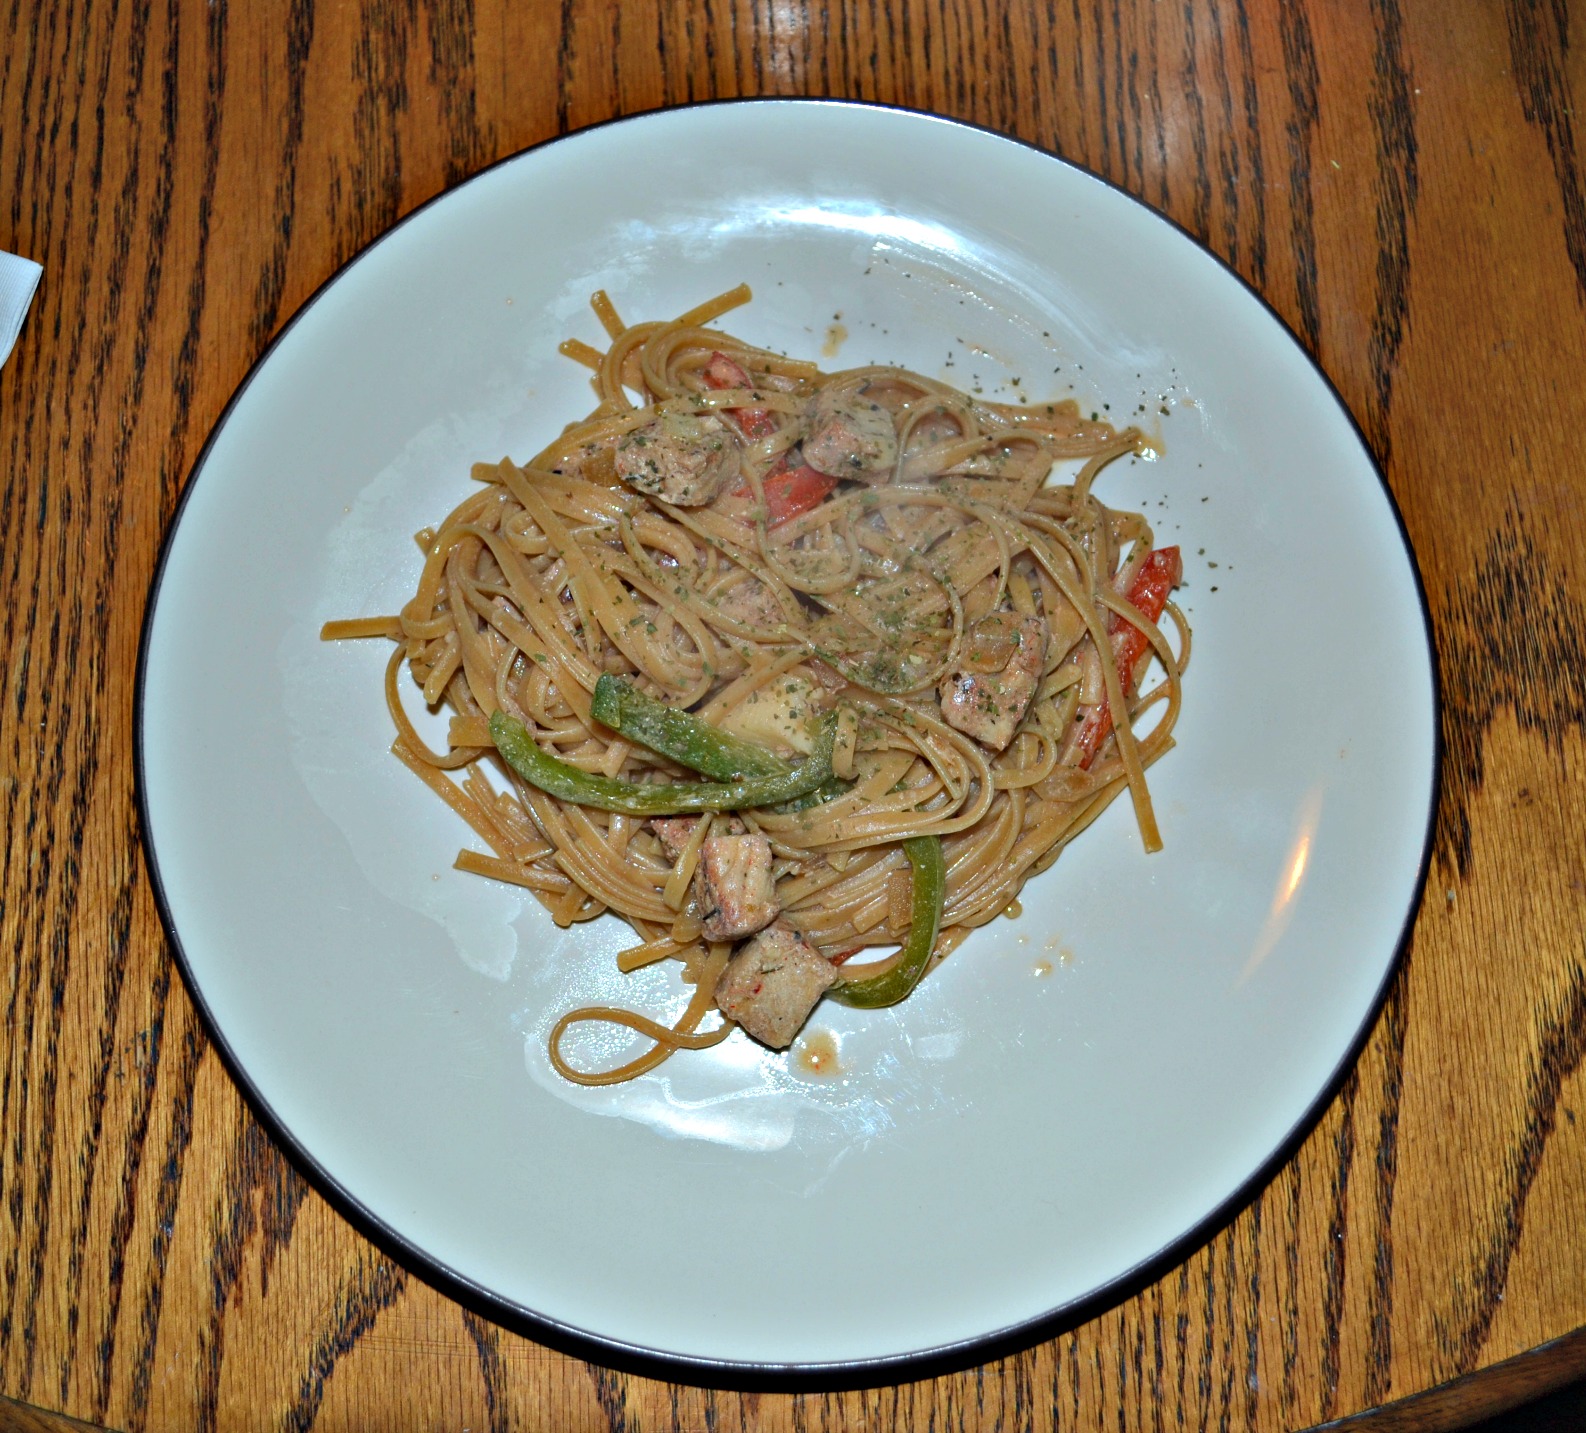
Gong Bao chicken - another favourite, this one has boneless pieces of chicken in a spicy, sticky sauce.
Gong Bao Chicken
The below picture was what we ordered for lunch for three people (eep!) when Billy came to town. It was totally a case of our eyes being bigger than our stomachs! After this lunch, I was literally eating the leftovers for a week! Phew! It also happened to be like a 38C day, so we were really grateful for Dainty's insane airconditioning!
Lunch for 3
I love the lamb skewers! I think these are Xinjiang-style: in addition to the heat from the chilli, and the sour Sichuan peppercorns, these are seasoned with a hefty dose of cumin.
Lamb Skewers
Fish-fragrant eggplant is a classic Sichuan dish, but I (immodestly) prefer my own home cooked version. Dainty's eggplant pieces were quite firm, whereas I prefer meltingly soft eggplant.
Fish-Flavoured Eggplant
We were recommended the Chonqing Chilli Chicken by one of the waitresses on this visit, as it's one of their specialities. I couldn't believe how much I liked it! There is a rather terrifying amount of dried chilli on the plate, with many deep-fried chicken wings, chopped up into tiny chopstickable pieces. The chicken is indeed, very spicy, but also extremely sour and tingly. (I imagine that the chicken pieces are dipped in ground Sichuan peppercorns before being deep fried). The texture can be pretty challenging, especially if you're used to eating boneless chicken pieces, but there is something really compelling about the combo of crisp skin and chewy, cartilaginous meat. (Fuchsia Dunlop has a wonderful chapter in Shark's Fin and Sichuan Pepper about different textures in Chinese cuisine!) 
Chongqing Chilli Chicken

On another night, I brought an old supervisor of mine to Dainty, as a thank-you to her for being a reference on a (successful!) job application of mine. Although, now I reflect on it, I'm not sure if taking a Dainty-virgin for hotpot is a reward or a punishment....
Small Hotpot - half spicy, half not-spicy
Having never had hotpot before, we were totally overwhelmed by the hotpot choices, but luckily our waitress was really helpful in explaining what we should order and how it all worked. We ended up getting a small hotpot (half spicy, half not spicy), and getting a few meats and veggies to cook inside.
Hotpot spices
Apologies for the out-of-focus picture: I was clearly suffering from the chilli sweats! The spicy soup wasn't quite as hot as it looked, but it was definitely good to have both types of soup so we could adjust our own bowls according to taste. (The waiters also come and fill up the hotpot with more soup out of a giant kettle as the night goes on - awesome!)

So here's what we ordered to go in the hotpot. (Plus a plate of raw beef kebabs that isn't pictured). You can see we were playing it quite safe with our choices, maybe next time I'll try a bit of offal or some vegetables I've never heard of before. Hot tip: I love potato noodles, but they're impossible to fish out of the bubbling hot broth. Also, that sesame dipping sauce is all kinds of amazing!
Hotpot Additions: Shiitake mushrooms, potato noodles, wombok cabbage, tender beef, broad bean sauce, sesame sauce, crispy bamboo shoots
This hotpot, plus a serve of the beans with minced pork and gong bao chicken made a generous meal for three people. (And I can't believe we practically finished it all!)

And finally, on Saturday night I came to Dainty in a group of eleven, to celebrate my birthday! A big thank-you to my friends for enduring the cray cray spicy food and chilli sweats! (Seriously, not the most sensible idea to go to Dainty all dressed up - my makeup totally melted off and my hair deflated!) But, it was totally worth it!

The below sweet and sour pork ribs weren't spicy at all, but were still quite strongly flavoured with a sticky sweet sauce, and were (from memory) about $18 for a small entree-sized plate. We got two for the table. (They're similar to the sweet and sour pork ribs I made from Fuchsia Dunlop's recipe).
Sweet and Sour Pork Ribs
I felt we should order something green, and I loved these delicate jade-coloured soybeans, dressed with a subtle slick of sesame oil. A refreshing contrast to the rest of the dishes!
Soy Beans
Moving back to spicy dishes, my friend Wes chose the calamari, and it was great! The tentacles were pleasantly chewy without being rubbery.
Calamari Wok
My cousin, who tries to avoid too much chilli and who actually hates Sichuan pepper, (SORRY CUZ!!!!) ordered a plate of mixed seafood and vegetables for herself, which I think she liked. Although a sneaky Sichuan peppercorn found its way in there, poor girl!
Mixed Seafood and Vegetables
Our waitress recommended we order a big dish of pork ribs (this one was about $45), as it's apparently one of their famous dishes. This massive dish came served, precariously, on a gas burner (and was nearly dropped onto our table by the waitress - oops!). But luckily nothing spilled or broke, and the dish was delicious. There were meaty pork ribs, there were tendons, there was pork fat, onions, lotus roots and more. Great recommendation!
Pork Ribs with tendons, fat, lotus roots
And let's just have another picture of the Chongqing Chilli Chicken because I love it and it's the most addictive of all the dishes!
Chongqing Chilli Chicken

Yay for chilli! Although having said that, I always need a bottle or jug of soy milk alongside to help cool things down (and enable me to keep eating!)

Do you have a favourite Dainty Sichuan (or general Sichuan) dish? I still want to try the "Ants climbing up the trees" noodle dish, but they don't serve it at the city location. Any must-try dishes for me? What are your favourite additions to hotpot?
reade more... Résuméabuiyad

Mini thin mint cheesecakes


Time for another What's Baking challenge! Amanda from Our Italian Kitchen asked each of us to bake mini/bite-sized treats for April. Immediately, my head start swirling around for ideas... mini cakes, mini trifles (in shot glasses, no less), and even donut holes. Hey, they're mini, right?

Then the light bulb went off. Mini cheesecakes! My husband and I enjoy eating cheesecake, but we simply can't eat a full sized one between the two of us. Mini cheesecakes would be the perfect individually portioned snack, and we could easily share leftovers with coworkers or friends.

I wanted something chocolatey and minty and remembered that we ordered Thin Mints from one of our neighbors. I found a mini thin mint cheesecake on Sticky Gooey Creamy Chewy that sounded good, so off I went to bake.

I loved these mini cheesecakes. The crust was nice and minty from the crushed Thin Mint cookies, and the cheesecake layer was smooth, creamy and chock full of the crushed mint cookies and chocolate chips. My favorite part of these cheesecakes was that they were portion controlled. No need to decide how large to cut a slice!

Mini thin mint cheesecakes
  • 1 box Girl Scout Thin Mint cookies (can substitute with Trader Joe's Candy Cane Joe Joe's or Mint Oreos)
  • 2 tablespoons butter, melted
  • Two (2) 8-ounce packages cream cheese, softened
  • ½ cup powdered sugar
  • 2 large eggs, at room temperature
  • 1 teaspoon peppermint extract
  • 1 teaspoon vanilla
  • 1 cup mini chocolate chips
  • Whipped Cream, optional (for garnishing)
Directions
Preheat your oven to 325 degrees F.

Line a standard muffin tin with 12 paper liners.

In a food processor or blender, pulse the cookies a few times until coarsely ground and the cookies resemble sand. Or, you can place the cookies in a resealable clear bag and crush them with a rolling pin or another object (like the bottom of saucepan).

In a small mixing bowl, combine half of the crushed cookies with the melted butter and mix until well combined.  Using the back of a spoon, press about one teaspoon of the cookie crumb mixture into the bottom of each paper liner. Place in the refrigerator and cool for about 30 minutes.

While the cookie crumb base is chilling, make the cream cheese filling. In the bowl of a stand mixer fitted with the paddle attachment or in a large bowl using a hand mixer, beat the cream cheese and powdered sugar together on medium speed until smooth and creamy.

Individually add the eggs and mix well until the first one is fully incorporated before adding the second egg. Beat until both eggs are well combined.

While the mixer is still running, add the peppermint and vanilla extracts and beat for one additional minute.

Stop the mixer and gently stir in the remaining cookie crumbs (you may want to save a few tablespoons for garnishing), and the chocolate chips.

Evenly distribute the batter into the prepared muffin cups and bake for 25-28 minutes or until set.  The cheesecakes will jiggle slightly when they are fully baked.

Remove the pan from the oven and transfer each individual cheesecake to a wire cooling rack. Allow cheesecakes to cool completely and then transfer to your refrigerator for several hours until the cheesecakes are fully chilled.

If desired, garnish each cheesecake with a swirl of whipped cream and the reserved cookie crumbs.

Yield: 12 standard muffin-sized cheesecakes


Source: Sticky Gooey Creamy Chewy

Photobucket
reade more... Résuméabuiyad

Unfried Crispy Wedge Fries

Unfried Crispy Wedge Fries
Think great crispy potato wedges have to be deep fried? Not on your life; at our house we never do. Instead, we use the simple method we also use for making outstanding English Style Roast Potatoes. We par-boil the potato wedges for only three minutes to break up the starches on the surface, which greatly aids in getting them fantastically crispy without a lot of oil. We usually allow only one tablespoon of oil per person but I'm pretty sure that you could even cut that back a bit; as long as the wedges are all thinly coated with oil, they will be fine. You can peel the potatoes if you prefer, but we like to keep them on for extra flavor and nutrition.

As the recipe notes, you can add herbs or chili flakes to the potatoes before baking but you can also add flavor when they come out of the oven. Toss them in Cajun spice mix for a wonderful spicy version. As with roasting potatoes we often break up a head of garlic and simply throw the unpeeled cloves randomly among the wedges to infuse garlic flavor into the oil and potatoes.

Oh and one last thing, any leftover wedges can be quickly heated and re-crisped in a hot oven and even re-purposed  for brunch like in this photo of the reheated wedges in a potato bacon and cheddar omelette.

Unfried Crispy Wedge Fries in a Potato Bacon and Cheddar Omelette


Serves 4-6
  • 6 large potatoes (about 1 1/2  to 2 pounds)
  • 3 tablespoons olive oil or canola oil
  • Salt and pepper to season
  • 1 small head of garlic (optional)
Preheat the oven to 425 degrees F. Preheat the cookie sheet in the oven as well. It is important that the fries hit a hot pan because this will help ensure that they do not stick to the pan. If the potato wedges sizzle when they hit the hot pan, that's perfect. You'll want to get the pan back into the oven as quickly as possible too.

Bring 2-3 liters of salted water to a boil. Begin by washing the potatoes and cutting them in thick wedges. Drop the potato wedges in the boiling water and cook for 3 minutes exactly. Immediately drain the water off the potatoes and toss in the olive oil, salt and pepper. You can add additional seasoning at this point like herbs or chili flakes but they are great simply seasoned with salt and pepper.

Spread the potato wedges in a single layer on a large preheated cookie sheet. Bake at 425 degrees F for about 30 minutes. Turn the wedges over once, half way through the baking time. Remove from oven, sprinkle with kosher salt and serve.
reade more... Résuméabuiyad

East End Mess a.k.a. Blueberry Eton Mess

East End Mess a.k.a. Blueberry Eton Mess
Today's recipe is inspired by Eton Mess, a very well known dessert in the UK. Legend has it that many years ago it began as a strawberry pavlova that was brought along to the annual cricket match and picnic at the famous boys school, Eton College. The story goes that a rambunctious Labrador sat on the picnic basket containing that much anticipated pavlova but the picnickers ate it anyway and Eton Mess was born. I'm not sure that I believe a word of that story but the telling of it has been enjoyed for decades.

The original recipe uses slow baked, harder textured meringues which bake at a low temperature for several hours. Instead of those more time consuming meringues and borrowing from the origin story, I start my version by making a simple meringue pavlova, which I think gives the same flavor with much better melt-in-your-mouth texture.

The "east end" part of the name is my tongue in cheek way of paying homage to the original dish but with a local twist. I do live in the east end of St. John's, near historic Signal Hill where, in late summer, you can wander the hill picking the best wild blueberries in the world. I turned some of those blueberries into a quick cooked compote which gets swirled through whipped cream, layered with broken pieces of pavlova then topped with more blueberry compote.

The kids and our dinner guests absolutely loved this simple, luscious dessert with more than one asking for seconds. A slight word of caution; this is not a make ahead dessert. It is meant to be prepared and enjoyed in the same day, preferably within a few hours of preparation. Left for overnight for example, the meringue pavlova would begin to dissolve and lose its crunchy, slightly chewy, melt-in-your-mouth texture. The recipe is also quite large and would serve about 10 people, so making only half the recipe is a good option if you are serving only a few people. Be careful though, once your diners get their first mouthful of this amazing dessert, they may well be asking for seconds.

Serves 10-12

Begin by preparing a pavlova.

Preheat oven to 250 degrees F.
  • 4 large egg whites, at room temperature
  • 1 cup fine granulated sugar
  • 2 tsp vanilla extract
Whip the egg whites and vanilla to soft peaks and gradually add the sugar slowly, whipping until the sugar is completely dissolved. Pinch the meringue between your fingertips to feel that all of the sugar granules have completely dissolved. Sprinkle the meringue with
  • 4 tsp corn starch
  • 1 tsp white vinegar
Fold in the corn starch and vinegar gently with a rubber spatula. This step helps a crisp crust to form on the meringue. Drop the meringue onto a parchment paper lined baking sheet and spread it out into a 9 inch circle.

Bake for 1 hour and 15 minutes or until small cracks appear in the meringue. Turn off the oven, leave the door ajar and allow the pavlova to cool completely in the oven.

Blueberry Compote
  • 4 cups blueberries (fresh or frozen)
  • 1 cup sugar
  • ¼ cup water
  • 1 1/2 tablespoons corn starch
Bring the berries and sugar to a gentle boil. Mix the corn starch with the water and add slowly to the boiling berry mixture stirring constantly. Boil gently for 1 additional minutes stirring constantly. Cool completely.
 
Whip to firm peaks: 
  • 3 cups whipping cream
  • 4 rounded tablespoons powdered sugar (icing sugar)
  • 2 tsp pure vanilla extract
Gently fold in:
  • 1/2 of the blueberry compote
There is no need to fully fold in the compote. Leaving streaks of compote ribboned through the whipped cream is desirable.

To put the dessert together, simply cut the pavlova into 2 or 3 inch pieces and layer the pieces alternately with the whipped cream and compote mixture. A trifle dish as pictured, works well. Finish the dessert by adding the remaining blueberry compote on top of the dessert.
reade more... Résuméabuiyad

Naan #SundaySupper

     Notice anything different about my blog today?  After almost 3 years of going under the blog address http://hezzi-dsbooksandcooks.blogspot.com I've switched over to my own .com!  Make sure you update my blog address in your reader as the new address is www.hezzi-dsbooksandcooks.com.  I'm super excited to share my new domain with you!  Speaking of new things, what until you see what I have for you this week for #SundaySupper.

     For the past two years I've made a list of things I wanted to accomplish during the year.  Since I'm 32 this year my list consisted of 32 items, many of them cooking related.  So when I found out the theme for #SundaySupper this week was to tackle something new in the kitchen I really wanted to knock something off my list.


     I decided on Naan because I've seen several delicious looking recipes recently plus I heard someone talking about Naan pizza and just knew I had to try it!  This is an easy bread to make because it only rises once and then is cooked in a skillet.  I wasn't sure about the skillet method but it made the Naan golden brown and delicious.

     It reminded me of flatbread and I think it would be great to use for a sandwich or wrap.  We really enjoyed it as a base for a pizza.  It was sturdy enough to hold them topping and was perfect for dinner.  I'm so glad I tried this recipe.  It's much easier and faster to make then many other breads and it's so versatile I know I'll be making this recipe a lot in the future!

Naan (slightly adapted from So Tasty, So Yummy)
2 t. dry active yeast
1 t. sugar
1/2 c. warm water
1/4 c. vegetable oil
1/3 c. plain Greek yogurt
1 egg
2 3/4 c. flour
1 t. salt
1/2 t. black pepper

1.  In a large bowl combine the yeast, sugar, and water.  Stir to dissolve then let sit for 5 minutes.

2.  Stir in the oil, yogurt, and egg.  Mix well.

3.  Slowly mix in the flour, a half cup at a time, along with the salt and pepper.  Mix until the dough comes together and then remove from the bowl and knead for 5 minutes.

4.  Return the dough to the bowl and cover with a towel.  Allow the dough to rise for 1 hour, or until it doubles in size.

5.  After the dough has risen, flatten it out and cut it into 8 pieces.  Shape each piece into a ball.  Roll each ball into a 1/4 inch thick pancake shape that is 6 inches in diameter.

6.  Spray a large skillet with nonstick cooking spray.  Heat over medium heat.  Place the dough in the skillet and cook until the under side is golden brown and bubbles begin forming.  Flip the dough and cook until the other side is golden brown as well. 

7.  Repeat with remaining dough.


Naan Pizza  (a Hezzi-D original)
4 pieces Naan
1/2 c. marinara sauce
3/4 c. mozzarella cheese, shredded
1/2 c. pepperoni

1.  Preheat the oven to 400 degrees.

2.  Spread 2 tablespoons of sauce on each piece of Naan.  Top with 3 tablespoons of cheese and pepperoni.  

3.  Place on a baking sheet.  Bake for 10 minutes or until cheese is melted.  Serve hot. 


These are the dishes that our contributors have been dying to declare victory over.

New Expeditions (Sides, Starters & Staples)

Homemade Corn Tortillas from Pescetarian Journal
Easy Oven Polenta from Shockingly Delicious
Homemade Spiced Flour Tortillas from Chocolate Moosey
Naan from Hezzi-D’s Books and Cooks
Homemade Tofu from Kimchi MOM
Indian Moong Beans from Magnolia Days
Baked Lemon Coconut Risotto from Soni’s Food
Homemade Peanut Butter from Home Cooking Memories
Homemade Ricotta Cheese from Webicurean
Portuguese Chorizo Bread from Family Foodie  
Savory mushroom and herb steel cut oat Risotto Foxes Love Lemons
Grilled Asian Snap Peas and Peppers from Neighborfood

Grand Quests (Main Dishes)

Traditional Pork Tamales from Gourmet Drizzles
Braised Lamb Brisket with Lemon Oregano Yogurt Sauce from The Girl In The Little Red Kitchen
Rice Burger from The Urban Mrs.
Pan-fried Scallops with Garlic Chili Linguine from Food Lust People Love
Miso-Glazed Salmon from The Foodie Patootie
Penne with Mustard and Chives from My Other City By The Bay
Arepas Rellenas (Stuffed Arepas) from The Wimpy Vegetarian
Spanish Baked Scallops from Momma’s Meals
Black Beans and Cheese Empanadas from Basic N Delicious
Pork Dim Sum from Small Wallet, Big Appetite
Venison Steak Gyros from Curious Cuisiniere
Baked Tilapia with Parmesan Basil Sauce from Growing Up Gabel
Vegetarian Hortobagyi Pancakes from Happy Baking Days
Caribou & Andouille Chili from The Foodie Army Wife  

Escapades (Sweet Treats & Spirited Companions)

Vegan Chocolate Mousse from The Not So Cheesy Kitchen
Zebra Cake from That Skinny Chick Can Bake
Multilayer Bars from What Smells So Good?
Rut-Busting Wines For New Cooking Adventures from ENOFYLZ Wine Blog
Homemade Vanilla Marshmallows from Vintage Kitchen
Strawberry Raspberry Fruit Leather from Juanita’s Cocina
Making Macarons – FAIL! from girlichef
Macaroons from Noshing With The Nolands
Fresh Strawberry Frozen Yogurt from The Messy Baker
Bircher Muesli from Peanut Butter and Peppers
Hello Kitty Rice Krispies from The Ninja Baker
Homemade Cinnamon Rolls from In The Kitchen With KP
Dorie Greenspan’s Orange Almond Tart from Hip Foodie Mom
Ombre Mini Cakes from Daily Dish Recipes
Chocolate Dipped Madeleines from Big Bear’s Wife
Join the #SundaySupper conversation on Twitter on Sunday, April 28th to talk all about citrus recipes! We’ll tweet throughout the day and share recipes from all over the world. Our weekly chat starts at 3:00 pm AKST/7:00 pm EST. Follow the #SundaySupper hashtag, and remember to include it in your tweets to join in the chat. Check out our #SundaySupper Pinterest board for more delicious recipes and food photos.
reade more... Résuméabuiyad