Pages

Showing posts with label sandwich. Show all posts

Pear Palooza! 30+ Sweet and Savory Pear Recipes


     Pears were never one of my favorite fruits.  I thought they were boring and didn't have much flavor.  Turns out that's because I only ever had the plain green pears.  Years later I began eating different variety of pears and started to enjoy them more then ever.  I finally made a pear butter that was out of this world and I've been hooked on pears ever since.

     Since pears are usually considered a fall to winter fruit, I thought this would be the perfect time to share some sweet and savory pear recipes from some seriously talented food bloggers!

Sweet Pear Recipes:

1.  Pear Almond Graham Cracker Tart from Vintage Kitchen Notes
2.  Pear and Ginger Bites 
3.  Salted Caramel Pears from 52 Kitchen Adventures 
4.  Mini Pear Walnut Crisps with Blood Orange Caramel Sauce from Chocolate Moosey
5.  Honey Glazed Baked Korean Pears in Wonton Crisps from Cooking on the Weekends
6.  Spiced Pear Bread Pudding from Snappy Gourmet 
7.  Baked Pear Vanilla French Toast from Taste and Tell
8.  Pear Bourbon Clafoutis from Eat the Love 

9.  Apple Pear Crumble from Because I Like Chocolate 
10.  Slow Cooker Spiced Pear Butter from Frugal Foodie Mama 
11.  Oatmeal Cookie Pear Bars
12.  Pear and Almond Tart from Karen's Kitchen Stories
13.  Pear and Cranberry Cornmeal Cake from Ricki Heller
14.  Pear Butter
15. Vanilla Roasted Pears from An Edible Mosaic
16. Pear, Apple, and Pistachio Crumble from Cravings of a Lunatic
17.  Port Wine Mascarpone Pear Tart from
18.  Spiced Pear Ginger Scones
19.  Brown Butter Pear Cake from Crumb 
20. Southern Comfort Pear Almond Frangipane Pie from Eat the Love
21. Autumn Poached Pears from The Little Ferraro Kitchen
22. Pear Walnut Crisp from The Kitchen is My Playground
23. Winter Fruit Crisp from Keep It Sweet Desserts
24. Pear Pecan Upside Down Cake from Vintage Kitchen Notes
25. Red Wine Poached Pear Rustic Tart from Eat the Love

Savory Pear Recipes: 


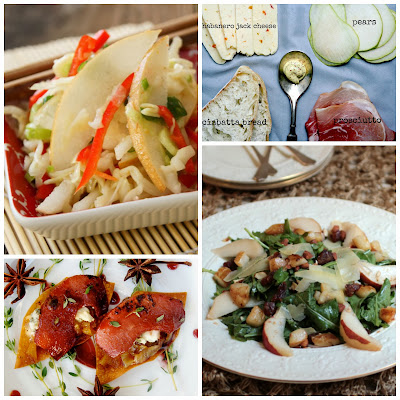
27. Asian-Style Slaw with Korean Pears from Cooking on the Weekends
28.  Caramelized Onion Cabrales Pear Crisp from Cooking on the Weekends

30.  Pomegranate, Pear, and Gorgonzola Salad from What Jew Wanna Eat
32.  Fennel & Pear Crostini from The Hungry Goddess
 

     Pears were never one of my favorite fruits.  I thought they were boring and didn't have much flavor.  Turns out that's because I only ever had the plain green pears.  Years later I began eating different variety of pears and started to enjoy them more then ever.  I finally made a pear butter that was out of this world and I've been hooked on pears ever since.

     Since pears are usually considered a fall to winter fruit, I thought this would be the perfect time to share some sweet and savory pear recipes from some seriously talented food bloggers!

Sweet Pear Recipes:

1.  Pear Almond Graham Cracker Tart from Vintage Kitchen Notes
2.  Pear and Ginger Bites 
3.  Salted Caramel Pears from 52 Kitchen Adventures 
4.  Mini Pear Walnut Crisps with Blood Orange Caramel Sauce from Chocolate Moosey
5.  Honey Glazed Baked Korean Pears in Wonton Crisps from Cooking on the Weekends
6.  Spiced Pear Bread Pudding from Snappy Gourmet 
7.  Baked Pear Vanilla French Toast from Taste and Tell
8.  Pear Bourbon Clafoutis from Eat the Love 

9.  Apple Pear Crumble from Because I Like Chocolate 
10.  Slow Cooker Spiced Pear Butter from Frugal Foodie Mama 
11.  Oatmeal Cookie Pear Bars
12.  Pear and Almond Tart from Karen's Kitchen Stories
13.  Pear and Cranberry Cornmeal Cake from Ricki Heller
14.  Pear Butter
15. Vanilla Roasted Pears from An Edible Mosaic
16. Pear, Apple, and Pistachio Crumble from Cravings of a Lunatic
17.  Port Wine Mascarpone Pear Tart from
18.  Spiced Pear Ginger Scones
19.  Brown Butter Pear Cake from Crumb 
20. Southern Comfort Pear Almond Frangipane Pie from Eat the Love
21. Autumn Poached Pears from The Little Ferraro Kitchen
22. Pear Walnut Crisp from The Kitchen is My Playground
23. Winter Fruit Crisp from Keep It Sweet Desserts
24. Pear Pecan Upside Down Cake from Vintage Kitchen Notes
25. Red Wine Poached Pear Rustic Tart from Eat the Love
Savory Pear Recipes: 


27. Asian-Style Slaw with Korean Pears from Cooking on the Weekends
28.  Caramelized Onion Cabrales Pear Crisp from Cooking on the Weekends

30.  Pomegranate, Pear, and Gorgonzola Salad from What Jew Wanna Eat
32.  Fennel & Pear Crostini from The Hungry Goddess
 
reade more... Résuméabuiyad

Greek Style Hummus Burgers

     It's starting to get chilly out and I'm sad because that means grilling season is coming to an end.  For some reason we haven't grilled out as much as we normally do during the summer and fall.  It may have to do with the crazy amount of rain we've had this year.  I don't know but in any case, Frank and I have both been wanting to use the grill as much as possible before the snow comes.

      Living in a town named Frostburg we get a lot of snow during the winter.  Even when it isn't snowing it's cold.  I like to say that we have winter 9 months a year here but really it's more like 7 months of the year.

Greek Style Hummus Burger made with Sabra Hummus from Hezzi-D's Books and Cooks
      So we wanted to use the grill as much as possible in the next month.  We decided on burgers but I wanted to make something a little different.  We really like these lamb patties that I pan fry and put in pita pockets but I wanted to give them more flavor and put them on a bun.

      Since these burgers were going to be Greek burgers I wanted to add in some hummus and feta cheese.  I had these super cute Sabra Hummus cups in the refrigerator that were the perfect portions for making burgers.  Aren't they cute with Spongebob and Patrick on them?  I've been taking them to school along with pita bread and they make a great snack.  So I added some hummus and feta to the ground beef and jazzed it up with some seasonings.

       Frank put them out on the grill and they were ready in no time!  I dressed my burger up with lettuce, tomato, red onion, and Tzatziki sauce for a delicious Greek Style Hummus Burger.  The burger was bursting with flavor and I loved the addition of the feta mixed in with the burger.  The hummus gave it a nice garlic flavor and helped hold the burger together.  I could even taste just a hint of the lemon juice. 

Greek Style Hummus Burgers (a Hezzi-D original)
1 1/4 lb. ground beef (I used 85% lean)
1 t. oregano
1 t. parsley
1 T. lemon juice
1/3 c. Sabra original hummus
1/3 c. feta cheese 
1 egg, beaten
1/4 c. breadcrumbs
salt and pepper to taste

For the Tzatziki Sauce:
1/2 c. plain Greek yogurt
1/2 cucumber, peeled and minced
1 T. lemon juice
2 garlic cloves, minced
1 t. salt
1 t. black pepper
1/2 t. oregano 

For assembling the burgers:
4 hamburger buns
4 lettuce leaves
sliced tomatoes
sliced red onion
Feta cheese 

1.  Heat the grill to medium high heat.

2.  Combine all of the burger ingredients in a bowl and mix with your hands until well combined.  Divide the burger mixture into 4 balls and shape into burgers.  Set aside.

3.  Combine all the ingredients for the Tzatziki sauce in a medium bowl.  Mix well and refrigerate until ready to use.

4.  Cook the burgers on the grill for 4-5 minutes per side or until they are cooked through.  Place the buns on the grill for 1-2 minutes to toast them.

Greek Style Hummus Burger #Sabra #hummus from Hezzi-D's Books and Cooks
5.  To assemble the burgers place them on a bun and top with lettuce, tomatoes, red onion, and additional feta cheese.  Spoon the Tzatziki sauce on top and enjoy.

Greek Hummus Burger from Hezzi-D's Books and Cooks

Sabra provided me with the hummus and a stipend for my work but all opinions, photos, and text are 100% my own.
     It's starting to get chilly out and I'm sad because that means grilling season is coming to an end.  For some reason we haven't grilled out as much as we normally do during the summer and fall.  It may have to do with the crazy amount of rain we've had this year.  I don't know but in any case, Frank and I have both been wanting to use the grill as much as possible before the snow comes.

      Living in a town named Frostburg we get a lot of snow during the winter.  Even when it isn't snowing it's cold.  I like to say that we have winter 9 months a year here but really it's more like 7 months of the year.

Greek Style Hummus Burger made with Sabra Hummus from Hezzi-D's Books and Cooks
      So we wanted to use the grill as much as possible in the next month.  We decided on burgers but I wanted to make something a little different.  We really like these lamb patties that I pan fry and put in pita pockets but I wanted to give them more flavor and put them on a bun.

      Since these burgers were going to be Greek burgers I wanted to add in some hummus and feta cheese.  I had these super cute Sabra Hummus cups in the refrigerator that were the perfect portions for making burgers.  Aren't they cute with Spongebob and Patrick on them?  I've been taking them to school along with pita bread and they make a great snack.  So I added some hummus and feta to the ground beef and jazzed it up with some seasonings.

       Frank put them out on the grill and they were ready in no time!  I dressed my burger up with lettuce, tomato, red onion, and Tzatziki sauce for a delicious Greek Style Hummus Burger.  The burger was bursting with flavor and I loved the addition of the feta mixed in with the burger.  The hummus gave it a nice garlic flavor and helped hold the burger together.  I could even taste just a hint of the lemon juice. 

Greek Style Hummus Burgers (a Hezzi-D original)
1 1/4 lb. ground beef (I used 85% lean)
1 t. oregano
1 t. parsley
1 T. lemon juice
1/3 c. Sabra original hummus
1/3 c. feta cheese 
1 egg, beaten
1/4 c. breadcrumbs
salt and pepper to taste

For the Tzatziki Sauce:
1/2 c. plain Greek yogurt
1/2 cucumber, peeled and minced
1 T. lemon juice
2 garlic cloves, minced
1 t. salt
1 t. black pepper
1/2 t. oregano 

For assembling the burgers:
4 hamburger buns
4 lettuce leaves
sliced tomatoes
sliced red onion
Feta cheese 

1.  Heat the grill to medium high heat.

2.  Combine all of the burger ingredients in a bowl and mix with your hands until well combined.  Divide the burger mixture into 4 balls and shape into burgers.  Set aside.

3.  Combine all the ingredients for the Tzatziki sauce in a medium bowl.  Mix well and refrigerate until ready to use.

4.  Cook the burgers on the grill for 4-5 minutes per side or until they are cooked through.  Place the buns on the grill for 1-2 minutes to toast them.

Greek Style Hummus Burger #Sabra #hummus from Hezzi-D's Books and Cooks
5.  To assemble the burgers place them on a bun and top with lettuce, tomatoes, red onion, and additional feta cheese.  Spoon the Tzatziki sauce on top and enjoy.

Greek Hummus Burger from Hezzi-D's Books and Cooks

Sabra provided me with the hummus and a stipend for my work but all opinions, photos, and text are 100% my own.
reade more... Résuméabuiyad

Blue Apron and Heirloom Tomato & Fontina Grilled Cheese Sandwiches

   When I pulled in the driveway at 1:00pm today I was exhausted.  I'd had a 5 hour workshop in the morning, was starving, and couldn't think of a single thing I wanted for lunch.  While pondering exactly what I could make I noticed a package on my front porch.  I went to check it out and saw the side that said "Perishable".  I immediately started grinning in hopes that my lunch was inside that box.

    Lucky for me it was!  I received a vegetarian box from Blue Apron.  What is Blue Apron?  I'm glad you asked.  It's a service that sends you a box filled with all the fresh ingredients you need to prepare 3 meals.  Everything is packaged, labeled, and ready to go and there are full color photos and recipe cards that go along with the ingredients.  Plus there's no shipping cost!  Blue Apron charges $9.99 per person, per meal.  There is a vegetarian and a meat option.  My box was a vegetarian box.

     Included in the box was all the produce, spices, and ingredients needed to make Heirloom Tomato & Fontina Grilled Cheese Sandwiches with Dijon Green Beans, Smoky Swiss Chard & Black Bean Tostadas, and Dal Bhat.  The produced all looked fresh and the spices were packaged in individual bags.  I opted to try the grilled cheese and green beans for lunch because I was hungry and it looked delicious.
 
     The step by step directions made it super easy to cook this meal.  It was prepared, cooked, and on a plate in 15 minutes.  I was surprised by just how good it tasted!  I'm not a huge tomato fan but the tomato with the creamy fontina, crisp red onions, and rocket was incredible!  Then the green beans were cooked to tender crisp and the Dijon dressing was tangy and delicious.  It was a fresh meal that was easy to prepare and tasted good.  Plus the recipe cards have the number of calories for each meal written right on them.  Each meal is between 500-700 calories so they are healthy too!

Heirloom Tomato & Fontina Grilled Cheese Sandwiches (recipe from Blue Apron)
4 oz. Fontina Cheese
1 Heirloom Tomato
1 Red Onion
1 oz. Rocket
4 Slices Sourdough Bread
1 Lemon
1 T. butter

1. Prepare the ingredients for the grilled cheese sandwiches.  Slice the fontina cheese into thick slices.   Slice the tomatoes into 1/2 inch slices.  Peel the onion and cut it in half.  Slice half of the onion into thin rings.

2.  Lay the sourdough slices on a cutting board.  Top two of the slices of bread with the fontina cheese slices.  Then place the tomatoes on top of the cheese.  Divide the onions between the sandwiches and top with rocket.

3.  Place the other two slices of bread on top of the sandwiches and lightly spread butter over top of the sandwiches.

4.  Heat a large skillet over medium heat.  Add the sandwiches, butter side down, and cook for 4-5 minutes. Meanwhile, spread the remaining butter on the exposed sides of the bread.  Flip the sandwiches over and cook for an additional 3-5 minutes or until golden brown.

5.  Cut the sandwiches in half and serve on two plates.


I received this box from Blue Apron but all opinions and photos are 100% my own.
   When I pulled in the driveway at 1:00pm today I was exhausted.  I'd had a 5 hour workshop in the morning, was starving, and couldn't think of a single thing I wanted for lunch.  While pondering exactly what I could make I noticed a package on my front porch.  I went to check it out and saw the side that said "Perishable".  I immediately started grinning in hopes that my lunch was inside that box.

    Lucky for me it was!  I received a vegetarian box from Blue Apron.  What is Blue Apron?  I'm glad you asked.  It's a service that sends you a box filled with all the fresh ingredients you need to prepare 3 meals.  Everything is packaged, labeled, and ready to go and there are full color photos and recipe cards that go along with the ingredients.  Plus there's no shipping cost!  Blue Apron charges $9.99 per person, per meal.  There is a vegetarian and a meat option.  My box was a vegetarian box.

     Included in the box was all the produce, spices, and ingredients needed to make Heirloom Tomato & Fontina Grilled Cheese Sandwiches with Dijon Green Beans, Smoky Swiss Chard & Black Bean Tostadas, and Dal Bhat.  The produced all looked fresh and the spices were packaged in individual bags.  I opted to try the grilled cheese and green beans for lunch because I was hungry and it looked delicious.
 
     The step by step directions made it super easy to cook this meal.  It was prepared, cooked, and on a plate in 15 minutes.  I was surprised by just how good it tasted!  I'm not a huge tomato fan but the tomato with the creamy fontina, crisp red onions, and rocket was incredible!  Then the green beans were cooked to tender crisp and the Dijon dressing was tangy and delicious.  It was a fresh meal that was easy to prepare and tasted good.  Plus the recipe cards have the number of calories for each meal written right on them.  Each meal is between 500-700 calories so they are healthy too!

Heirloom Tomato & Fontina Grilled Cheese Sandwiches (recipe from Blue Apron)
4 oz. Fontina Cheese
1 Heirloom Tomato
1 Red Onion
1 oz. Rocket
4 Slices Sourdough Bread
1 Lemon
1 T. butter

1. Prepare the ingredients for the grilled cheese sandwiches.  Slice the fontina cheese into thick slices.   Slice the tomatoes into 1/2 inch slices.  Peel the onion and cut it in half.  Slice half of the onion into thin rings.

2.  Lay the sourdough slices on a cutting board.  Top two of the slices of bread with the fontina cheese slices.  Then place the tomatoes on top of the cheese.  Divide the onions between the sandwiches and top with rocket.

3.  Place the other two slices of bread on top of the sandwiches and lightly spread butter over top of the sandwiches.

4.  Heat a large skillet over medium heat.  Add the sandwiches, butter side down, and cook for 4-5 minutes. Meanwhile, spread the remaining butter on the exposed sides of the bread.  Flip the sandwiches over and cook for an additional 3-5 minutes or until golden brown.

5.  Cut the sandwiches in half and serve on two plates.


I received this box from Blue Apron but all opinions and photos are 100% my own.
reade more... Résuméabuiyad

London 2013: Afternoon Tea at The Wolseley


How perfect is that tier of tea-time treats? It was with that delightful afternoon tea that we finished our weekend in London.

The Wolseley
160 Piccadilly
London W1J 9EB
United Kingdom
Ph: +44 20 7499 6996
Website
The Wolseley on Urbanspoon

I must admit I hadn't heard of The Wolseley before this trip, but when my friend Clarice suggested "a proper high tea at The Wolseley (Nigella's fave!)" in our pre-trip emails, I was totally down! I made a booking online for the Sunday afternoon, thinking that it would be a nice way to round off the weekend before catching the Eurostar back to Paris. Due to the timing, we actually had to go to the train station directly from The Wolseley, and rocked up with our coats, mini-suitcases and shopping bags (including lots of great stuff from a mad-dash through nearby Fortnum and Mason just beforehand). We'd been worried that this might cause an issue, but the staff very kindly put all our bags in the cloakroom for us when we arrived, and we were free to relax and enjoy the afternoon.

The main dining area
For some reason I had been expecting a very old-fashioned, twee setting, so was suitably impressed by the beautiful, expansive art deco space. The Wolseley serve breakfast, lunch, dinner and more - there was an American lady at a table near us, who refreshed herself with a Cosmopolitan while her young grandson, dressed in a smart blue blazer, ate chips out of a silver bucket - too cute! And we also saw plates of choucroute garnie being ferried around by waiters, which looked and smelled amazing.

However, we were most certainly there for afternoon tea! Their Full Afternoon Tea is priced at £22.50, which gets you a pot of tea, and a tier of fruit scones, cakes and sandwiches, all made in-house. (See the picture at the top of this post). I splashed out and got a glass of champagne for an extra £10.

I loved the teapots and the pretty silver accessories!
Tea, Champagne
Of course, when you have scones, you must have cream and jam. Here, it was an indulgently thick clotted cream, and a luscious, very softly set, strawberry jam.
Jam and cream

I just had to take a picture and show you how thick the cream was. Heaven.
Clotted cream

We started from the bottom up, saving the best for last. The scones were kept warm under the pretty silver cloche - a great idea.
Sandwiches
Before I took the photo, my first instinct was to remove that little piece of red paper that was stuck on it, but then I thought that it would be better to present the experience "warts and all". (Not that a tiny red bit of paper is a "wart" by any means, but I'm sure you catch my drift). From memory, the sandwiches on offer that day were: cucumber (naturally), smoked salmon and cream cheese, chicken and pesto, egg, and celery. Normally I don't like raw celery, but here it was sliced so finely that I actually enjoyed it! The sandwiches were all exceedingly fresh, with lovely soft bread.

Now, the dessert tier!
Cake tier
Clockwise from the front we have: eclair, pistachio and cherry "opera", cheesecake, Battenberg cake, Sachertorte, and a strawberry tart. All were delicious, and I loved the freshness of the choux pastry in the eclair. (So disappointing when you get stale choux pastry!) And whilst Sachertorte can sometimes be dry and bland, the Wolseley's version was moist, dark, and rich. The standout item on this tier was, however, the cheesecake. Being one of the plainer-looking cakes, I wasn't expecting much, but boy, it was good! The filling was incredibly rich and creamy, with just the right amount of cream cheese tang, and the biscuit base was crunchy and pleasantly firm, without a hint of sogginess. Absolute cheesecake perfection. (I don't know if they sell the cheesecake by the slice, but if they do - go, go, go!)

And finally (yes, we were getting full, but we persevered) we indulged in the scones. I found it interesting that they only served fruit scones and no plain ones, but given that I prefer fruit ones anyway, I wasn't complaining. The judicious use of dried fruit here ensured that you got a hint of sweet dried fruit, without it becoming overpowering. (Clarice, who loathes puddings based on dried fruit, like mince pies and Christmas cake, still liked these).
Fruit scones
You can see how perfect they look (aah, if only my scones had such smooth tops and were so uniform in shape!), and happily they tasted just as good. Warm, fluffy innards, with crisp, almost biscuity exteriors. I loved them.

Scones with cream and jam

And that's the last post for this London weekend! After this delicious tea, we took the Eurostar back to Paris, where more culinary adventures ensued. Can't wait to share them with you!

I hope you enjoyed by posts about London; here they are in a list!

How perfect is that tier of tea-time treats? It was with that delightful afternoon tea that we finished our weekend in London.

The Wolseley
160 Piccadilly
London W1J 9EB
United Kingdom
Ph: +44 20 7499 6996
Website
The Wolseley on Urbanspoon

I must admit I hadn't heard of The Wolseley before this trip, but when my friend Clarice suggested "a proper high tea at The Wolseley (Nigella's fave!)" in our pre-trip emails, I was totally down! I made a booking online for the Sunday afternoon, thinking that it would be a nice way to round off the weekend before catching the Eurostar back to Paris. Due to the timing, we actually had to go to the train station directly from The Wolseley, and rocked up with our coats, mini-suitcases and shopping bags (including lots of great stuff from a mad-dash through nearby Fortnum and Mason just beforehand). We'd been worried that this might cause an issue, but the staff very kindly put all our bags in the cloakroom for us when we arrived, and we were free to relax and enjoy the afternoon.

The main dining area
For some reason I had been expecting a very old-fashioned, twee setting, so was suitably impressed by the beautiful, expansive art deco space. The Wolseley serve breakfast, lunch, dinner and more - there was an American lady at a table near us, who refreshed herself with a Cosmopolitan while her young grandson, dressed in a smart blue blazer, ate chips out of a silver bucket - too cute! And we also saw plates of choucroute garnie being ferried around by waiters, which looked and smelled amazing.

However, we were most certainly there for afternoon tea! Their Full Afternoon Tea is priced at £22.50, which gets you a pot of tea, and a tier of fruit scones, cakes and sandwiches, all made in-house. (See the picture at the top of this post). I splashed out and got a glass of champagne for an extra £10.

I loved the teapots and the pretty silver accessories!
Tea, Champagne
Of course, when you have scones, you must have cream and jam. Here, it was an indulgently thick clotted cream, and a luscious, very softly set, strawberry jam.
Jam and cream

I just had to take a picture and show you how thick the cream was. Heaven.
Clotted cream

We started from the bottom up, saving the best for last. The scones were kept warm under the pretty silver cloche - a great idea.
Sandwiches
Before I took the photo, my first instinct was to remove that little piece of red paper that was stuck on it, but then I thought that it would be better to present the experience "warts and all". (Not that a tiny red bit of paper is a "wart" by any means, but I'm sure you catch my drift). From memory, the sandwiches on offer that day were: cucumber (naturally), smoked salmon and cream cheese, chicken and pesto, egg, and celery. Normally I don't like raw celery, but here it was sliced so finely that I actually enjoyed it! The sandwiches were all exceedingly fresh, with lovely soft bread.

Now, the dessert tier!
Cake tier
Clockwise from the front we have: eclair, pistachio and cherry "opera", cheesecake, Battenberg cake, Sachertorte, and a strawberry tart. All were delicious, and I loved the freshness of the choux pastry in the eclair. (So disappointing when you get stale choux pastry!) And whilst Sachertorte can sometimes be dry and bland, the Wolseley's version was moist, dark, and rich. The standout item on this tier was, however, the cheesecake. Being one of the plainer-looking cakes, I wasn't expecting much, but boy, it was good! The filling was incredibly rich and creamy, with just the right amount of cream cheese tang, and the biscuit base was crunchy and pleasantly firm, without a hint of sogginess. Absolute cheesecake perfection. (I don't know if they sell the cheesecake by the slice, but if they do - go, go, go!)

And finally (yes, we were getting full, but we persevered) we indulged in the scones. I found it interesting that they only served fruit scones and no plain ones, but given that I prefer fruit ones anyway, I wasn't complaining. The judicious use of dried fruit here ensured that you got a hint of sweet dried fruit, without it becoming overpowering. (Clarice, who loathes puddings based on dried fruit, like mince pies and Christmas cake, still liked these).
Fruit scones
You can see how perfect they look (aah, if only my scones had such smooth tops and were so uniform in shape!), and happily they tasted just as good. Warm, fluffy innards, with crisp, almost biscuity exteriors. I loved them.

Scones with cream and jam

And that's the last post for this London weekend! After this delicious tea, we took the Eurostar back to Paris, where more culinary adventures ensued. Can't wait to share them with you!

I hope you enjoyed by posts about London; here they are in a list!
reade more... Résuméabuiyad

Tennessee Burger with Bourbon and BBQ Sauce

     You can call me a burger snob.  It's ok.  I know I am.  For years I refused to eat beef burgers.  I just didn't really like them and had absolutely no interest in making them for myself.  My husband on the other hand loves a good burger so over the years I've started eating them again.  However, I will never order one in a restaurant or eat one that isn't made by me.  I just don't like what other people put in their burgers and I don't like not knowing what is in a burger.

     I use only lean ground beef in my burgers and I don't put much filler in them because there is no need.  I do like trying new gourmet burgers that have a good, solid burger at the core but fancy toppings all around.  This Tennessee Burger with Bourbon BBQ Sauce had my mouth watering as soon as I saw the picture.


     The burger is made with lean ground beef, a lovely onion mixture, and a few seasonings.  It's topped with a bourbon BBQ sauce as well as a red onion bourbon mixture.  The flavors are delicious.  The BBQ sauce is sweet, tangy, and has a bite from the bourbon.  The red onions are cooked with balsamic vinegar and bourbon and then have a lot of flavors from caramelizing them.

     It's a simple burger but the complex flavors really make it something special.  I topped it with lettuce but the suggested serving is with a tomato slice.  If you like gourmet burgers you need to give this one a try!

Tennessee Burger with Bourbon and BBQ Sauce (adapted from Cooking Light-July 2013)
1 T. olive oil
1 T. sugar
2 c. thinly sliced red onion
5 T. bourbon, divided
1 T. balsamic vinegar
2 garlic cloves, minced
1 t. sea salt
1/2 c. ketchup
1 T. Dijon mustard
1 T. honey
2 t. Frank's Red Hot
2 t. Worcestershire sauce
3/4 t. smoked paprkia
2 garlic cloves, minced
1/2 t. black pepper
1/2 t. onion powder
1 1/2 lb. lean (90%) ground beef 
5 hamburger buns
5 lettuce leaves

1.  In a medium skillet heat the olive oil over medium heat.  Add the sugar and red onions and cook for 15 minutes or until the onion is caramelized.

2.  Add in 3 tablespoons of bourbon, vinegar, 1/2 teaspoon of salt, and the garlic cloves.  Cook for 2 minutes or until the liquid is almost evaporated.  Remove mixture from heat and cool for 5 minutes.

3.  In a small saucepan combine the remaining bourbon, ketchup, Dijon mustard, honey, Frank's Red Hot, Worcestershire sauce, smoked paprika, garlic cloves, black pepper, and onion powder.  Bring to a boil, stirring frequently.  Reduce heat and simmer for 5 minutes. Remove from heat.

4.  Coarsely chop 1/2 cup of the red onion mixture.  Stir the chopped onions into the ground beef.  Divide the beef into 5 patties.  Sprinkle with remaining salt.

5.  Grill the burgers on a gas grill over medium heat for 4-5 minutes per side.

6.  Place 1 tablespoon of BBQ sauce on the bottom of each bun and top with a burger.  Place 1-2 tablespoons of the red onion mixture on top of the burger and then top off with the leaf of lettuce.


     You can call me a burger snob.  It's ok.  I know I am.  For years I refused to eat beef burgers.  I just didn't really like them and had absolutely no interest in making them for myself.  My husband on the other hand loves a good burger so over the years I've started eating them again.  However, I will never order one in a restaurant or eat one that isn't made by me.  I just don't like what other people put in their burgers and I don't like not knowing what is in a burger.

     I use only lean ground beef in my burgers and I don't put much filler in them because there is no need.  I do like trying new gourmet burgers that have a good, solid burger at the core but fancy toppings all around.  This Tennessee Burger with Bourbon BBQ Sauce had my mouth watering as soon as I saw the picture.


     The burger is made with lean ground beef, a lovely onion mixture, and a few seasonings.  It's topped with a bourbon BBQ sauce as well as a red onion bourbon mixture.  The flavors are delicious.  The BBQ sauce is sweet, tangy, and has a bite from the bourbon.  The red onions are cooked with balsamic vinegar and bourbon and then have a lot of flavors from caramelizing them.

     It's a simple burger but the complex flavors really make it something special.  I topped it with lettuce but the suggested serving is with a tomato slice.  If you like gourmet burgers you need to give this one a try!

Tennessee Burger with Bourbon and BBQ Sauce (adapted from Cooking Light-July 2013)
1 T. olive oil
1 T. sugar
2 c. thinly sliced red onion
5 T. bourbon, divided
1 T. balsamic vinegar
2 garlic cloves, minced
1 t. sea salt
1/2 c. ketchup
1 T. Dijon mustard
1 T. honey
2 t. Frank's Red Hot
2 t. Worcestershire sauce
3/4 t. smoked paprkia
2 garlic cloves, minced
1/2 t. black pepper
1/2 t. onion powder
1 1/2 lb. lean (90%) ground beef 
5 hamburger buns
5 lettuce leaves

1.  In a medium skillet heat the olive oil over medium heat.  Add the sugar and red onions and cook for 15 minutes or until the onion is caramelized.

2.  Add in 3 tablespoons of bourbon, vinegar, 1/2 teaspoon of salt, and the garlic cloves.  Cook for 2 minutes or until the liquid is almost evaporated.  Remove mixture from heat and cool for 5 minutes.

3.  In a small saucepan combine the remaining bourbon, ketchup, Dijon mustard, honey, Frank's Red Hot, Worcestershire sauce, smoked paprika, garlic cloves, black pepper, and onion powder.  Bring to a boil, stirring frequently.  Reduce heat and simmer for 5 minutes. Remove from heat.

4.  Coarsely chop 1/2 cup of the red onion mixture.  Stir the chopped onions into the ground beef.  Divide the beef into 5 patties.  Sprinkle with remaining salt.

5.  Grill the burgers on a gas grill over medium heat for 4-5 minutes per side.

6.  Place 1 tablespoon of BBQ sauce on the bottom of each bun and top with a burger.  Place 1-2 tablespoons of the red onion mixture on top of the burger and then top off with the leaf of lettuce.


reade more... Résuméabuiyad

Featured Dish: Onion bagel with cold-smoked salmon and a schmear of dill cream cheese, Bowery to Williamsburg

Onion Bagel with Cold-Smoked Salmon and a Schmear of Dill Cream Cheese, $7.50, Bowery to Williamsburg

Bagel of awesomeness
Featured dish! I know it's been ages, and I thought this segment had run out of steam, but then I had this amazing bagel today and just had to share! Bowery to Williamsburg (or B2W as I'm going to call them from now on, because I'm cool like that), is a new New York-inspired cafe that seems to be exploding in my twitter feed and RSS reader with rave reviews. I instinctively shy away from venues that have a lot of hype (mainly because I imagine there will be crazy queues and poor, hassled or attitudey staff), but I saw that they serve peanut butter hot chocolate (I KNOW RIGHT?), and I knew that I just had to make a visit.

B2W isn't open on weekends, and it's a bit out of the way for me, but I managed to pop in this morning at ten-thirty (my reward for coming in to work for an early-morning meeting and missing my usual breakfast at home!) It was a good time to visit - no queues! My fears of hassled staff were unfounded too - they were super nice. They must have seen my confused, overwhelmed face when I walked in, and one of the lovely staff promptly explained their ordering system (table service if you eat in, order at the bar for takeaway), the different bagel varieties and cream cheese schmear flavours, and which combos go together well. (There is a big sandwich menu on one wall, but I was much more interested in the bagels).

Bagel counter

I chose (drum roll please).... an onion bagel with cold-smoked salmon and a schmear of dill cream cheese. Yes, you can get hot-smoked salmon too, but the cold-smoked was sliced in these gorgeous thick pieces and looked too good to resist. (N.B. "cold-smoked" and "hot-smoked" here refer to the method of smoking the salmon, not the temperature at which it is served - they are both cold). It was incredible! The bagel itself (from 5 and Dime) had little crunchy onion pieces all over it, and an addictive layer of sea salt flakes on the top (think German pretzel, but not as chunkily salty). They were generous with the cream cheese, and the thick pieces of smoked salmon were so luxurious - a real treat.

Speaking of treats, though, I felt it would be a bit too much to have a peanut butter hot chocolate as well, so I'll have to try that another time. I'll just let you know, inspired by the B2W peanut butter hot chocolates I've been seeing posted on various blogs and Instagrams, I actually made my own at home on the weekend, and loved it! I have no idea how it compares to B2W's version, but I was extremely happy with mine, and I'll be posting the recipe here in the near future.

One of the six cream cheeses available is peanut butter cream cheese. Woah. So perhaps a double peanut butter breakfast is on the cards very soon!

Bowery to Williamsburg
16 Oliver Lane
Melbourne 3000
Ph (03) 9077-0162
Bowery to Williamsburg on Urbanspoon
Onion Bagel with Cold-Smoked Salmon and a Schmear of Dill Cream Cheese, $7.50, Bowery to Williamsburg

Bagel of awesomeness
Featured dish! I know it's been ages, and I thought this segment had run out of steam, but then I had this amazing bagel today and just had to share! Bowery to Williamsburg (or B2W as I'm going to call them from now on, because I'm cool like that), is a new New York-inspired cafe that seems to be exploding in my twitter feed and RSS reader with rave reviews. I instinctively shy away from venues that have a lot of hype (mainly because I imagine there will be crazy queues and poor, hassled or attitudey staff), but I saw that they serve peanut butter hot chocolate (I KNOW RIGHT?), and I knew that I just had to make a visit.

B2W isn't open on weekends, and it's a bit out of the way for me, but I managed to pop in this morning at ten-thirty (my reward for coming in to work for an early-morning meeting and missing my usual breakfast at home!) It was a good time to visit - no queues! My fears of hassled staff were unfounded too - they were super nice. They must have seen my confused, overwhelmed face when I walked in, and one of the lovely staff promptly explained their ordering system (table service if you eat in, order at the bar for takeaway), the different bagel varieties and cream cheese schmear flavours, and which combos go together well. (There is a big sandwich menu on one wall, but I was much more interested in the bagels).

Bagel counter

I chose (drum roll please).... an onion bagel with cold-smoked salmon and a schmear of dill cream cheese. Yes, you can get hot-smoked salmon too, but the cold-smoked was sliced in these gorgeous thick pieces and looked too good to resist. (N.B. "cold-smoked" and "hot-smoked" here refer to the method of smoking the salmon, not the temperature at which it is served - they are both cold). It was incredible! The bagel itself (from 5 and Dime) had little crunchy onion pieces all over it, and an addictive layer of sea salt flakes on the top (think German pretzel, but not as chunkily salty). They were generous with the cream cheese, and the thick pieces of smoked salmon were so luxurious - a real treat.

Speaking of treats, though, I felt it would be a bit too much to have a peanut butter hot chocolate as well, so I'll have to try that another time. I'll just let you know, inspired by the B2W peanut butter hot chocolates I've been seeing posted on various blogs and Instagrams, I actually made my own at home on the weekend, and loved it! I have no idea how it compares to B2W's version, but I was extremely happy with mine, and I'll be posting the recipe here in the near future.

One of the six cream cheeses available is peanut butter cream cheese. Woah. So perhaps a double peanut butter breakfast is on the cards very soon!

Bowery to Williamsburg
16 Oliver Lane
Melbourne 3000
Ph (03) 9077-0162
Bowery to Williamsburg on Urbanspoon
reade more... Résuméabuiyad

Smoked Beef Brisket

Smoked Beef Brisket
Smoked Beef Brisket
Beef brisket is notoriously slow to cook and even more slow to smoke. In my travels to the southern US I've sampled plenty of of one of my favorite slow barbequed meats. The low and slow method is absolutely necessary to break down all the connective tissue and marbled fat to create slices of tender perfection. I have sometimes smoked it for in excess of 10 hours to create a beautiful tender smoky brisket to thinly slice for the best sandwiches ever.

All that time in the smoker can be a significant investment of time to tend the smoker and keep adding the wood chips for smoke. One alternative method that I've used is to heavily smoke the brisket for a few hours and then finish it in the oven at 225 degrees F for  the last of the cooking time. I've found this works very well even smoking it the day before and finishing it in a slow oven the next day when you plan to serve it. It will still take quite a few hours in the oven but at least you don't have to continuously tend it like in the smoker.


Smoked Beef Brisket Sandwich


I begin by dry rubbing the brisket liberally with my Smokin' Summer Spice Dry Rub all over the outside of the meat. If you can rub the brisket the day before and leave it covered in the fridge, that's even better.
  • 8 to 10 pound beef brisket
Smokin' Summer Spice Dry Rub

Makes about 2 cups dry rub.

  • 3 tbsp paprika
  • 2 tbsp smoked paprika
  • 2 tbsp chili powder
  • 3 tbsp kosher salt
  • 1 tbsp powdered ginger
  • 1 tbsp chipotle powder
  • 6 tbsp brown sugar
  • 1 tbsp black pepper
  • 1 tbsp ground nutmeg
  • 1 tbsp ground oregano
  • 1 tbsp ground thyme
  • 1 tbsp ground coriander 
  • 2 tbsp dry mustard powder
  • 2 tbsp garlic powder
  • 3 tbsp onion powder
  • 1 tsp ground cumin
  • 1 tsp cinnamon
Mix together well and store any unused dry rub in an airtight container in a cool place.

If you are using your gas grill to smoke your brisket, place the meat on one side of the grill and use the burner or burners on the opposite side so that it is not directly over heat. Regulate the gas to keep the temperature at about 225 degrees for slow barbequed flavor. The same technique can also be used with a charcoal grill, just keep the charcoal on one side and the meat on the opposite side. You will only need a small amount of charcoal to create 225 degrees F in a large covered BBQ.

Add the smoke flavor by soaking hardwood chips like mesquite, apple, cherry or hickory in warm water for about a half hour. Several handfuls will do. Wrap a handful of the soaked wood chips in a double layer of heavy duty aluminum foil and poke only two holes in the foil, one at either end to allow the smoke to escape. On a gas grill, I place the foil packets in a vegetable grill pan so that the packet is not sitting directly on the gas burner. On a charcoal grill, simply toss the packet directly onto the hot coals. You can add more soaked wood chip packets as they burn out, it all depends on how much smoke favor you wish to add. Four to six of these packets should be enough for smoked beef brisket, depending on how long you cook the meat and how much smoked flavor you prefer.


In the last hour or so of cooking time you can baste the brisket in BBQ sauce if you like. I like the recipe below which I have used on the sandwich pictured.


Be sure to let the brisket rest for 15 -20 minutes before slicing thinly against the meat grain to serve.

Molasses BBQ Sauce

  • One 14 ounce can plain tomato sauce
  • 1/4 cup apple cider vinegar
  • 1/2 cup molasses
  • 1 tsp ground ginger
  • 1 tsp chipotle powder
  • 2 tsp smoked paprika
  • 1/4 tsp ground cumin
  • 1 tsp cayenne pepper (optional or to taste)
  • 1 tbsp ground fennel seed
  • 1 tsp freshly ground black pepper
  • 1 tablespoon ground dry oregano
  • ½ tsp kosher salt

Simmer all ingredients together slowly for about a half hour to an hour stirring every few minutes until the sauce reduces and thickens to the consistency you prefer. Remember that it will thicken slightly as it cools.

Smoked Beef Brisket
Smoked Beef Brisket
Beef brisket is notoriously slow to cook and even more slow to smoke. In my travels to the southern US I've sampled plenty of of one of my favorite slow barbequed meats. The low and slow method is absolutely necessary to break down all the connective tissue and marbled fat to create slices of tender perfection. I have sometimes smoked it for in excess of 10 hours to create a beautiful tender smoky brisket to thinly slice for the best sandwiches ever.

All that time in the smoker can be a significant investment of time to tend the smoker and keep adding the wood chips for smoke. One alternative method that I've used is to heavily smoke the brisket for a few hours and then finish it in the oven at 225 degrees F for  the last of the cooking time. I've found this works very well even smoking it the day before and finishing it in a slow oven the next day when you plan to serve it. It will still take quite a few hours in the oven but at least you don't have to continuously tend it like in the smoker.


Smoked Beef Brisket Sandwich


I begin by dry rubbing the brisket liberally with my Smokin' Summer Spice Dry Rub all over the outside of the meat. If you can rub the brisket the day before and leave it covered in the fridge, that's even better.
  • 8 to 10 pound beef brisket
Smokin' Summer Spice Dry Rub

Makes about 2 cups dry rub.

  • 3 tbsp paprika
  • 2 tbsp smoked paprika
  • 2 tbsp chili powder
  • 3 tbsp kosher salt
  • 1 tbsp powdered ginger
  • 1 tbsp chipotle powder
  • 6 tbsp brown sugar
  • 1 tbsp black pepper
  • 1 tbsp ground nutmeg
  • 1 tbsp ground oregano
  • 1 tbsp ground thyme
  • 1 tbsp ground coriander 
  • 2 tbsp dry mustard powder
  • 2 tbsp garlic powder
  • 3 tbsp onion powder
  • 1 tsp ground cumin
  • 1 tsp cinnamon
Mix together well and store any unused dry rub in an airtight container in a cool place.

If you are using your gas grill to smoke your brisket, place the meat on one side of the grill and use the burner or burners on the opposite side so that it is not directly over heat. Regulate the gas to keep the temperature at about 225 degrees for slow barbequed flavor. The same technique can also be used with a charcoal grill, just keep the charcoal on one side and the meat on the opposite side. You will only need a small amount of charcoal to create 225 degrees F in a large covered BBQ.

Add the smoke flavor by soaking hardwood chips like mesquite, apple, cherry or hickory in warm water for about a half hour. Several handfuls will do. Wrap a handful of the soaked wood chips in a double layer of heavy duty aluminum foil and poke only two holes in the foil, one at either end to allow the smoke to escape. On a gas grill, I place the foil packets in a vegetable grill pan so that the packet is not sitting directly on the gas burner. On a charcoal grill, simply toss the packet directly onto the hot coals. You can add more soaked wood chip packets as they burn out, it all depends on how much smoke favor you wish to add. Four to six of these packets should be enough for smoked beef brisket, depending on how long you cook the meat and how much smoked flavor you prefer.


In the last hour or so of cooking time you can baste the brisket in BBQ sauce if you like. I like the recipe below which I have used on the sandwich pictured.


Be sure to let the brisket rest for 15 -20 minutes before slicing thinly against the meat grain to serve.

Molasses BBQ Sauce

  • One 14 ounce can plain tomato sauce
  • 1/4 cup apple cider vinegar
  • 1/2 cup molasses
  • 1 tsp ground ginger
  • 1 tsp chipotle powder
  • 2 tsp smoked paprika
  • 1/4 tsp ground cumin
  • 1 tsp cayenne pepper (optional or to taste)
  • 1 tbsp ground fennel seed
  • 1 tsp freshly ground black pepper
  • 1 tablespoon ground dry oregano
  • ½ tsp kosher salt

Simmer all ingredients together slowly for about a half hour to an hour stirring every few minutes until the sauce reduces and thickens to the consistency you prefer. Remember that it will thicken slightly as it cools.

reade more... Résuméabuiyad

Blueberry Barbeque Pulled Pork

Blueberry Barbeque Pulled Pork
I can't imagine how many times I have tried pulled pork in my travels. It really is one of our family's favorite barbeque foods, especially my son 13 year old Noah who orders it almost every time he sees it on a menu. Last summer we embarked on a southern road trip through some amazing barbeque territory in Tennessee, Louisiana, Alabama, Florida, South Carolina and Georgia. I'm not even going to try and attempt to name my favorite pulled pork destination. They all do it a little differently and they all do it very well.

So, with all that delicious southern pulled pork experience I had to experiment with creating a local twist on the dish, way up here in the great white north. With the recent delicious success of our Blueberry Barbeque Sauce using wild local Newfoundland blueberries, it was, in my mind anyway, a natural marriage of northern and southern flavors and it certainly did not disappoint. My only mistake was not making more at the time because we all wanted even more the next day. I served it on toasted artisan bread from our neighborhood Georgestown Bakery as fantastic sandwiches. Next time I will be serving it with some great cornbread and Bacon and Brown Sugar Baked Beans for another southern feast. Can't wait for that one!

Blueberry Barbeque Pulled Pork
 Begin by dry rubbing a 5 to 6 pound pork shoulder roast with a mixture of
  • 1 tbsp paprika
  • 2 tsp smoked paprika
  • 1 tbsp kosher salt
  • 1 tsp powdered ginger
  • 1 tsp chipotle powder
  • 1 tsp black pepper
  • 1 tsp ground nutmeg
  • 1 tsp ground thyme
  • 2 tsp dry mustard powder
  • 2 tsp garlic powder
  • 1 tbsp onion powder
  • 1/2 tsp ground cumin
  • 1/2tsp cinnamon
Rub all over the surface of the roast, cover and let sit in the refrigerator for several hours or overnight.

There are two ways to approach beginning to cook the pork. A stove top method and a BBQ smoking method. I of course prefer the smoked version but in the winter months, I will be using the stove top method.


STOVE TOP METHOD

Heat 4 tbsp oil in a large heavy bottomed skillet over medium heat and brown the roast lightly  on all sides. Transfer the roast to a covered roasting pan. 


BBQ METHOD

If you are using your gas grill to barbeque, place the meat on one side of the grill and use the burner or burners on the opposite side so that it is not directly over heat. Regulate the gas to keep the temperature at about 250 for slow barbequed flavor. The same technique can also be used with a charcoal grill, just keep the charcoal on one side and the meat on the opposite side.
You can add smoke flavor by soaking hardwood chips like mesquite, apple, cherry or hickory in warm water for about a half hour. A couple of handfuls will do. Wrap the soaked wood chips in a double layer of heavy duty aluminum foil and poke only two holes in the foil, one at either end to allow the smoke to escape. I place the foil packets in a vegetable grill pan so that the packet is not sitting directly on the gas burner. The packet can be directly placed on the coals if you are using a charcoal barbeque. Smoke for only a only an hour or so, you don't want to heavily smoke the pork too much in this particular recipe. After an hour, transfer the roast to a covered roasting pan.


To the roasting pan, along with the roast, add:

  • 1 medium sized onion chopped
  • 4 medium sized firm apples peeled and chunked

Mix together well:
  • 4 cloves minced garlic
  • ½ cup apple cider vinegar
  • ½ cup brown sugar
  • ¼ cup Worcestershire sauce
  • 6 tablespoons hot sauce (adjust to taste)
  • 1 ½ tsp salt
  • 1 tsp freshly ground black pepper
  • 1 1/2 cups apple juice
  • 2 cups Blueberry Barbeque Sauce ( find that recipe by clicking here)
Pour all over the roast, apples and onions in the roasting pan. Cover with aluminum foil then the lid of the roasting pan. Roast in a 300 degree oven for several hours ( approximately 4-5) until the meat is very tender and falling off the bone.
Remove the braising liquid to a saucepan, skim all the excess fat and reduce the liquid if necessary until it slightly thickens. At this point you can puree the sauce with an immersion blender or in a food processor to smooth it out and incorporate the cooked onions and apples. Serve over the pulled pork.
Blueberry Barbeque Pulled Pork
I can't imagine how many times I have tried pulled pork in my travels. It really is one of our family's favorite barbeque foods, especially my son 13 year old Noah who orders it almost every time he sees it on a menu. Last summer we embarked on a southern road trip through some amazing barbeque territory in Tennessee, Louisiana, Alabama, Florida, South Carolina and Georgia. I'm not even going to try and attempt to name my favorite pulled pork destination. They all do it a little differently and they all do it very well.

So, with all that delicious southern pulled pork experience I had to experiment with creating a local twist on the dish, way up here in the great white north. With the recent delicious success of our Blueberry Barbeque Sauce using wild local Newfoundland blueberries, it was, in my mind anyway, a natural marriage of northern and southern flavors and it certainly did not disappoint. My only mistake was not making more at the time because we all wanted even more the next day. I served it on toasted artisan bread from our neighborhood Georgestown Bakery as fantastic sandwiches. Next time I will be serving it with some great cornbread and Bacon and Brown Sugar Baked Beans for another southern feast. Can't wait for that one!

Blueberry Barbeque Pulled Pork
 Begin by dry rubbing a 5 to 6 pound pork shoulder roast with a mixture of
  • 1 tbsp paprika
  • 2 tsp smoked paprika
  • 1 tbsp kosher salt
  • 1 tsp powdered ginger
  • 1 tsp chipotle powder
  • 1 tsp black pepper
  • 1 tsp ground nutmeg
  • 1 tsp ground thyme
  • 2 tsp dry mustard powder
  • 2 tsp garlic powder
  • 1 tbsp onion powder
  • 1/2 tsp ground cumin
  • 1/2tsp cinnamon
Rub all over the surface of the roast, cover and let sit in the refrigerator for several hours or overnight.

There are two ways to approach beginning to cook the pork. A stove top method and a BBQ smoking method. I of course prefer the smoked version but in the winter months, I will be using the stove top method.


STOVE TOP METHOD

Heat 4 tbsp oil in a large heavy bottomed skillet over medium heat and brown the roast lightly  on all sides. Transfer the roast to a covered roasting pan. 


BBQ METHOD

If you are using your gas grill to barbeque, place the meat on one side of the grill and use the burner or burners on the opposite side so that it is not directly over heat. Regulate the gas to keep the temperature at about 250 for slow barbequed flavor. The same technique can also be used with a charcoal grill, just keep the charcoal on one side and the meat on the opposite side.
You can add smoke flavor by soaking hardwood chips like mesquite, apple, cherry or hickory in warm water for about a half hour. A couple of handfuls will do. Wrap the soaked wood chips in a double layer of heavy duty aluminum foil and poke only two holes in the foil, one at either end to allow the smoke to escape. I place the foil packets in a vegetable grill pan so that the packet is not sitting directly on the gas burner. The packet can be directly placed on the coals if you are using a charcoal barbeque. Smoke for only a only an hour or so, you don't want to heavily smoke the pork too much in this particular recipe. After an hour, transfer the roast to a covered roasting pan.


To the roasting pan, along with the roast, add:

  • 1 medium sized onion chopped
  • 4 medium sized firm apples peeled and chunked

Mix together well:
  • 4 cloves minced garlic
  • ½ cup apple cider vinegar
  • ½ cup brown sugar
  • ¼ cup Worcestershire sauce
  • 6 tablespoons hot sauce (adjust to taste)
  • 1 ½ tsp salt
  • 1 tsp freshly ground black pepper
  • 1 1/2 cups apple juice
  • 2 cups Blueberry Barbeque Sauce ( find that recipe by clicking here)
Pour all over the roast, apples and onions in the roasting pan. Cover with aluminum foil then the lid of the roasting pan. Roast in a 300 degree oven for several hours ( approximately 4-5) until the meat is very tender and falling off the bone.
Remove the braising liquid to a saucepan, skim all the excess fat and reduce the liquid if necessary until it slightly thickens. At this point you can puree the sauce with an immersion blender or in a food processor to smooth it out and incorporate the cooked onions and apples. Serve over the pulled pork.
reade more... Résuméabuiyad

35 BBQ and Picnic Ideas for Memorial Day and Summer Celebrations!

    Summer is coming!  Summer is coming!  I am so happy I could jump up and down.  I absolutely love the warm weather and sun.  Running around outside in my bare feet with a sundress on or shorts and a tank top.  For me the beginning of summer is officially Memorial Day.  We usually end up having a picnic or BBQ at my parents house and my dad opens up the pool.  As long as it doesn't rain it's the perfect start to summer.

    Since I feel like we often have the same foods at our summer parties I wanted to share some of my favorite picnic and BBQ ideas as well as some from my favorite bloggers!  I hope these help with your Memorial Day parties and other summer celebrations.  I've also included a few fun project ideas for Memorial Day as well.


Main Dishes on the Grill:
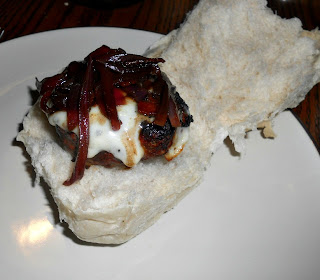
Bison Beer Burgers with Blue Cheese from I Love My Disorganized Life


Easy Black Bean Burgers from Clarks Condensed


Summer Salads:

My Mother's Pasta Salad from I Love My Disorganized Life

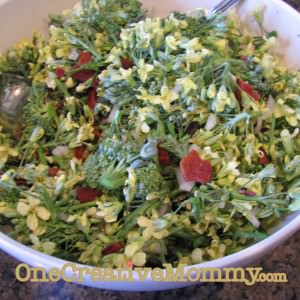
Broccoli Flower Salad from One Creative Mommy

Summer Pasta Salad from Happy Food, Healthy Life

My Favorite Potato Salad from Persnickety Plates


Easy Macaroni Salad from Organized Island

Antipasto Pasta Salad from Will Cook for Smiles

Cucumber Salad from Miss Information Blog


Summer Side Dishes:

Copycat KFC Coleslaw from Mom on Time Out

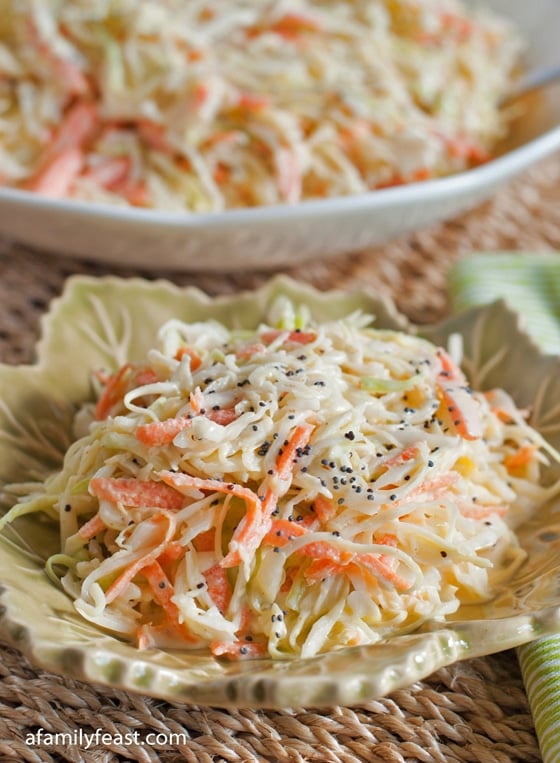
Coleslaw from A Family Feast

Tabouli from The Kitchen is My Playground

Mr. Williams Mac and Cheese from Persnickety Plates

Sun Dried Tomato, Artichoke, and Basil Pasta from The Kitchen is My Playground 


Desserts:

S'more Chocolate Chip Cookies from I Love My Disorganized Life


Vanilla Custard Brulee from The Tasty Fork

Lime Chiffon from Just My Crazy Kitchen


S'mores Pudding Pie from Cupcakes & Kale

Raspberry Peach Cobbler from Miss Information

Crafts and Projects:
Bug Party Tic Tac Toe from Suzy's Sitcom
Memorial Day Dree Printables from Sweet Bellaroos 


    Summer is coming!  Summer is coming!  I am so happy I could jump up and down.  I absolutely love the warm weather and sun.  Running around outside in my bare feet with a sundress on or shorts and a tank top.  For me the beginning of summer is officially Memorial Day.  We usually end up having a picnic or BBQ at my parents house and my dad opens up the pool.  As long as it doesn't rain it's the perfect start to summer.

    Since I feel like we often have the same foods at our summer parties I wanted to share some of my favorite picnic and BBQ ideas as well as some from my favorite bloggers!  I hope these help with your Memorial Day parties and other summer celebrations.  I've also included a few fun project ideas for Memorial Day as well.


Main Dishes on the Grill:
Bison Beer Burgers with Blue Cheese from I Love My Disorganized Life


Easy Black Bean Burgers from Clarks Condensed


Summer Salads:

My Mother's Pasta Salad from I Love My Disorganized Life

Broccoli Flower Salad from One Creative Mommy

Summer Pasta Salad from Happy Food, Healthy Life

My Favorite Potato Salad from Persnickety Plates


Easy Macaroni Salad from Organized Island

Antipasto Pasta Salad from Will Cook for Smiles

Cucumber Salad from Miss Information Blog


Summer Side Dishes:

Copycat KFC Coleslaw from Mom on Time Out

Coleslaw from A Family Feast

Tabouli from The Kitchen is My Playground

Mr. Williams Mac and Cheese from Persnickety Plates

Sun Dried Tomato, Artichoke, and Basil Pasta from The Kitchen is My Playground 


Desserts:

S'more Chocolate Chip Cookies from I Love My Disorganized Life


Vanilla Custard Brulee from The Tasty Fork

Lime Chiffon from Just My Crazy Kitchen


S'mores Pudding Pie from Cupcakes & Kale

Raspberry Peach Cobbler from Miss Information

Crafts and Projects:
Bug Party Tic Tac Toe from Suzy's Sitcom
Memorial Day Dree Printables from Sweet Bellaroos 


reade more... Résuméabuiyad