Pages

A Wicked Kind of Dark by Jonathan K. Benton

A Wicked Kind of Dark Robert Duncan no longer believes in magic. A mysterious call about a blood moon, however, leads him back to the magical world of his childhood and to Luthien, the beautiful girl with flame-coloured hair, who he loved and lost. As Robert unravels the secrets of his childhood, darkness enters his life and an ancient evil awakens. To have any chance of defeating the dark forces that would destroy two worlds, Robert must find Luthien before the rise of the blood moon. He must, once more, believe in magic … A Wicked Kind of Dark mixes vast and spectacular fantasy landscapes with gritty urban reality. A must-read for people of all ages who believe in the power of imagination, and the importance of never losing touch with your inner child.

 
Author Jonathan K. Benton Jonathan Benton always wanted to write books, having won first place in a short story competition when he was ten. Inspired by writes such as Ray Bradbury and Stephen King, Jonathan first discovered the crossover genre of literary/fantasy while reading Bradbury’s Something Wicked This Way Comes. Jonathan grew up in New Zealand, dreaming of travelling to London and finally making the pilgrimage in his mid-twenties. Returning from England, he settled in Australia, the country he now calls home, and decided to take his writing seriously.


BookBlast Giveaway $100 Amazon Gift Card or Paypal Cash Ends 9/22/13 Open only to those who can legally enter, receive and use an Amazon.com Gift Code or Paypal Cash. Winning Entry will be verified prior to prize being awarded. No purchase necessary. You must be 18 or older to enter or have your parent enter for you. The winner will be chosen by rafflecopter and announced here as well as emailed and will have 48 hours to respond or a new winner will be chosen. This giveaway is in no way associated with Facebook, Twitter, Rafflecopter or any other entity unless otherwise specified. The number of eligible entries received determines the odds of winning. Giveaway was organized by Kathy from I Am A Reader, Not A Writer http://iamareader.com and sponsored by the author. VOID WHERE PROHIBITED BY LAW.
a Rafflecopter giveaway
A Wicked Kind of Dark Robert Duncan no longer believes in magic. A mysterious call about a blood moon, however, leads him back to the magical world of his childhood and to Luthien, the beautiful girl with flame-coloured hair, who he loved and lost. As Robert unravels the secrets of his childhood, darkness enters his life and an ancient evil awakens. To have any chance of defeating the dark forces that would destroy two worlds, Robert must find Luthien before the rise of the blood moon. He must, once more, believe in magic … A Wicked Kind of Dark mixes vast and spectacular fantasy landscapes with gritty urban reality. A must-read for people of all ages who believe in the power of imagination, and the importance of never losing touch with your inner child.

 
Author Jonathan K. Benton Jonathan Benton always wanted to write books, having won first place in a short story competition when he was ten. Inspired by writes such as Ray Bradbury and Stephen King, Jonathan first discovered the crossover genre of literary/fantasy while reading Bradbury’s Something Wicked This Way Comes. Jonathan grew up in New Zealand, dreaming of travelling to London and finally making the pilgrimage in his mid-twenties. Returning from England, he settled in Australia, the country he now calls home, and decided to take his writing seriously.


BookBlast Giveaway $100 Amazon Gift Card or Paypal Cash Ends 9/22/13 Open only to those who can legally enter, receive and use an Amazon.com Gift Code or Paypal Cash. Winning Entry will be verified prior to prize being awarded. No purchase necessary. You must be 18 or older to enter or have your parent enter for you. The winner will be chosen by rafflecopter and announced here as well as emailed and will have 48 hours to respond or a new winner will be chosen. This giveaway is in no way associated with Facebook, Twitter, Rafflecopter or any other entity unless otherwise specified. The number of eligible entries received determines the odds of winning. Giveaway was organized by Kathy from I Am A Reader, Not A Writer http://iamareader.com and sponsored by the author. VOID WHERE PROHIBITED BY LAW.
a Rafflecopter giveaway
reade more... Résuméabuiyad

Copycat Starbucks: Cranberry Bliss Bars


If you have ever been to Starbucks in the fall or winter I am sure you have at seen these spectacular treats, if not devoured one or twenty. Cranberry Bliss Bars are perfectly named they are pure dessert bliss packed into a little bar.

Munchkin and I had so much fun making these bars. My 3year old has been promoted to chief egg cracker. Over the summer we ate a lot of scrambled eggs and omelets so I would plop a dozen eggs on the counter and let her practice. Well, I have to tell you after a few dozen, she cracks eggs better than any kid I have ever met and even better than some adults. I still have to teach her
Continue Reading »

If you have ever been to Starbucks in the fall or winter I am sure you have at seen these spectacular treats, if not devoured one or twenty. Cranberry Bliss Bars are perfectly named they are pure dessert bliss packed into a little bar.

Munchkin and I had so much fun making these bars. My 3year old has been promoted to chief egg cracker. Over the summer we ate a lot of scrambled eggs and omelets so I would plop a dozen eggs on the counter and let her practice. Well, I have to tell you after a few dozen, she cracks eggs better than any kid I have ever met and even better than some adults. I still have to teach her
Continue Reading »
reade more... Résuméabuiyad

Pie for My Guy: Chocolate Mint Ice Cream Pie(S)!

I know, I know...it seems like I forgot the month of August pie for my guy, but I promise, this was made, and consumed in AUGUST! ;) (Instagram will back me up.)
chocolate mint ice cream pie {recipe makes 2!} ::: bake at 350 blog
This ice cream pie is one of my mom's recipes and one of my absolute favorites.
{PLUS: the recipe makes TWO PIES!!!  #winning}

I have to tell you about this crust.  The ingredients may seem a little strange...
chocolate mint ice cream pie {recipe makes 2!} ::: bake at 350 blog
...but they come together to make this insanely fudgey, sticky, rich, chewy, chocolaty crust.  Ohmygoshsogood!

You can absolutely use green mini chocolate chip ice cream for this recipe...Mom always did.  I'll tell you the truth, though...sometimes, when you stir the chocolate into the ice cream, the green looks...not so beautiful.  So, I used this ice cream from Haagen-Dazs:
chocolate mint ice cream pie {recipe makes 2!} ::: bake at 350 blog

Mr. E is not a traditional cake person, so this was his birthday cake.

Over the last several years of blogging, I've learned something.  It's ok if your family wants to slice into dessert after it's dark outside and you've lost the good light for photography.
chocolate mint ice cream pie {recipe makes 2!} ::: bake at 350 blog
Life is not about the blog, but about enjoying the moment. ;)

Aaaaaand, dessert can always be photographed and eaten the next day for lunch. *cough*
chocolate mint ice cream pie {recipe makes 2!} ::: bake at 350 blog
print recipe photo printrecipe.jpg
Chocolate Mint Ice Cream Pie
{makes 2 pies, from bakeat350.blogspot.com}

1 box chocolate cake mix
¾ c. water
¼ c. canola or vegetable oil
1 (16 oz.) jar chocolate fudge frosting, divided
4 pints (or ½ gallon) mint chocolate chip ice cream
optional: chocolate chip, melted
            whipped cream

Preheat oven to 350.

Combine the cake mix, water, oil, and 1 cup of the fudge frosting in the bowl of a mixer on low speed. Beat for 15-30 seconds, then increase the speed to high and beat for 2 minutes.
chocolate mint ice cream pie {recipe makes 2!} ::: bake at 350 blog

The mixture will be very fluffy.  Divide into 2 pie pans. Bake for 25-30 minutes, until they’re not liquidy in the center. Place on wire cooling rack to cool.  The crusts will sink in the middle.
chocolate mint ice cream pie {recipe makes 2!} ::: bake at 350 blog

Once the crusts are cool, place the ice cream on the counter for 15 minutes until softened.  Place the remaining frosting in the microwave and heat for about 15 seconds on 50% power, until melted and warm.

chocolate mint ice cream pie {recipe makes 2!} ::: bake at 350 blog
Place the softened ice cream in a large bowl along with the heated frosting. Stir with a wooden spoon until combined. (Don’t worry if a few places aren’t totally combined.) Divide between the two cooled crusts, smoothing with an offset spatula. Freeze at least 4 hours before serving.

(Optional: melt some chocolate chips and squiggle across the top. Add some piped whipped cream for decoration, if desired.)

For easiest serving, dip the bottom of the pan in hot water for a few seconds. Cut and wiggle a cake server all the way underneath the crust.  It’s fudgey and sticky and needs a little help getting out of the pan. :) 
chocolate mint ice cream pie {recipe makes 2!} ::: bake at 350 blog
I don't want to peer pressure you, but DO IT! ;)

Pie for My Guy, June: blueberry cheesecake pie
Pie for My Guy, July: fried cherry pies


I know, I know...it seems like I forgot the month of August pie for my guy, but I promise, this was made, and consumed in AUGUST! ;) (Instagram will back me up.)
chocolate mint ice cream pie {recipe makes 2!} ::: bake at 350 blog
This ice cream pie is one of my mom's recipes and one of my absolute favorites.
{PLUS: the recipe makes TWO PIES!!!  #winning}

I have to tell you about this crust.  The ingredients may seem a little strange...
chocolate mint ice cream pie {recipe makes 2!} ::: bake at 350 blog
...but they come together to make this insanely fudgey, sticky, rich, chewy, chocolaty crust.  Ohmygoshsogood!

You can absolutely use green mini chocolate chip ice cream for this recipe...Mom always did.  I'll tell you the truth, though...sometimes, when you stir the chocolate into the ice cream, the green looks...not so beautiful.  So, I used this ice cream from Haagen-Dazs:
chocolate mint ice cream pie {recipe makes 2!} ::: bake at 350 blog

Mr. E is not a traditional cake person, so this was his birthday cake.

Over the last several years of blogging, I've learned something.  It's ok if your family wants to slice into dessert after it's dark outside and you've lost the good light for photography.
chocolate mint ice cream pie {recipe makes 2!} ::: bake at 350 blog
Life is not about the blog, but about enjoying the moment. ;)

Aaaaaand, dessert can always be photographed and eaten the next day for lunch. *cough*
chocolate mint ice cream pie {recipe makes 2!} ::: bake at 350 blog
print recipe photo printrecipe.jpg
Chocolate Mint Ice Cream Pie
{makes 2 pies, from bakeat350.blogspot.com}

1 box chocolate cake mix
¾ c. water
¼ c. canola or vegetable oil
1 (16 oz.) jar chocolate fudge frosting, divided
4 pints (or ½ gallon) mint chocolate chip ice cream
optional: chocolate chip, melted
            whipped cream

Preheat oven to 350.

Combine the cake mix, water, oil, and 1 cup of the fudge frosting in the bowl of a mixer on low speed. Beat for 15-30 seconds, then increase the speed to high and beat for 2 minutes.
chocolate mint ice cream pie {recipe makes 2!} ::: bake at 350 blog

The mixture will be very fluffy.  Divide into 2 pie pans. Bake for 25-30 minutes, until they’re not liquidy in the center. Place on wire cooling rack to cool.  The crusts will sink in the middle.
chocolate mint ice cream pie {recipe makes 2!} ::: bake at 350 blog

Once the crusts are cool, place the ice cream on the counter for 15 minutes until softened.  Place the remaining frosting in the microwave and heat for about 15 seconds on 50% power, until melted and warm.

chocolate mint ice cream pie {recipe makes 2!} ::: bake at 350 blog
Place the softened ice cream in a large bowl along with the heated frosting. Stir with a wooden spoon until combined. (Don’t worry if a few places aren’t totally combined.) Divide between the two cooled crusts, smoothing with an offset spatula. Freeze at least 4 hours before serving.

(Optional: melt some chocolate chips and squiggle across the top. Add some piped whipped cream for decoration, if desired.)

For easiest serving, dip the bottom of the pan in hot water for a few seconds. Cut and wiggle a cake server all the way underneath the crust.  It’s fudgey and sticky and needs a little help getting out of the pan. :) 
chocolate mint ice cream pie {recipe makes 2!} ::: bake at 350 blog
I don't want to peer pressure you, but DO IT! ;)

Pie for My Guy, June: blueberry cheesecake pie
Pie for My Guy, July: fried cherry pies


reade more... Résuméabuiyad

Blue Apron and Heirloom Tomato & Fontina Grilled Cheese Sandwiches

   When I pulled in the driveway at 1:00pm today I was exhausted.  I'd had a 5 hour workshop in the morning, was starving, and couldn't think of a single thing I wanted for lunch.  While pondering exactly what I could make I noticed a package on my front porch.  I went to check it out and saw the side that said "Perishable".  I immediately started grinning in hopes that my lunch was inside that box.

    Lucky for me it was!  I received a vegetarian box from Blue Apron.  What is Blue Apron?  I'm glad you asked.  It's a service that sends you a box filled with all the fresh ingredients you need to prepare 3 meals.  Everything is packaged, labeled, and ready to go and there are full color photos and recipe cards that go along with the ingredients.  Plus there's no shipping cost!  Blue Apron charges $9.99 per person, per meal.  There is a vegetarian and a meat option.  My box was a vegetarian box.

     Included in the box was all the produce, spices, and ingredients needed to make Heirloom Tomato & Fontina Grilled Cheese Sandwiches with Dijon Green Beans, Smoky Swiss Chard & Black Bean Tostadas, and Dal Bhat.  The produced all looked fresh and the spices were packaged in individual bags.  I opted to try the grilled cheese and green beans for lunch because I was hungry and it looked delicious.
 
     The step by step directions made it super easy to cook this meal.  It was prepared, cooked, and on a plate in 15 minutes.  I was surprised by just how good it tasted!  I'm not a huge tomato fan but the tomato with the creamy fontina, crisp red onions, and rocket was incredible!  Then the green beans were cooked to tender crisp and the Dijon dressing was tangy and delicious.  It was a fresh meal that was easy to prepare and tasted good.  Plus the recipe cards have the number of calories for each meal written right on them.  Each meal is between 500-700 calories so they are healthy too!

Heirloom Tomato & Fontina Grilled Cheese Sandwiches (recipe from Blue Apron)
4 oz. Fontina Cheese
1 Heirloom Tomato
1 Red Onion
1 oz. Rocket
4 Slices Sourdough Bread
1 Lemon
1 T. butter

1. Prepare the ingredients for the grilled cheese sandwiches.  Slice the fontina cheese into thick slices.   Slice the tomatoes into 1/2 inch slices.  Peel the onion and cut it in half.  Slice half of the onion into thin rings.

2.  Lay the sourdough slices on a cutting board.  Top two of the slices of bread with the fontina cheese slices.  Then place the tomatoes on top of the cheese.  Divide the onions between the sandwiches and top with rocket.

3.  Place the other two slices of bread on top of the sandwiches and lightly spread butter over top of the sandwiches.

4.  Heat a large skillet over medium heat.  Add the sandwiches, butter side down, and cook for 4-5 minutes. Meanwhile, spread the remaining butter on the exposed sides of the bread.  Flip the sandwiches over and cook for an additional 3-5 minutes or until golden brown.

5.  Cut the sandwiches in half and serve on two plates.


I received this box from Blue Apron but all opinions and photos are 100% my own.
   When I pulled in the driveway at 1:00pm today I was exhausted.  I'd had a 5 hour workshop in the morning, was starving, and couldn't think of a single thing I wanted for lunch.  While pondering exactly what I could make I noticed a package on my front porch.  I went to check it out and saw the side that said "Perishable".  I immediately started grinning in hopes that my lunch was inside that box.

    Lucky for me it was!  I received a vegetarian box from Blue Apron.  What is Blue Apron?  I'm glad you asked.  It's a service that sends you a box filled with all the fresh ingredients you need to prepare 3 meals.  Everything is packaged, labeled, and ready to go and there are full color photos and recipe cards that go along with the ingredients.  Plus there's no shipping cost!  Blue Apron charges $9.99 per person, per meal.  There is a vegetarian and a meat option.  My box was a vegetarian box.

     Included in the box was all the produce, spices, and ingredients needed to make Heirloom Tomato & Fontina Grilled Cheese Sandwiches with Dijon Green Beans, Smoky Swiss Chard & Black Bean Tostadas, and Dal Bhat.  The produced all looked fresh and the spices were packaged in individual bags.  I opted to try the grilled cheese and green beans for lunch because I was hungry and it looked delicious.
 
     The step by step directions made it super easy to cook this meal.  It was prepared, cooked, and on a plate in 15 minutes.  I was surprised by just how good it tasted!  I'm not a huge tomato fan but the tomato with the creamy fontina, crisp red onions, and rocket was incredible!  Then the green beans were cooked to tender crisp and the Dijon dressing was tangy and delicious.  It was a fresh meal that was easy to prepare and tasted good.  Plus the recipe cards have the number of calories for each meal written right on them.  Each meal is between 500-700 calories so they are healthy too!

Heirloom Tomato & Fontina Grilled Cheese Sandwiches (recipe from Blue Apron)
4 oz. Fontina Cheese
1 Heirloom Tomato
1 Red Onion
1 oz. Rocket
4 Slices Sourdough Bread
1 Lemon
1 T. butter

1. Prepare the ingredients for the grilled cheese sandwiches.  Slice the fontina cheese into thick slices.   Slice the tomatoes into 1/2 inch slices.  Peel the onion and cut it in half.  Slice half of the onion into thin rings.

2.  Lay the sourdough slices on a cutting board.  Top two of the slices of bread with the fontina cheese slices.  Then place the tomatoes on top of the cheese.  Divide the onions between the sandwiches and top with rocket.

3.  Place the other two slices of bread on top of the sandwiches and lightly spread butter over top of the sandwiches.

4.  Heat a large skillet over medium heat.  Add the sandwiches, butter side down, and cook for 4-5 minutes. Meanwhile, spread the remaining butter on the exposed sides of the bread.  Flip the sandwiches over and cook for an additional 3-5 minutes or until golden brown.

5.  Cut the sandwiches in half and serve on two plates.


I received this box from Blue Apron but all opinions and photos are 100% my own.
reade more... Résuméabuiyad

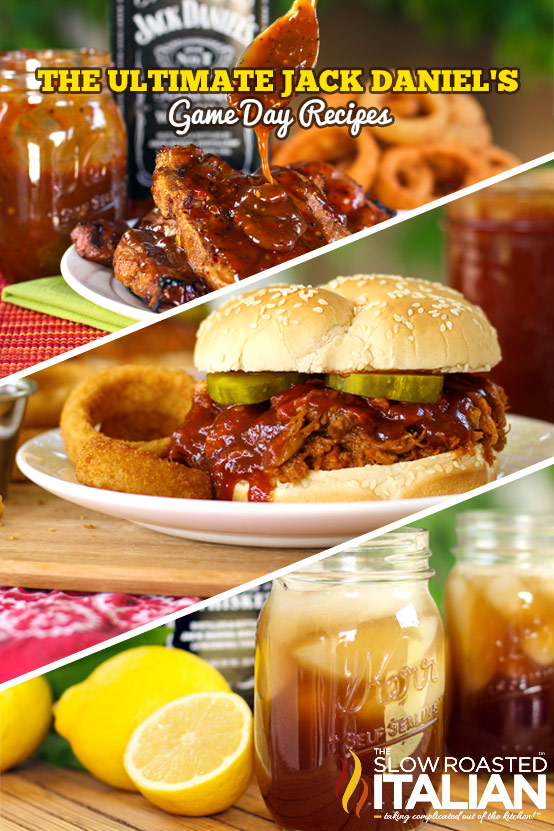
Ultimate Jack Daniel's Game Day Recipes


It might surprise you to hear that just 4 months ago there was no Jack Daniel's to be found in our home. We had been dabbling in different flavors and cooking with wine and beer more often. Once we sampled Jack Daniels that was it.

I was over the moon with the flavor profile and just knew it cooking with it would make it a home run!
Continue Reading »

It might surprise you to hear that just 4 months ago there was no Jack Daniel's to be found in our home. We had been dabbling in different flavors and cooking with wine and beer more often. Once we sampled Jack Daniels that was it.

I was over the moon with the flavor profile and just knew it cooking with it would make it a home run!
Continue Reading »
reade more... Résuméabuiyad

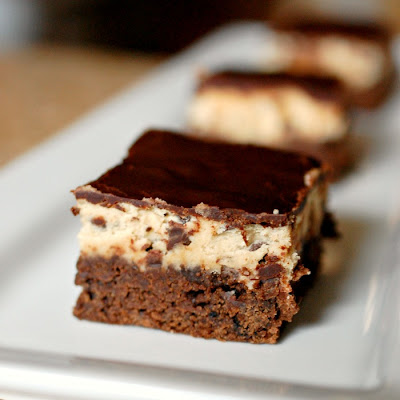
Chocolate chip cookie dough brownies

I bet that most of you are one of those people who like to lick the spoon or bowl after making a batch of cookies or brownies. For whatever reason, I'm not one of those people. I don't know why, but it's just never appealed to me.

Don't get me wrong - I do love some cookie dough or brownie batter ice cream, but I just am not the type of person who likes to clean off the excess batter. My husband and daughter, on the other hand, well - let's just say that they both enjoy having the honors. I foresee some fights in the not-too-distant future between the two of them to see who will get to the spatula first...

I know that I already have these fabulous cookie dough brownies on the blog (excuse the terrible photo), but I thought that these sounded divine as well. My best friend and her family were on their way to visit us, and I wanted to make sure we had something yummy to snack on during the evening of their visit. What could be better than cookie dough brownies? They would be easy to eat (especially with our young kids) and would satisfy any chocolate fan, myself included.

I'm pleased to say that these brownies were a big hit. Addie wanted more, as usual, but the girl has a sweet tooth that rivals her mother's. My one critique is that the brownie base was a bit dry. If you make these brownies, I recommend that you check out the brownie base from the cool mint dessert that my entire family loves and adores. Other than that, the cookie dough and chocolate glaze layers were just as I expected. These brownies definitely hit the spot and was something that both my and my best friend's families all enjoyed.

Chocolate chip cookie dough brownies
Brownies
  • 1/2 cup all-purpose flour
  • 1 TBSP cocoa powder (I used Hershey's Dark)
  • 1/2 teaspoon salt
  • 3.5 ounces (1 bar) dark or semisweet chocolate, chopped
  • 1/3 cut unsalted butter, cut into cubes
  • 2/3 cup light brown sugar, packed
  • 2 large eggs, lightly beaten
  • 1 teaspoon vanilla
Cookie dough
  • 1/4 cup granulated sugar
  • 1/2 cup light brown sugar, packed
  • 2 TBSP milk or cream
  • 1/2 teaspoon vanilla extract
  • 3/4 cup all-purpose flour
  • 1/4 teaspoon salt
  • 1/2 cup mini semisweet chocolate chips (regular sized chips work too)
Chocolate glaze
  • 3.5 ounces (1 bar) dark or semisweet chocolate, chopped
  • 2 TBSP unsalted butter, cut into cubes
Directions
Preheat your oven to 350 degrees F. Generously grease or line an 8x8 inch square pan with parchment paper with two sheets (one going vertically and one horizontally so they lay on top of each other and form an X). Make sure that there is an overhang all around. Or, you can use a silicone square pan like I did (I did not grease my pan).

To make the brownie: In a small bowl, whisk together the flour, cocoa powder and salt Set aside. In a double boiler (or in a medium bowl set over a pot of simmering water), melt the chocolate and butter together. Stir constantly until the mixture is smooth. Alternatively, you can heat the chocolate and butter in the microwave in 30 second bursts, but be sure not to scorch the chocolate.

Remove the mixture from the heat and add the brown sugar and mix until it has melted. Slowly mix in the eggs and the vanilla extract. Then slowly incorporate the flour mixture until the the batter is just incorporated - do not over mix.

Pour the batter into the prepared baking pan and bake in your preheated oven for 18-20 minutes or until a toothpick inserted in the center comes out clean. Turn off the oven, remove the pan from the oven and allow to cool completely.

To make the cookie dough: In the bowl of a stand mixer or in a medium to large bowl if using a handheld mixer, cream the butter and sugars together until light and fluffy. Add in the milk/cream and vanilla and mix until smooth. Slowly add the flour and salt until the cookie dough is nice and fluffy. Turn off the mixer and stir in the chocolate chips using a rubber spatula or wooden spoon. Set aside. (Note that this can be made ahead and stored in the refrigerator until you need it.)

To make the glaze: In a small saucepan set over low heat, melt the chocolate and butter together. Stir constantly until the mixture is completely smooth. Turn off the heat and set aside.

To assemble the bars: Once the brownies have completely cooled, spread the cookie dough on top and smooth with a spatula, knife or angled spatula. Make the tops as smooth as you can. At this point you can either refrigerate the bars to allow the cookie dough to set or move onto the next step. Pour the glaze directly on top of the cookie dough and smooth the top. Transfer the bars to a refrigerator to allow them to set.

Once the bars are cooled, you can cut them into squares and serve. Bars will keep in an airtight container in the refrigerator for up to 3 days.


Yield: One 8x8 inch pan, or about 16 square bars

Source: The Cookie Dough Lover's Cookbook, by Lindsay Landis, pages 39-40

Photobucket
I bet that most of you are one of those people who like to lick the spoon or bowl after making a batch of cookies or brownies. For whatever reason, I'm not one of those people. I don't know why, but it's just never appealed to me.

Don't get me wrong - I do love some cookie dough or brownie batter ice cream, but I just am not the type of person who likes to clean off the excess batter. My husband and daughter, on the other hand, well - let's just say that they both enjoy having the honors. I foresee some fights in the not-too-distant future between the two of them to see who will get to the spatula first...

I know that I already have these fabulous cookie dough brownies on the blog (excuse the terrible photo), but I thought that these sounded divine as well. My best friend and her family were on their way to visit us, and I wanted to make sure we had something yummy to snack on during the evening of their visit. What could be better than cookie dough brownies? They would be easy to eat (especially with our young kids) and would satisfy any chocolate fan, myself included.

I'm pleased to say that these brownies were a big hit. Addie wanted more, as usual, but the girl has a sweet tooth that rivals her mother's. My one critique is that the brownie base was a bit dry. If you make these brownies, I recommend that you check out the brownie base from the cool mint dessert that my entire family loves and adores. Other than that, the cookie dough and chocolate glaze layers were just as I expected. These brownies definitely hit the spot and was something that both my and my best friend's families all enjoyed.

Chocolate chip cookie dough brownies
Brownies
  • 1/2 cup all-purpose flour
  • 1 TBSP cocoa powder (I used Hershey's Dark)
  • 1/2 teaspoon salt
  • 3.5 ounces (1 bar) dark or semisweet chocolate, chopped
  • 1/3 cut unsalted butter, cut into cubes
  • 2/3 cup light brown sugar, packed
  • 2 large eggs, lightly beaten
  • 1 teaspoon vanilla
Cookie dough
  • 1/4 cup granulated sugar
  • 1/2 cup light brown sugar, packed
  • 2 TBSP milk or cream
  • 1/2 teaspoon vanilla extract
  • 3/4 cup all-purpose flour
  • 1/4 teaspoon salt
  • 1/2 cup mini semisweet chocolate chips (regular sized chips work too)
Chocolate glaze
  • 3.5 ounces (1 bar) dark or semisweet chocolate, chopped
  • 2 TBSP unsalted butter, cut into cubes
Directions
Preheat your oven to 350 degrees F. Generously grease or line an 8x8 inch square pan with parchment paper with two sheets (one going vertically and one horizontally so they lay on top of each other and form an X). Make sure that there is an overhang all around. Or, you can use a silicone square pan like I did (I did not grease my pan).

To make the brownie: In a small bowl, whisk together the flour, cocoa powder and salt Set aside. In a double boiler (or in a medium bowl set over a pot of simmering water), melt the chocolate and butter together. Stir constantly until the mixture is smooth. Alternatively, you can heat the chocolate and butter in the microwave in 30 second bursts, but be sure not to scorch the chocolate.

Remove the mixture from the heat and add the brown sugar and mix until it has melted. Slowly mix in the eggs and the vanilla extract. Then slowly incorporate the flour mixture until the the batter is just incorporated - do not over mix.

Pour the batter into the prepared baking pan and bake in your preheated oven for 18-20 minutes or until a toothpick inserted in the center comes out clean. Turn off the oven, remove the pan from the oven and allow to cool completely.

To make the cookie dough: In the bowl of a stand mixer or in a medium to large bowl if using a handheld mixer, cream the butter and sugars together until light and fluffy. Add in the milk/cream and vanilla and mix until smooth. Slowly add the flour and salt until the cookie dough is nice and fluffy. Turn off the mixer and stir in the chocolate chips using a rubber spatula or wooden spoon. Set aside. (Note that this can be made ahead and stored in the refrigerator until you need it.)

To make the glaze: In a small saucepan set over low heat, melt the chocolate and butter together. Stir constantly until the mixture is completely smooth. Turn off the heat and set aside.

To assemble the bars: Once the brownies have completely cooled, spread the cookie dough on top and smooth with a spatula, knife or angled spatula. Make the tops as smooth as you can. At this point you can either refrigerate the bars to allow the cookie dough to set or move onto the next step. Pour the glaze directly on top of the cookie dough and smooth the top. Transfer the bars to a refrigerator to allow them to set.

Once the bars are cooled, you can cut them into squares and serve. Bars will keep in an airtight container in the refrigerator for up to 3 days.


Yield: One 8x8 inch pan, or about 16 square bars

Source: The Cookie Dough Lover's Cookbook, by Lindsay Landis, pages 39-40

Photobucket
reade more... Résuméabuiyad

Cucumber Cups #SundaySupper

     Whenever we have people over I automatically start planning the menu.  I generally start with the easy part, the desserts.  Then I move on to the appetizers which more often then not include a selection of dips or hot appetizers.  This time I was having friends over for an afternoon happy hour and since it's been so hot I wanted a light and cool appetizer.  I didn't have many of those on hand so I was left searching for something.

     I found a simple recipe for cucumber cups that sounded great.  I had plenty of cucumbers from the farmer's market.   The filling is a simple cream cheese, mozzarella, garlic, and chives.  The original recipe had bacon but I was looking for a purely vegetarian recipe.

     These cups looked fancy and were so easy to put together.  They crunch of the cucumber cups paired with the cheeses and herbs were wonderful.  It is a great summer time appetizer and one to use when you don't have much time to prepare.  I'm planning on making it again for Labor Day which just happens to be the theme of this weeks #SundaySupper.  I think this would be the perfect appetizer for an end of the season Labor Day BBQ!

Cucumber Cups (adapted from Will Cook for Smiles)
2 large cucumbers
8 oz. of light cream cheese
1 c. mozzarella cheese
3 garlic cloves, minced
1 t. Italian seasonings
1 t. salt
1/2 t. black pepper
1 T. fresh chives, chopped

1.  In a medium bowl combine the cream cheese, mozzarella cheese, garlic cloves, Italian seasonings, salt, and pepper.  Mix well then put in the refrigerator.

2.  Wash the cucumbers then peel them in a zebra pattern.  Cut the cucumbers into 1 inch thick slices.  Using a spoon scoop out the middle of the cucumbers, leaving a thin slice of cucumber at the bottom and forming a cup.

3.  Scoop the cheese mixture into the cups and sprinkle with the fresh chives.  Serve chilled.


Refreshing Drinks
Amazing Appetizers and Sides
Enviously Good Entreés
Delicious Desserts
Join the #SundaySupper conversation on twitter each Sunday. We tweet throughout the day and share recipes from all over the world. Our weekly chat starts at 7:00 pm EST. Follow the #SundaySupper hashtag and remember to include it in your tweets to join in the chat. Check out our #SundaySupper Pinterest board for more fabulous recipes and food photos. Would you like to join the Sunday Supper Movement? It’s easy. You can sign up by clicking here → Sunday Supper Movement.
     Whenever we have people over I automatically start planning the menu.  I generally start with the easy part, the desserts.  Then I move on to the appetizers which more often then not include a selection of dips or hot appetizers.  This time I was having friends over for an afternoon happy hour and since it's been so hot I wanted a light and cool appetizer.  I didn't have many of those on hand so I was left searching for something.

     I found a simple recipe for cucumber cups that sounded great.  I had plenty of cucumbers from the farmer's market.   The filling is a simple cream cheese, mozzarella, garlic, and chives.  The original recipe had bacon but I was looking for a purely vegetarian recipe.

     These cups looked fancy and were so easy to put together.  They crunch of the cucumber cups paired with the cheeses and herbs were wonderful.  It is a great summer time appetizer and one to use when you don't have much time to prepare.  I'm planning on making it again for Labor Day which just happens to be the theme of this weeks #SundaySupper.  I think this would be the perfect appetizer for an end of the season Labor Day BBQ!

Cucumber Cups (adapted from Will Cook for Smiles)
2 large cucumbers
8 oz. of light cream cheese
1 c. mozzarella cheese
3 garlic cloves, minced
1 t. Italian seasonings
1 t. salt
1/2 t. black pepper
1 T. fresh chives, chopped

1.  In a medium bowl combine the cream cheese, mozzarella cheese, garlic cloves, Italian seasonings, salt, and pepper.  Mix well then put in the refrigerator.

2.  Wash the cucumbers then peel them in a zebra pattern.  Cut the cucumbers into 1 inch thick slices.  Using a spoon scoop out the middle of the cucumbers, leaving a thin slice of cucumber at the bottom and forming a cup.

3.  Scoop the cheese mixture into the cups and sprinkle with the fresh chives.  Serve chilled.


Refreshing Drinks
Amazing Appetizers and Sides
Enviously Good Entreés
Delicious Desserts
Join the #SundaySupper conversation on twitter each Sunday. We tweet throughout the day and share recipes from all over the world. Our weekly chat starts at 7:00 pm EST. Follow the #SundaySupper hashtag and remember to include it in your tweets to join in the chat. Check out our #SundaySupper Pinterest board for more fabulous recipes and food photos. Would you like to join the Sunday Supper Movement? It’s easy. You can sign up by clicking here → Sunday Supper Movement.
reade more... Résuméabuiyad